
 Lessons: 15Length: 1.7 hours
- Overview
- Transcript
2.1 Making a List of Elements
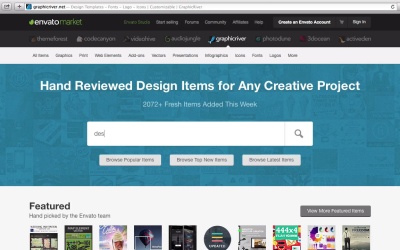
In this lesson we’ll be deciding on the purpose of our future banner and making a list of workspace elements, using some web resources and the surrounding environment to find proper references.
Related Links
1.Introduction
1.1Introduction01:40
2.Advertisement Concept Idea
2.1Making a List of Elements03:30
3.Creating a Set of Workspace Elements
3.1Making a Laptop13:40
3.2Drawing a Cup of Coffee06:58
3.3Creating a Sketchbook05:53
3.4Rendering Glasses07:55
3.5Making Headphones06:37
3.6Creating a Smartphone04:59
3.7Creating a Tablet04:10
3.8Drawing a Camera08:32
3.9Designing a Wallet and Credit Cards11:50
3.10Making Stationery08:15
4.Making an Advertisement Template
4.1Creating a Wooden Background06:15
4.2Building a Composition08:26
5.Conclusion
5.1Conclusion02:13
2.1 Making a List of Elements
Hi everyone and welcome to creating flatwork space elements for advertisement course with Yula at tuts+. In this lesson we'll be deciding on the purpose of our future banner and making a list of workspace elements using some web resources and the surrounding environment to find proper references. Let's start. So first of all we need to know what kind of advertisement are we going to make. What do we need it for? Will it be an advertisement of some service which helps you to start your business? If the answer is yes then we need to draw some business related objects like charts and diagrams, a laptop, glasses maybe a suitcase and so on. Or maybe you want to make a promotional flier or some indication. In this case, when you to draw some desktop school objects, like copy books, pens and pencils, paper sheets, a computer, and so on. As you can see, everything depends on the purpose of your image. In this tutorial, we'll be making a functional banner with some common workspace elements which can be used in any advertisement. You can always add one or two specific items to the existing list which will serve the purpose of your banner. The easiest way to form a list of the needed elements is using Google. Let's go to Google images and see what we can find if we search for workspace elements. Here you can find a lot of nice designs, which will inspire you and help to decide on what exactly you need to draw. You can also try finding inspiration on various market or stock sites, such as GraphicRiver. If you try searching desktop, you will discover various interesting mock-ups, which contain a lot of elements. However, the most interesting and inspiring way to create your own artwork and using your own ideas is to look around and find the proper elements at your own desk. Those can be any objects which are commonly used day by day. Sometimes we don't even think of how often do we hold this thing in hands and we stop paying attention to them. However these objects are the best option for such advertisement banners because they serve their purpose and attract people who see familiar elements and feel connected and involved. Let's see what do we have at our desk. I've collected some things and devices which I usually used for my work, and made a top view photo. Such photos can also serve as a good reference, if you want to use them as the template image while drawing. It helps to see the real proportions and the scale of objects clearly if we compare them to each other. Here is a list of items that we found using the photo. A laptop, a cup of coffee, a sketchbook, glasses, headphones, a smart phone and digital tablet, an old photo camera, a leather wallet, some credit cards, paper sheets and pencils. Great. So now we have a complete list of workspace elements, which we will be creating during this course, and then combining into a balanced composition for our advertisement banner. In our next lesson, we'll be creating the first item from our list, a laptop, using various Adobe Illustrator tools to make it look realistic and turning the screen into a mock up for our custom templates. Stay tuned.


