- Overview
- Transcript
3.2 Drawing a Cup of Coffee
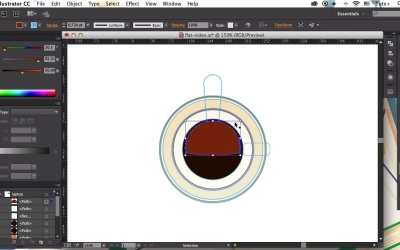
In this lesson we’ll be using basic shapes to create a top view of a flat cup of black coffee.
1.Introduction1 lesson, 01:40
1.1Introduction01:40
2.Advertisement Concept Idea1 lesson, 03:30
2.1Making a List of Elements03:30
3.Creating a Set of Workspace Elements10 lessons, 1:18:49
3.1Making a Laptop13:40
3.2Drawing a Cup of Coffee06:58
3.3Creating a Sketchbook05:53
3.4Rendering Glasses07:55
3.5Making Headphones06:37
3.6Creating a Smartphone04:59
3.7Creating a Tablet04:10
3.8Drawing a Camera08:32
3.9Designing a Wallet and Credit Cards11:50
3.10Making Stationery08:15
4.Making an Advertisement Template2 lessons, 14:41
4.1Creating a Wooden Background06:15
4.2Building a Composition08:26
5.Conclusion1 lesson, 02:13
5.1Conclusion02:13
3.2 Drawing a Cup of Coffee
Hello folks and welcome back to creating Flat Workspace Elements for Advertisements Course with Yulia Sokolova at Tuts+. Today we will be using basic shapes to create a top view of a flat cup of black coffee. Let's get started. First of all, we'll create an outline base for the elements, a saucer, a cup, a spoon, and so on. Take the Ellipse Tool and create a new circle of 200 x 200 pixels for the saucer. And now let's make a smaller circle for the cup. Go to Object, Path, Offset Path. Play with the Offset value, picking the needed number. Minus 30 pixels will be fine. Copy the cup and place it in front. Make the cup smaller, forming the inner part of the cup. Let's add a handle with the rounded Rectangle Tool. You can adjust the corner radius with the help of the live corners function. The next element is a spoon, or to be more exact, its handle. Make a narrow rectangle with the Rectangle Tool. Let's place our spoon right in the center. Select the spoon and the cup. Make the cup a key object by clicking it while holding down the Alt key. Then go to the Align panel and click Horizontal Align Center. Let's make the upper part of this pull handle wider. Slide the upper right anchor point with the Direct Selection tool and click Enter to open the Move options window. Set the Horizontal move value to 10 pixels. And let's do the same for the top left anchor point. But this time, set the horizontal move value to -10 pixels. Make the corners of the handles slightly rounded, or fuller rounded, by pulling the markers of the live corners. Now we can apply the colors. We'll be filling our objects with laying air gradients, adding a semi-realistic look to our flat cap. Make the saucer light beige, a bit darker at the top. Copy the saucer. And make the copy a bit smaller and darker from the edge of the saucer. Now let's add another circle around the saucer with the Offset Path function. Set the Offset value to three pixels and fill it with darker brown gradient in order to add some contrast to the light shapes Color the cup and add an outline as well. Select the cup and apply Offset Path with three pixels of set value. Pick the color from the dark outline of the saucer. Fill the inner shape with dark brown colors for the coffee. Now let's take the Ellipse Tool and form a lighter highlight on the surface of the coffee. Align the shapes. And use the Shape Builder Tool to delete the unneeded piece. Make the highlights slightly smaller and let's add another highlight below. Copy the shape twice. And move the top copy 10 pixels up, using the Move Tool. Select the two copies and use minus frame function of Pathfinder to cut off the shape. Make it a bit smaller and apply a dark brown color. Now let's color the handle. Send it backwards several times to place the handle beneath the cup. And a darker Offset to the handle to separate it from the saucer. Pick the color using the Eyedropper Tool and adjust the direction of the gradient with the Gradient tool. Fill the handle with steel shades of dark grey gradient, imitating a metal surface. Go to Object, Path, Offset Path. Place a smaller and lighter shape inside, adding dimension to the handle. Fill the highlight with light grey color and place the spoon on top by bringing it to front. Use the eraser tool and hold down the Alt key to delete the lower part of the spoon handle, forming a straight line and the edge of it. Select all the objects and turn off the Stroke in the color panel. We can add some minor details here, such as another lighter circle beneath the coffee shape. Adjust some colors and the sizes of the shape, if needed. Now let's add a gentle flat shadow from our cup, placing it above the saucer. Make a rectangle of a width of our cup. The smart guys will help you to make a shape of a needed size. Set the Blending mode to Multiply. Make one part of the gradient white to make it transparent. Rotate the shape to 45 degrees and place it in proper position. Group all the parts of the cup for more convenience. And use the Layers panel to drag the shadow under the cup, placing it right above the saucer. Now we need to get rid of the shadow outside the saucer. Let's use the Clipping Mask. Select the larger dark brown element of the saucer, copy it, and drag it on top of the shadow shape in the Layers panel. Select both the created copy and the shadow, click right mouse button, and Make Clipping Mask. And that's it. Our flat cup of coffee is finished. Great work. Now we're ready to move on and create our network's best element. Next time we'll be rendering a flat pocket notebook using basic shapes and various Adobe Illustrator tools. Don't miss it.


