- Overview
- Transcript
3.6 Creating a Smartphone
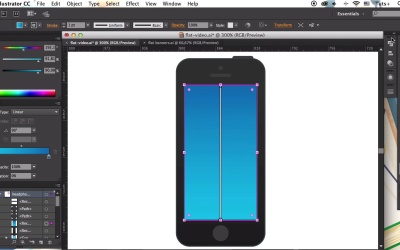
In this lesson we’ll be using basic shapes to create a front view of a smartphone, and then we’ll add a custom template to its screen.
1.Introduction1 lesson, 01:40
1.1Introduction01:40
2.Advertisement Concept Idea1 lesson, 03:30
2.1Making a List of Elements03:30
3.Creating a Set of Workspace Elements10 lessons, 1:18:49
3.1Making a Laptop13:40
3.2Drawing a Cup of Coffee06:58
3.3Creating a Sketchbook05:53
3.4Rendering Glasses07:55
3.5Making Headphones06:37
3.6Creating a Smartphone04:59
3.7Creating a Tablet04:10
3.8Drawing a Camera08:32
3.9Designing a Wallet and Credit Cards11:50
3.10Making Stationery08:15
4.Making an Advertisement Template2 lessons, 14:41
4.1Creating a Wooden Background06:15
4.2Building a Composition08:26
5.Conclusion1 lesson, 02:13
5.1Conclusion02:13
3.6 Creating a Smartphone
Hey everyone and welcome back to creating flat workspace elements for advertisement course with us a call at tuts plus. In this lesson we'll be using basic shapes to create a front view of a smartphone and then use its screen as a mockup to apply a custom template. Let's get started. Start by making an 85 by 180 pixels rectangle. Make the corners slightly rounded with the Live Corners function. Create another rectangle of 70 by 130 pixels size, and align it to the center of the first rectangle, creating the screen of our smartphone. Take the ellipse tool and make an even circle of 15 by 15 pixel size in the bottom of the smartphone for the button. Align it to the center of the basic shape and place it in the lower part of the phone. Hold Alt+Shift and drag to copy the shape. Place the circle in the upper part of the base shape and resize it to 4x4 pixels, making the front camera. Now, let's add a speaker. Take the rectangle tool and make it 20x3 pixels shape. Align the shapes or make this big around it with the life function. Go with the shape placing the copy at the top right side of the smartphone for the lock button. Let's fill the base of our smartphone with a very dark gray linear gradient. Make the minor elements slightly lighter, so that they are visible above dark gray color. Use the eye dropper tool to pick the color from the one element and apply it to the other. Send the lock button to the back, hiding its lower half being at the base of the phone. Fill the screen with a bright blue linear gradient. Now we can add a highlight to the screen. Copy the blue shape and place it in front. Take the scissors tool and click the upper left and lower right anchor points to split the shape diagonally into two equal halves. Doing the lower half, click right mouse button for the upper piece and join it to make the path closed. Set the planning mode to Screen making a gentle highlight. Make one part of the gradient black to make it transparent in the screen mode. Now let's take the webpage mock up that we've made previously for the screen of our laptop. Use the eye dropper tool to apply the color of the webpage background to the screen of our smart phone. Set the width of the yellow shape equal to the width of the screen. Align the screen and the yellow shape, making the screen a key object. Resize all the elements to make them fit the screen. Make the rectangle taller and add more text lines and the footer in the bottom. Apply a bright orange color to the foyer. Using the eraser tool holding down the Alt key to make the gaps in the text lines, making them look more realistic. And that's it. Our semi-realistic smartphone is ready. Good work. We've finished making our smartphone and now can move to another device from our list of items. In our next lesson, we'll be rendering a front view of a digital tablet using its screen as a mock up for a template. Stay tuned.


