
 Lessons: 17Length: 1.5 hours
- Overview
- Transcript
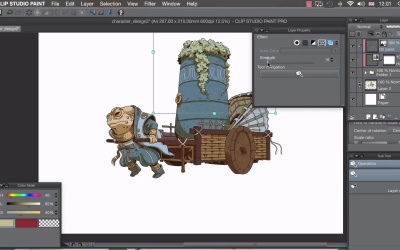
5.2 Texture
In this lesson we’ll be adding a simple texture to our drawing to give it a paper-like quality.
1.Introduction
1.1Introduction01:01
2.Sketching Our Idea
2.1Reference03:53
2.2Blocking In09:22
2.3Working Out the Perspective11:46
2.4Background09:57
2.5Character09:50
3.Inking
3.1Pen Setup05:44
3.2Inking Over Our Drawing09:18
4.Colour
4.1Flatting04:54
4.2Palette05:10
4.3Colouring03:17
4.4Shading04:41
4.5Line Colour03:28
5.Finishing Touches
5.1Colour Tweaks02:44
5.2Texture02:29
5.3Exporting02:24
6.Conclusion
6.1Conclusion00:41
5.2 Texture
Hi, welcome back. In this lesson, I'm going to show you how to add texture to your images. My illustration is almost finished. But I've got one last thing I'd like to do before I save this out. I'd like to add a bit of an organic feel, and I'm going to do that by adding a subtle texture. I've got a couple of different ways you can add textures, the easiest of which is dragging from your materials folder. To view your materials folder, you go to window, Choose Material, and then you want to go to Monochromatic Pattern. From there, we can drag out any one of these patterns in our library here. So just drag that and it'll create a new layer, which we can then resize like this. I'm then going to add a clip mask, so you can see that makes the texture apply to only this character here. I'll just close this window for now. And then we click on window, go to Layer Properties, and click on this icon here which combines this as a texture. So you'll see instantly that changes our layer into a texture. We can then change the strength of our texture so that the higher I pull this up you'll see the more of our texture affects our image, so I'll do quite a subtle effect, like that. You can also add your own custom images. So, if I get rid of this layer for now, I'll delete that layer, I'll click on File, Import, and then Import Image, and I have a paper texture here that I'd like to apply to my illustration. So if I select that one, press Open, that then opens up this paper texture here. We can resize that as we did the texture that we dragged previously, and again just click on this icon in our layer properties, and that applies this texture on onto our image. Apply a clipping mask, and that will only apply it to our drawing layer. The last way that you can add a texture is by drawing one. So if you add a new layer, we can click on Filter, Draw, and then choose Perlin Noise. We can then generate noise from this dialogue box here. So you can see I've generated some noise. I click OK, I can then clip that to the illustration, change the layer mode, so I'm gonna choose Overlay for this one. And then we'll just change the opacity, and that applies a subtle texture to our illustration. In the next lesson, I'm gonna show you how to export your finished work.


