
 Lessons: 17Length: 1.5 hours
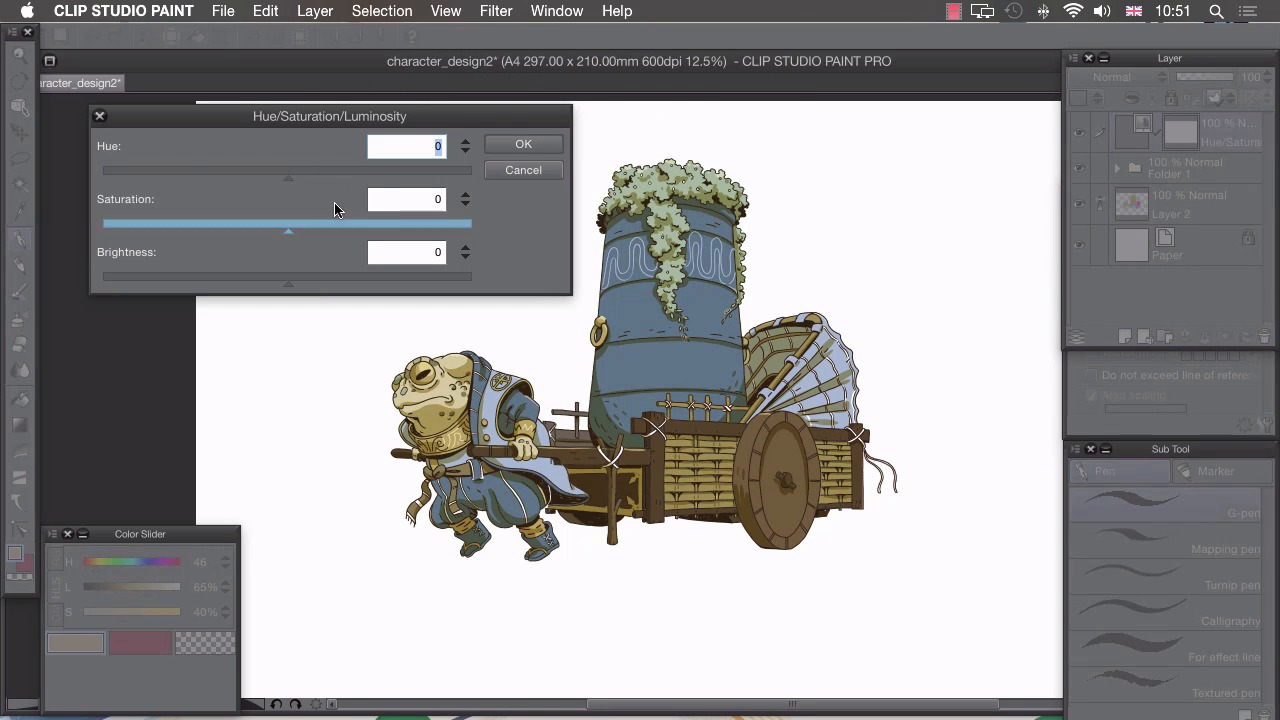
- Overview
- Transcript
5.1 Colour Tweaks
In this lesson we’ll be using some adjustment layers to unify our colours and get them looking how we envisioned them.
1.Introduction
1.1Introduction01:01
2.Sketching Our Idea
2.1Reference03:53
2.2Blocking In09:22
2.3Working Out the Perspective11:46
2.4Background09:57
2.5Character09:50
3.Inking
3.1Pen Setup05:44
3.2Inking Over Our Drawing09:18
4.Colour
4.1Flatting04:54
4.2Palette05:10
4.3Colouring03:17
4.4Shading04:41
4.5Line Colour03:28
5.Finishing Touches
5.1Colour Tweaks02:44
5.2Texture02:29
5.3Exporting02:24
6.Conclusion
6.1Conclusion00:41
5.1 Colour Tweaks
Hi, welcome to chapter five. In this chapter, I'll be showing you how to add the finishing touches to your images. And in this lesson I'll show you how to adjust our newly painted colors. With our lines and colors in place now, it's time to take a step back and have a look at this image as a whole and see if there's anything that we need to change at the last minute. Looking at this, I think I've gone a little bit too yellow with my color palette. So the first thing I'd like to do is change the hue of my picture. We can do this in in a couple of ways. So the first way would be to select one of our layers. So if I select our color layer there and click on Edit, I can then go to Tonal Correction and change any of my tones with any of these options here. So for example, if I choose Hue/Saturation/Luminosity I can drag the saturation all the way up, press OK, and that will be applied to our colors layer. That's a little bit destructive, and the way I like to actually change my colors is by adding a different layer. So if I create a new folder, drag that to the top, drag in our finished inks, drag in our finished colors, and collapse that. I can then click Layer, New Correction Layer, and you'll see that we have all those same options that we had in our edit panel, but this time we can apply them as a layer. So if I choose Hue/Saturation/Luminosity again, and I want to sort of get rid of this yellow color, so if I drag this slider a bit to the left there and that makes all of our browns a lot more red and all of our blues a little bit warmer. Add just one or two saturation points and click OK. I can then clip this, so that's added a clip mask to this tonal control, and that's applied only to our folder here. So I can turn that off and on to see how it was before and after our tonal control. And I know that because we have this clip mask here that this tonal control is only being applied to my lines and my colors. If I want to change the color of just one specific piece I can still use these flat layers. So going to the Magic Wand tool, I can go to my flat layers and choose, for example, this plant. I can then go into this folder, go to our colors, go to Edit, Tonal Correction, and I can change just that piece like that. Or I can create a New Correction Layer, Hue/Saturation again, change that so you can see what's happened, click OK, and that applies this mask here and only changes the color of this plant. In the next lesson, I'll show you how to add textures to your image.


