
 Lessons: 17Length: 1.5 hours
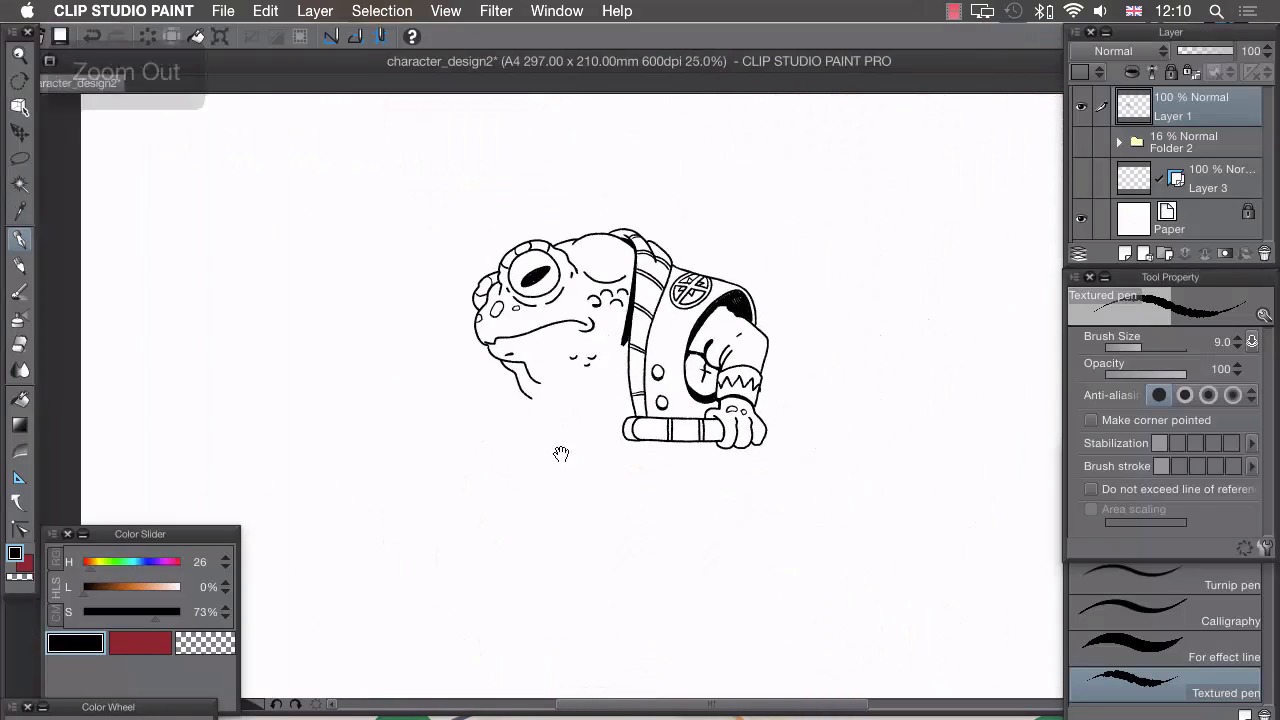
- Overview
- Transcript
3.2 Inking Over Our Drawing
In this lesson I’ll show you how to ink over your sketch.
1.Introduction
1.1Introduction01:01
2.Sketching Our Idea
2.1Reference03:53
2.2Blocking In09:22
2.3Working Out the Perspective11:46
2.4Background09:57
2.5Character09:50
3.Inking
3.1Pen Setup05:44
3.2Inking Over Our Drawing09:18
4.Colour
4.1Flatting04:54
4.2Palette05:10
4.3Colouring03:17
4.4Shading04:41
4.5Line Colour03:28
5.Finishing Touches
5.1Colour Tweaks02:44
5.2Texture02:29
5.3Exporting02:24
6.Conclusion
6.1Conclusion00:41
3.2 Inking Over Our Drawing
Hi, welcome back. In this lesson I'll be showing you how I go about inking over my drawings. With our pen tool set up, we can start inking over this drawing that we have here. And I'm going to show you how I do that by showing you first on a small piece and explaining what my thought process is behind that. I'm then gonna speed up this recording and you can watch me go through the whole piece much quicker. So, the first thing I do is zoom right into my drawing. That way, I've got maximum control. And I can make sure that my line width is how I like it at all times. So I'll focus on this arm piece here. And what I do is just ink over in a separate layer on the top here, like that. And we're trying to duplicate the lines that we have with our pencils here. I don't like varying my line width too much. I like to keep quite an even line width here. And I'm doing this completely freehand so. I'm just drawing in lines and if I don't like them I can just undo them. Drawing in lines like that and doing that free-hand, cuz I like this slight wobble that you get when you do things free-hand. So this wouldn't have quite as much charm for me if I'd have put a ruler tool to make this ellipse here like that. You may notice what I'm also doing is adding a little bit of embellishment to my drawing, so if I turn off the inks for just a second, you'll see that this sleeve piece here didn't have sort of a double edged thickness to it, but in my inks, I've added this extra line here, and that gives us this sort of thickness here in the sleeve. So throughout the whole drawing, I'm gonna go through and sort of embellish on the drawing that I've done, cuz this is only just a rough basis. I like to sort of keep things a bit fresh and keep things a little bit spontaneous when I'm inking as well, so if I move onto this pattern on his shoulder here, you'll see that again I'll draw the rough shape like that and fix any mistakes. And at this point, I'm gonna start just ad-libbing the design on our character's shoulder, so I'm going to make some quarters in this design here. Like that. So you can the difference between our sketch which is really quite loose. And then the ink over the top. I've gone and changed that and I've added some thickness to our lines. And I'm going to be adding a few sort of decorative patterns that he may have on his clothing, and then onto this inner sleeve here like this. Gonna draw pretty much what we have. Like that. Another thing I like to do is fill in black areas as I go along. So you may like to fill in the black areas once you've done all of your outlines, and that's perfectly fine. But I like to sort of be able to gauge how much black I'm using in my piece, so I do it as I go along. And I'll know where to add to keep balance. So in areas where I'm not gonna be using shading I want things to be completely black, so if they're completely obscured from light I usually fill them in completely black. So I don't think a shadow would fill in this space for the sleeve adequately, so I'm gonna go in and just completely ink that in like this by just roughly scribbling in here. And I like to keep these very small pieces here so it looks a bit more like you're using traditional media when you zoom out. And I'll add a shadow over this arm here. So this gives us a really heavy shadow on his arm, and implies that his arm is going really deeply into this sleeve. Few wrinkles on the shirt underneath, and a little bit of shadow again. And another thing we need to do the whole time is keep zooming out. So we need to zoom out and turn off our drawings, and just see what's happening with our inks alone. So it's always good to just compare with our drawing and see what's happening, see that the marks we're making are nice and see how we're progressing. I'm going to continue doing this throughout the whole drawing and I'm going to speed this up so you can follow along. Once we've inked our whole drawing, we just want to turn the ink layer off and on. And that's just to check that we haven't missed any details that we have in our sketch that we haven't actually inked in. So we'll just go off and on with the ink layer like this just to make sure I've not missed anything. And I'm pretty sure that I've inked everything there. So I hope you're able to see how I just used a few basic principles to ink this whole drawing. Just to recap, what I basically did was trace over any lines that I do like and lines that I don't like or lines that are only there to imply volume that I'm going to use for my shading stage. I haven't inked at all. I've added extra details so I'll turn this ink off. Added extra detail when there wasn't any in my drawing, and I filled in black areas to add clarity or to push objects further into the background. In the next lesson, I'll show you how to flat your new ink drawing ready for coloring.


