
 Lessons: 17Length: 1.5 hours
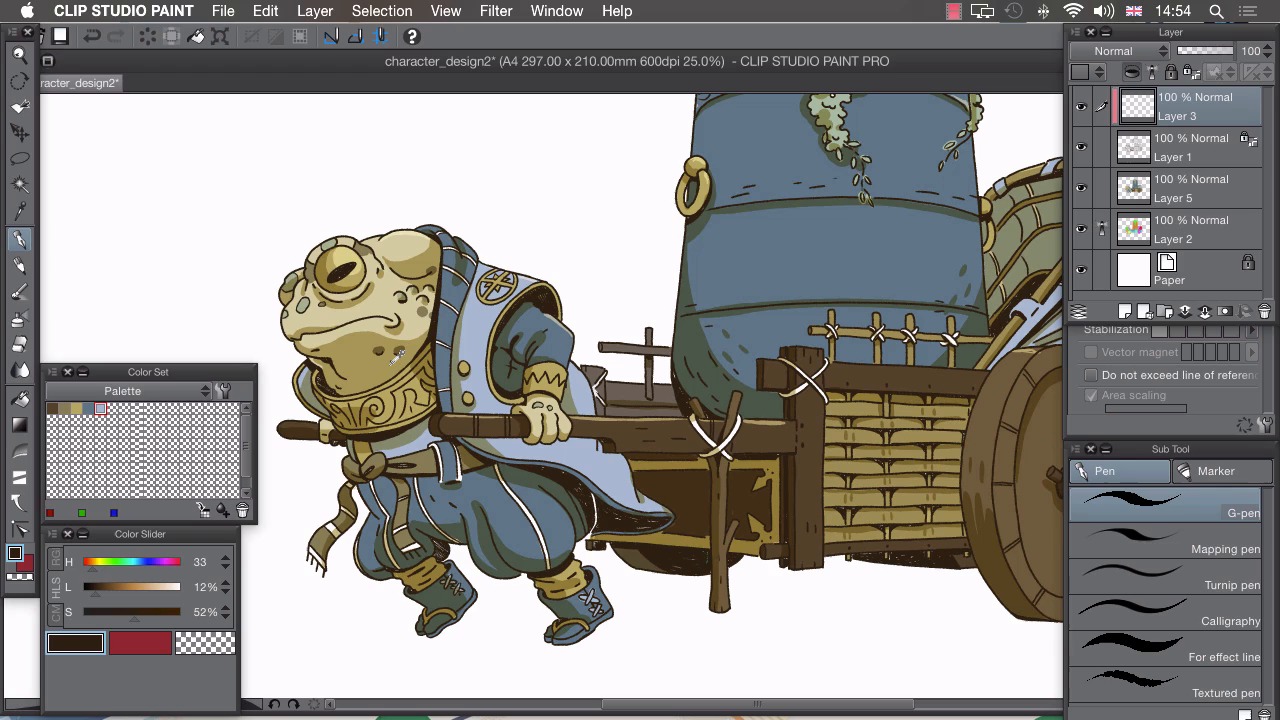
- Overview
- Transcript
4.5 Line Colour
In this lesson I’ll show you how to make our lines a different colour without redrawing them.
1.Introduction
1.1Introduction01:01
2.Sketching Our Idea
2.1Reference03:53
2.2Blocking In09:22
2.3Working Out the Perspective11:46
2.4Background09:57
2.5Character09:50
3.Inking
3.1Pen Setup05:44
3.2Inking Over Our Drawing09:18
4.Colour
4.1Flatting04:54
4.2Palette05:10
4.3Colouring03:17
4.4Shading04:41
4.5Line Colour03:28
5.Finishing Touches
5.1Colour Tweaks02:44
5.2Texture02:29
5.3Exporting02:24
6.Conclusion
6.1Conclusion00:41
4.5 Line Colour
Hi, welcome back. In this lesson, I'm going to show you how you can change the color of your line. At the moment, all of our inks are drawn in 100% black. And this could potentially look a little bit harsh in certain areas, or it might not convey the right sort of texture on an object. I'm gonna show you a couple of ways in which we can change the color of our line. And the first and simplest one, would be to lock our layers. So, If we click on this icon here in our layers tab, we can lock all transparent pixels. So with our ink selected, we can lock those pixels, choose a different color and there you can see that it locks to what I've drawn previously. Now this is great if I want to change just small parts of the drawing. So for example, if I just wanted to change the color of his pupil here, I could just paint that in a different color. But if I wanted to change the color of all these inks, so at the moment, I think that pure black looks a little bit harsh. I think I might change this to a dark brown. So I can change the color of all of these inks at once, by selecting a dark brown color. I'll choose it from my push cart, and drag it down on my color slider, so it's just off black. We can then click edit, and choose change color of line to drawing. And you'll see that changes all of the lines in our drawing into our selected new color. Another one you can change the lines which is the less destructive way would be to create a layer on top of that. Click on the clipping icon here. Now we have this layer clipped to our inks. We can choose different color. So at the moment I think I'm going to change the color of some of these lines on his collars. So I want this to look a little bit like sort of gold or something a little bit reflective. So I'm going to choose this lighter yellow here. I'm just gonna draw in a few of these parts here to imply a shine on this texture and do the same on his sleeve. And then, just zoom into his shoulder and change this top surface of this pattern here on his shoulder. Zoom out to check that. And I don't actually like what I've done on his shoulder here, and you'll see how non-destructive this is. If I just choose my eraser tool, I can then get rid of the color change on the ink, and we've retained this color underneath. One last thing to change here. I think this pattern on the vase It is really a bit harsh so if I choose this light blue I can then paint in all of this pattern in a light blue to imply that it's sort of a raised surface on this vase. Fill that in roughly like that, making sure not to hit any of these other edges. Move along, and I think I might just change part of his pupil here, so if I lighten this very slightly, a small part of his pupil, possibly even lighter, that gives us the impression of light hitting his eye there. Just zoom out and check if any other lines need changing. Possibly a little bit of a shine on this to the part of this gold. And once you're happy with the color of all your lines, that's your colors finished. In the next lesson, I'll show you how to tweak your finished colors.


