
 Lessons: 17Length: 1.5 hours
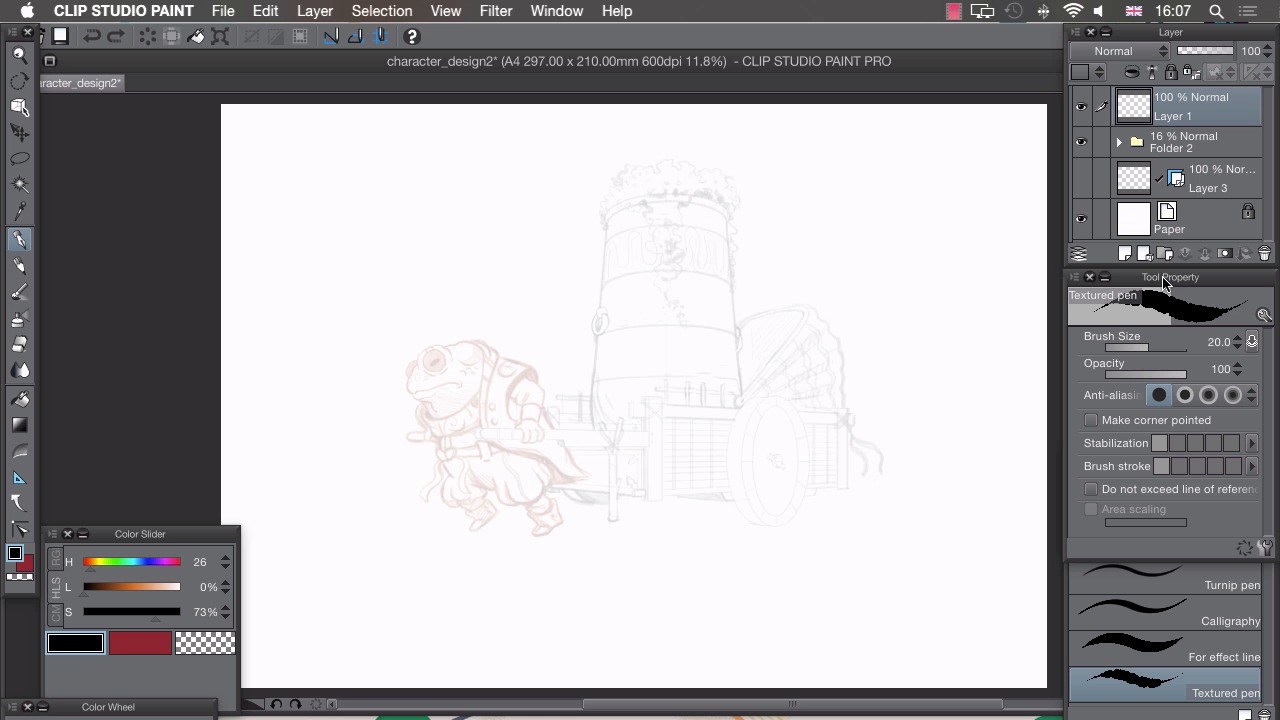
- Overview
- Transcript
3.1 Pen Setup
Before we start inking, we need to make sure our pen is set up to make lines that we like.
1.Introduction
1.1Introduction01:01
2.Sketching Our Idea
2.1Reference03:53
2.2Blocking In09:22
2.3Working Out the Perspective11:46
2.4Background09:57
2.5Character09:50
3.Inking
3.1Pen Setup05:44
3.2Inking Over Our Drawing09:18
4.Colour
4.1Flatting04:54
4.2Palette05:10
4.3Colouring03:17
4.4Shading04:41
4.5Line Colour03:28
5.Finishing Touches
5.1Colour Tweaks02:44
5.2Texture02:29
5.3Exporting02:24
6.Conclusion
6.1Conclusion00:41
3.1 Pen Setup
Hi, welcome to chapter three. In this chapter, I'll show you how to ink your drawing, and in this lesson, I'll show you how to prepare it before you start. Before we start inking, there are a few things we need to change about our artwork space and about our tools so that we can do it a lot easier. The first thing to do is get rid of anything that we're not using anymore. So I'm not using my sub-view window anymore, I can click on the cross there and that frees up all that space so I can see more of my canvas when I'm making this drawing. I'm actually not going to use my references anymore but if I do need to use them for any reason I can go to window, click on sub view. And you'll see that still retains all of the images that we loaded previously. The next thing I need to do is change our layers. We have a few layers we're not actually using any more so it's good to get rid of them. And we need to also organize the ones that we are using, so the first thing I'm going to do is create a new folder and drag our neat drawings into that. Collapse that so it's a little bit neater and you'll see that contains these two neat layers. If I show this frog on the bottom and hide this one, you see we that still have these really rough drawings that we don't need to use anymore. We can simply get rid of those and the last layer that we have here is our ruler here. I don't actually use rulers when I'm inking cuz I quite like the wobbly line I get when I use freehand. But it's always good to keep this just in case there are any last minute design decisions I need to make here. So I can always refer to this ruler layer if I need to check something that I wasn't sure about how I've drawn it. I can refer back to this ruler layer because I've been retaining that hidden underneath our folder here. I'm just gonna change the opacity of this folder here and create a new layer on top so that we can ink on top of this. And there are a few changes we need to make to our pen tool. So, I've selected the pen tool there, and we have a few different presets to choose from. And I'll show you what they're like. So, if I choose the G pen and I press lightly on the canvas, and then press down a bit harder. You'll see that this pen goes from really really thin, all the way to really quite thick. And that's quite a good pen to use if you want to simulate something like dipping a paint brush into an ink pot. By contrast, we also have something like the turnip pen. So, again, I'll press light and hard on this. But you'll see that it actually makes a really constant line. ANd this would be something you'd use if you're drawing something like a map for example. The pen I like to use when I'm making stuff is the texture pen. And that's somewhere in between the g pen and the toner pen. So if I press lightly and then hard. You'll see that we can go to really quite thin to slightly thicker but there's not so much of a variation in the width there. A really important thing to take into consideration is our settings here. So if we go to our tool properties, the first thing we need to consider, and this is probably the most important thing and that is, the size of our brush. So what we need to do is zoom into our canvas and to the size that we actually intend our finished drawing to be. So if you're doing this to only be shown on a screen, you can zoom into whatever size you'd like and then figure out your brush sizes or, if you're doing this for print, you can go to File > Preferences. And then we need to go to our canvas, and we need to change our display resolution. So my screen at the moment is 109 DPI. If you Google your resolution of your screen, you can click on settings and change the DPI. And then when we go to View and choose Print Size. This shows a true size of how this will print. With that in mind, we can then change our brush size, so we're not using some lines that are too thick or too thin for our intended drawing. So we can go through, make a few lines and experiment with that and see what we like. So at the moment I see that if I were to ink with this sized brush that would look really thick and a bit clumpy so I'm gonna undo that, drag my brush size down a bit and try again. And again, I think that's a little bit too thick so I'm gonna go a few notches down to about nine point. And I think that's the thickness that I like. So I like quite a thin line when I'm making stuff and I'm gonna go for about nine points. I want my opacity set to 100, simulating using ink on paper. I want my anti-aliasing on zero here because I want a really crisp line, I don't really want any soft edges here. I don't want the corners pointed when I'm drawing. I don't want any stabilization. So this depends on how you like to draw. I like to see the wobbly lines, so I like to be able to draw really wobbly lines like that. But if I change my stabilization at the top, you'll see I'm trying to wobble the lines but it's not wobbling quite as much because it's actually stabilizing my line for me. I'd like to keep mine at the very bottom here. But you can experiment with that and use whatever setting you like. Brush stroke, so at the moment I draw on my canvas like this and it stops where I take my pen off my tablet. If I put brush stroke to the very top there, I'll draw, take my pen off, and it carries on, making this weird trailing line, so I want that set all the way to the bottom. Once you've chosen the pen you like and you've changed the tool properties so that it actually makes marks that are appropriate for your drawing, you're ready to start inking. In the next lesson, I'll show you how I like to ink my drawings.


