
 Lessons: 15Length: 2.1 hours
- Overview
- Transcript
3.3 Use Your Geometric Pattern
In this lesson we will scale rotate our patterns and create a quick mock-up so we can showcase our patterns.
1.Introduction
1.1Introduction01:12
2.A Quick Overview of Patterns
2.1What Are Patterns?06:31
2.2Patterns in Adobe Illustrator08:30
3.Create Patterns From Scratch
3.1Create a Repeating Geometric Pattern13:03
3.2Customize the Geometric Pattern10:25
3.3Use Your Geometric Pattern10:33
4.Create a Seamless Pattern
4.1Create a Seamless Floral Pattern09:01
4.2Customize Your Floral Pattern12:27
4.3Transform Your Pattern Into a Seamless Pattern for Different Devices10:20
5.Create Pattern Brushes
5.1Create a Basic Pattern Brush12:03
5.2Add a Corner Design to Your Pattern Brush07:57
5.3Create a Pixel-Based Pattern Brush06:49
6.Create a Complex Pattern
6.1Create a Vintage Pattern08:54
6.2Assemble Your Complex Pattern09:26
7.Conclusion
7.1Conclusion01:20
3.3 Use Your Geometric Pattern
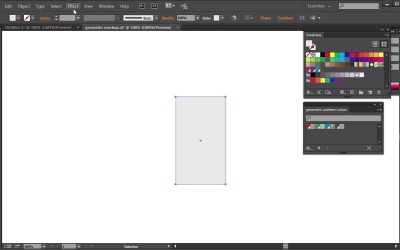
Hello everybody. I'm Trimony, and welcome back to the course mastering patterns in Adobe Illustrator here on tuts+. In this lesson, use your geometric pattern. In this lesson we will learn how we can scale, rotate, or alter a pattern, and how we can create a quick mock up so we can showcase the patterns we've created. So let's get started right away. Let's open up Adobe Illustrator. As you remember from the previous lesson, we created our pattern library called geometric pattern colors. I still have the panel open. And just in case you forgot to keep it open, you can easily find it again when you go to Swatches. And just watch this Library, under User Defined, or wherever you saved your swatches, and open it up again. Now let’s create a new document. So we go to File > New, any size will do here. So, let's have it landscape and press OK. Now, let's zoom in for a minute. As you can see here, we see our patterns. And I will be creating, let's say, a square. And let's turn the stroke off. And let's fill it with the red. If you see this white line here, don't worry about it. This is just a display issue Illustrator has, and it's actually not in the pattern. But we don't really see a lot of our pattern. It's quite large. And we would like to change the size of the pattern, but we don't want to alter the pattern. And drag it out, make it smaller, put it back into the panel, and create a new pattern swatch out of it. We just want to reuse the same pattern, but change the scale of it without changing the scale of our shape. Well, of course Illustrator has these awesome tools like the scale tool, so we can just double-click it here in the menu. And in the pop up window, we can scale it the way we want to. The first here says Uniform. Of course, this will scale everything in proportion. We can also choose from Non-Uniform, and down here in the options, we have Scale Rectangle Corners, Scale Strokes & Effect, Transform Object, and Transform Patterns. Now since we do not want to transform the object, we only want to transform the patterns, we will uncheck this option here. Of course we have the preview option again, so let's check that. And then when we go into the uniform scale, and we change it to, let's say 50%. And we toggle off and on the preview, we can now see that the pattern has been scaled down to 50%. The object itself has not changed. Now if we reset the swatches and the to have the default white fill and black but just hitting D on the keyboard. And then we were to draw a new rectangle, and fill it again with the swatch. As you can see, the original size will be applied again. So we did not alter anything of our pattern. We just altered the size of the pattern in our object without scaling our object up or down. Now let me delete the shape here. We can scale it. We can make it big or small. But at the same time we could also rotate the pattern. And of course we don't want to rotate the shape itself. We just want to rotate the pattern. So, we're going to choose the Rotate Tool here. Double-click it. And if you remember from the previous lesson, if you just press the Alt option key and then click in the center, in the pop-up window, you see again the chance to rotate the object and transform the patterns. And in our case, of course, we want to uncheck Transform Objects and just have Transform Patterns checked. We keep the preview. And, now we can change the angle of rotation. And, as you can see, the pattern will be rotated to whatever degree I put it to. So, you can rotate it, and say, oh, this looks really nice. This gives me a different kind of geometric pattern. And, then we can say, okay, we like this. We can either create a copy of it, or press OK. In this case we'll just press OK. And now we've rotated our pattern. Now if you were to create a new object again and we still have for the fill the pattern selected, it will also remember that we've rotated the pattern and the scale and will fill this object with the rotated and scaled pattern. Now if you say, but what happened to our original one? All we have to do is set the filter none, create a new shape and select the pattern and here's our original pattern again. Now that we've changed and rotated the patterns without really altering the original one, let me show you what else we can do to show off our patterns. Go to your source file folder and open up the file called geometric mockup. Here you can already see a rectangle. This is the size of a business card. And patterns usually go really well with business cards for the back side. For example, where a logo is applied or nothing else, just to show off a nice visual element. Now since Illustrator has some really great tools for 3D to just simply mark up something really quick. Now we select our rectangle and we go up to Effect, 3D, Extrude and Bevel, and in the pop-up window we get tons of options. So let's check the preview button here and since we know that a business card is fairly thin, for the extrude depth we can set it to two points. And here, for the positioning in the custom rotation, we can rotate it into the position we think would look good for business card mock up. So, let's say this is a good position, and at the same time, we might want to play with the perspective angle a little bit, which makes things sometimes just a little bit more realistic looking, so I set it to 55 degrees, and we have the plastic shading on, we can change it to diffuse shading or plastic shading. It is really up to you. Let's choose diffuse shading, we could move the highlights around as well, and then we can press OK. Now, of course we don't see the pattern at all on our business card mock-up here. As you can see we don't have a pattern applied to our object, but we have them here in the panels. They're not in the swatches panel but in our custom panel. So all we have to do is select the shape. And then just click on the pattern we like. And then we can easily open up the Rotate Tool and rotate it. Of course just the pattern. Or the scale tool. Just to scale the pattern. And as you can see this is an easy way to mock up your pattern in Adobe Illustrator. And when we press OK you could say okay this one would be the back card of the business card. And if you make a copy and place it on the other side you'll just change it back into maybe white, or maybe even blue for the other side and then you could show off how a pattern could be applied. But what if you wanted to actually show the pattern to be applied to a packaging? It wouldn't really work to create a box and then have just the fill in the pattern. Because it would not wrap around the sides. So, let me show you quickly how we can do this in Illustrator as well. Let me reset to the default, turn off the stroke and then select the rectangle tool and create a rectangle that could be for our box. Then of course we go back to 3D effects > Extrude and Bevel. Check the preview and then we can play with the positioning of the box but I think this is actually good. And maybe add a little bit of perspective. Then we press OK. Now if I wanted to add to the rectangle the pattern for the fill, as you can see on the side it will not wrap around like I want it to. So of course that doesn't work for me. We can easily go and open up the appearance panel, and here we see the 3D Extrude and Bevel effect that we've applied. And since the 3D and Bevel, if I double-click it, has an option to add Map Art to the sides, we can easily add our pattern via the Map Art. But the first thing that we have to do, we have to create symbol of our pattern. So, let's cancel here. And all I have to do is, drag out the red pattern here onto the art board. Then I have my red tile here in my art board. Then all I have to do is open up the symbols panel and drag my symbol in it. We can call it Red for now, make it simple, and click OK. Now I can delete it from my board again. I reselect my box, go to the Appearance panel, double click the 3D Extrude & Bevel effect. And then in the pop-up, I'll click Preview again, I'll click Map Art. And there, in the pop-up, I will cycle through the surfaces. So the first surface is already selected and is highlighted here in red and all I have to do is click from the symbol drop down and choose the symbol that we've just added to the Symbols panel. And as you can see it gets applied and that can make sure that it fits correctly, I say Scale to Fit and, now I have applied the pattern on the front of the box. And, of course, I can cycle through the sides of the box by clicking on the arrows on here. And, I'm going to select the side, as you can see, the red shows me it's selected. Again, I go click red, I can say scale to fit, unless I can see here it flips it to the side. So I can just scale it myself, rotate it, and then stretch it out. And now it is applied to the side of the box. And then after that I want to apply the same thing to the top face here. I select the symbol, I say scale to fit and then I say okay. Now I can play with the shading and of course nothing will show up because there's one little tick you have to take in the map part so we will open it up again. We'll select shade art work and now you can see that the art work will be shaded. And now when we drag our highlight around, we can actually highlight the front of the box a little bit better. And now we can click OK. And this is how you can easily create some simple mockups to show how the patterns would look like on the product. Or business card or anything else you would like to create. And this is it for this lesson. Now let's move on to the next lesson and let's create a seamless floral pattern with the help of Adobe's pattern option tool.


