
 Lessons: 15Length: 2.1 hours
- Overview
- Transcript
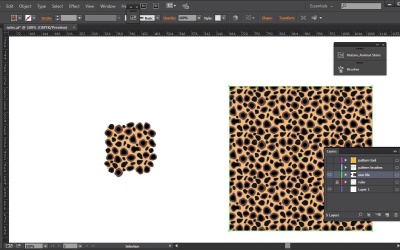
2.2 Patterns in Adobe Illustrator
In this lesson we will talk about how Adobe Illustrator can help us create awesome patterns, what tools we can use, and how we can organize and apply patterns.
1.Introduction
1.1Introduction01:12
2.A Quick Overview of Patterns
2.1What Are Patterns?06:31
2.2Patterns in Adobe Illustrator08:30
3.Create Patterns From Scratch
3.1Create a Repeating Geometric Pattern13:03
3.2Customize the Geometric Pattern10:25
3.3Use Your Geometric Pattern10:33
4.Create a Seamless Pattern
4.1Create a Seamless Floral Pattern09:01
4.2Customize Your Floral Pattern12:27
4.3Transform Your Pattern Into a Seamless Pattern for Different Devices10:20
5.Create Pattern Brushes
5.1Create a Basic Pattern Brush12:03
5.2Add a Corner Design to Your Pattern Brush07:57
5.3Create a Pixel-Based Pattern Brush06:49
6.Create a Complex Pattern
6.1Create a Vintage Pattern08:54
6.2Assemble Your Complex Pattern09:26
7.Conclusion
7.1Conclusion01:20
2.2 Patterns in Adobe Illustrator
Hello every, I'm Simona. And welcome back to the course Mastering Patterns in Adobe Illustrator here in Tuts+. And this is lesson Patterns in Adobe Illustrator. In this lesson, we will talk about how Adobe Illustrator can help us create awesome patterns, what tools we can use and how we can organize and apply patterns. So let's get started. Let's open up Adobe Illustrator. Adobe Illustrator already comes with quite a few patterns that we can choose from. And we can easily find them when we open up the swatches panel, let me pull this out here, and on the bottom here you see the little icon for swatches library menu. And when we click it in the drop down we can find patterns. Here we can choose from basic patterns which has dots, lines, and textures. Decorative patterns, some decorative legacy patterns and vonster patterns. And nature patterns from animal skins to nature foliage. Now let's open up the animal skins. Here you can see the animal skins that we already have available, from alligator, cheetah, elephant, and so forth. Now let me quickly show you how we can use those. So all we have to do is create a shape, so let me create a rectangle here. And then I'm going to click for example, the tiger pattern. And then my shape with be filled with the tiger pattern. Pay attention that the patterns always apply to a fill. Now in Adobe Illustrator you can of course also create your patterns from scratch if you don't want to use any of the patterns that Illustrator ships with. You can customize existing patterns by simply dragging them out on to the art board. And then changing color, size and shape. Or you can create patterns from scratch with any of the illustrator tools. You can create circles, lines, icons, or you can create flower patterns. Faces, patterns, your own animal skin patterns, and the possibilities are endless. Now let me delete this here for a second. Remember that patterns are intended for filling objects. And those patterns are usually called fill patterns and they're different in design and tiling from any patterns that are intended. To be applied to a path, meaning a stroke. Those would be called brush patterns. Now, brush patterns we can also find already in Adobe Illustrator. So if we open the brushes panel here, and let me drag it out, you already have some brushes patterns in here. For example, this one here is the denim seam. So if I draw another rectangle and instead of having the fill, I'm going to apply it to the stroke and all I'm going to do is select the denim seam brush pattern here in the brush's panel. And as you can now we have a pattern applied to the stroke. Which is a pattern brush. Now again we could double click the pattern brush here and we can alter it. But I'm not gonna go into detail here because we're going to have lessons coming up in this course where we exactly will set up our own pattern brush and create our custom pattern brush. And we will go into details for that. Well let me delete this here quickly. Now, when we design patterns, it really helps to understand how Adobe Illustrator tiles patterns. So let's have a look at this. All patterns tile from left to right from the ruler origin, to the opposite side of the artwork. Now what does that mean? In CS5 and newer versions of Adobe Illustrator, this would mean from the top left downwards to the bottom right. In CS4 and older it was the opposite, it was from the bottom left up to the top right. Next thing, fill patterns typically have only one tile, so if we take an animal skin pattern here, this is the tile for the animal skin. And if I fill it in a rectangle, this tile will be repeated, filling up the whole space. But usually we just create one tile that will be repeated. And the next thing, we have pattern brushes. Now, pattern brushes work a little bit differently. Pattern brushes usually consist of up to five tiles. We have one tiles for the side. We have a tile for the corner. The inner corner and the outer corner. Then we have a start tile and an end tile. The additional corner tiles enable brushes to flow smoothly at corners. Now what does that mean? That means that we have the corner tiles here, and then the side tile is repeated, ending in another corner tile, the side, the corner, the side, the corner enclosing it. If we only had one path that we want to apply the pattern brush to, we would see here the start tile, the side tile in the middle repeated and the end tile. And all of this we can find in the brushes panel, pattern brush here. If I double click it, we can see that all the tiles are applied. Outer tile corner, side tile, inner corner tile, start tile, and end tile. But like I said before, we will go into detail in later lessons in this course. Now in the past, when creating patterns or pattern brushes in Illustrator, it was kind of tedious and sometimes time-consuming, especially when we wanted to create a seamless pattern. Now with CS6, Adobe introduced the pattern options tool. And with this tool we can now easily refine, adjust and create patterns. Now let's have a quick look at the pattern options tool. We can find this on the window, and in the drop down, we see here pattern options. Now when we open this we see the pattern options panel. We have a fly out menu here in the side. But all the other options are grayed out. We can only this Pattern Options tool when we actually select an object that we created. Now let me show you how this works. Now here we have a simple circle. Now if I select the circle, the pattern options panel is still grayed out. The first thing we have to do is we have to make a pattern out of this circle. Now we have two options here. You can go to object, pattern, make, or we can use the fly out menu here from the pattern option's panel, and select the same, make pattern. Now in the pop up window that Illustrator shows us here, it says the new pattern has been added to the swatches panel. And we can see this here. And any changes made while in pattern editing mode will be applied to the swatch upon exit. This simply means that if you want to make a change to the pattern you just double click your pattern in the swatches panel, you will get the pattern options panel again, you can adjust things in here. And then with the menu on top of where it says save copy, done or cancel, you can basically update your pattern. If you don't want to see this pop-up window again, you would just click don't show again. But, I will leave the default as is for now. Now, as you can see, let me move the swatches out of here, we created a simple pattern. We have a bounding box around the circle, and the circle repeats in one tile around. And now, we can also rename the pattern. We can change the tile type from grid to brick by column and so forth. We can change the width of the bounding box. We can have different overlap options, and we can change the copies that will be shown in the background. If they're dimmed, if they show the tile edges, and so forth. But before I go into depth with the pattern options tool and how we can refine, alter and adjust patterns that we want to create, I will stop here, and I will see you in the next lesson where we will go into creating a geometric pattern from scratch.


