
 Lessons: 15Length: 2.1 hours
- Overview
- Transcript
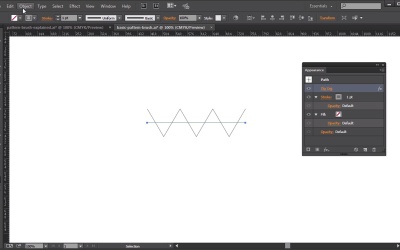
5.1 Create a Basic Pattern Brush
In this lesson we will create our own basic pattern brush in Adobe Illustrator.
1.Introduction
1.1Introduction01:12
2.A Quick Overview of Patterns
2.1What Are Patterns?06:31
2.2Patterns in Adobe Illustrator08:30
3.Create Patterns From Scratch
3.1Create a Repeating Geometric Pattern13:03
3.2Customize the Geometric Pattern10:25
3.3Use Your Geometric Pattern10:33
4.Create a Seamless Pattern
4.1Create a Seamless Floral Pattern09:01
4.2Customize Your Floral Pattern12:27
4.3Transform Your Pattern Into a Seamless Pattern for Different Devices10:20
5.Create Pattern Brushes
5.1Create a Basic Pattern Brush12:03
5.2Add a Corner Design to Your Pattern Brush07:57
5.3Create a Pixel-Based Pattern Brush06:49
6.Create a Complex Pattern
6.1Create a Vintage Pattern08:54
6.2Assemble Your Complex Pattern09:26
7.Conclusion
7.1Conclusion01:20
5.1 Create a Basic Pattern Brush
Hello everybody. I'm Simona and welcome back to the course, mastering patterns in Adobe Illustrator here on tuts+. And this is lesson, create a basic pattern brush. In this lesson, we will create our own pattern brush in Adobe Illustrator. Now, let's get started right away and open up Adobe Illustrator. I already created a new file, and please feel free to follow along. It doesn't matter what size of the document you choose. Pattern brushes are super fun, and you might have already made your own pattern brushes, or have explored them, at least. I would like to show you in this lesson how to create a six side patterned brush without much difficulty and effort. But first, let's explore how pattern brushes are constructed. I created a small file for you to see and let me open up the explanation here. Now, let's have a look how our pattern brush is constructed. Usually, we have five tiles for a pattern brush. First, we have a corner tile. Then we have a side tile. Here we have an inner corner tile. Which most likely can be the same as the corner tile. Or, it can be different. Then we have a start tile and an end tile. Now corner tiles we need when you wanna have a border. If you have a circle or an ellipse, the side tile of your brush will be used. But as soon as you have a rectangle or a polygon, corner tiles will be added into those corners of course. And if you just had a line that you wanted to fill with a pattern brush, you would have the start tile, in between the side tile and at the end, the end tile. Here are a few things to know about pattern brushes. The corner tile has to be square in order to work properly, and the height of the side tile has to be equal to the height of the corner tile. Basically, if you have your side tile being height 50 points, your square for the corner tile has to be 50 points in height as well. When creating a pattern brush, we need to pay attention also to some other things. For example, we cannot use gradients. If you wanted to use gradients, we would have to actually use blends in order to fake a gradient. Then, you can make a brush out of it and it will look like a gradient but the gradient is actually constructed out of a blend. We can not put a brush into another brush, so to speak. We can't create a shape with an existing brush and then, make a brush out of it. Of course, if we were to expand the brush, and then have a new shape which is sort of flattened or expanded, then you could make a brush out of it. Also, we can't use any effects. If effects are applied to a shape, you would have to expand those effects. It's also best when creating pattern brushes to work with guides and smart guides. It's also good to have a boundary box around the shape. Now I want to show you this brush here, how this brush is looking, so you will understand the five tiles much better. Here, this is just the line, and the pattern brush has been applied to it. You can see this dark tile on the left and the end tile on the right. Then here we have a polygon. As you can see here we have two corners, and the corner tile here is applied. And this would be the inner corner, and since the inner corner in this example is exactly the same as the corner tile there is no difference in the corners. And this of course we can also find in the brush library. So if I were to double click, you can see exactly what is going on. This is the outer corner tile, this is the side tile, this is the inner corner tile, the start tile and the end tile. On top of here of course we can give it a name. We have the scale to be fixed depending if you work with a tablet, we can have pressure, styles wheel, tilt, bearing and rotation. But usually we'll leave it as fixed. Then we have the flip, either to be flipped along horizontally or vertically and we have the fit. Either stretch to fit, if I were to add a space in-between, you can see how it creates a gap in-between, or you can select approximate path. But usually, I work with stretch to fit. And the colorization, you can either choose tints, or use shift or none. For example, if you wanted your brush to have the same color, no matter what stroke colors applied, you would set it to none. If you wanna have a tint of the stroke color you're choosing, you would choose tints, or tints and shades. Or if you want to have the exact same color that you have for your stroke, you would set it to hue shift. I usually set it to hue shift so no matter what pattern brush I create, I can always change the color via the stroke color. So now we have a little bit of an overview of how pattern brushes are set up. Now, let's go and create our own. And I've already created a new file called basic pattern brushes. You can find this in your source file folder just in case you want to follow along with the same kind of brush. What I have done here, I've created a line, a simple line with a grey stroke. And I added an effect to it. I can find the effect here in my appearance pallet just to show you how easy it is to make a zigzag line. And I chose the effect zigzag. And if I open up the Options, you can see I set it to 40 points in size, absolute, and ridges per segment to five. Now, of course, we can't use effects in brushes. So what I have to do here is, I have to actually expand the effect that I've added to the line. So we have to go to Object. And expand the appearance. Now I think one point for the stroke is a little small so I am going to set mine to be three points. Now here I would like to have a repetition of this exact line so all I am doing is selecting it and making a copy on the bottom and then I repeat it one more time. And now, this is the basic pattern I would like to add. Now if I select all of these shapes, I can make use of my pattern options tool, and I can see how it gets repeated. So we select all three lines, we're going to object, pattern, make. Now as you remember from previous lessons, here we will have a pattern of the three lines that get repeated. But as you can see, I have a little bit of an issue here. Let me zoom in. At the edges, my lines are not joining together. Let me zoom in a little bit more so we can see it even better. Here, we need to have the path actually joined. Now since we have a stroke, this might get a little difficult. Now let me show you how we can fix this. Let's exit the pattern tool here by double clicking the escape key on the keyboard twice. The first thing we need to do is we need to select the lines and we need to outline them. Via Object, Path, Outline Stroke. Now, with the lines outlined and in shapes, all we need to do is create with the pen tool a line that goes right through the middle here. We move it down a little bit and then, we select all of the lines and then, we're going to the Pathfinder tool. You can always find it here in the toolbar, and if not, under Window, Pathfinder. And here we're going to select the Divide tool. Now, this has divided these three lines here on the left, from the rest on the right. Now with the direct selection tool we can just select those and delete them. Now the same of course we want to do on the other side. So again we select the pen tool with the smart guides on of course. We move it down a little bit. This is our line where we want to cut it. We select all of them again and we go back to the pathfinder and select the divide tool. Then we select the direct selection tool. And delete those parts. Now, when we actually select all of the lines that we've just outlined, and then we go back to Object,Pattern, Make, as you can see now, we're going to have a repeating pattern, and the edges are meeting up, so now we know when we create a pattern brush that everything will be seamlessly added up. Since we're already in the pattern option tool, and this is the slide that we want to add to our pattern brush. We can right away add it to the swatches pallet. Now we can call it for example zig-zag slide. As you remember we usually have five tiles we need for our pattern brush. The corner, the side, the inner corner, the start and the end. For a very basic brush we could just work with the side for now. So since we've already saved it, we can just click done and exit. If I zoom out of course we still have our shapes here but if we wanted to have a pattern we have it in here called zigzag side, but since we want to create a pattern brush, what is the next step we have to do? Well, we actually have to open up the brushes palette. Now, let me drag it out here, and now you can see you have already existing brushes. I have one in here, it's already called zigzag. Now what if we wanted to add actually more elements to this part that will be the side for our pattern brush? While all we have to do is again use the power of the Pattern Options Tool, double-click and we have the Swatches panel. And in here we can just add anything we'd like. For example, what if I would like to add a circle here? So I'll draw a small circle. Of course we can always align it with the smart guides. And then I'll make a copy and drag it to the other side here on the right. And as you can see it overlaps the bounding box and then we repeat on the other side. And then we'll just escape and our pattern tile for the brush is ready. So what we have to do next is we have to open up the brushes palette. And here we could either click the icon for new brush or from the drop down select new brush. This is up to you. It does the same thing. And then we can click new brush. In the pop-up, we want to choose pattern brush of course. And then we click OK. And then we're going to get the pattern brush options panel. And here we want to give it a name called Zig Zag. And of course there's nothing in there, unless you remember from before. Here we need to place our tiles. So, the first one is the corner tile, but we do not have a corner tile at the moment, we just have a side. And since we added it to the swatches panel, when we click the arrow here for the side, in here we can see the ones called [INAUDIBLE] that we've just added. We can select it, and as you can see it automatically will give us a corner. This is a new feature here, and this is really nifty. Without having to create corners you can select form pre-generated corners. But for this basic example, I would like to set it to none. And now you can see this is our pattern brush. We have stretched to fit, and in the colorization, we select you shift, and then we press okay. Now if I was to create a circle and I set the field to none and then used for the stroke the pattern brush we've just made, all I have to do is size down the stroke. And as you can see, here is the new pattern brush we've created. Just to give you an example how it will look like on the straight line. Same thing. I'm going to have the stroke be fairly small and here is our new pattern brush. And this is it for this lesson. And in the next lesson, we will explore how we can create our own corners, or how we can choose from the presets and the automatic corner generations that Illustrator has now with the pattern brushes.


