
 Lessons: 15Length: 2.1 hours
- Overview
- Transcript
3.2 Customize the Geometric Pattern
In this lesson we will create several color options for our geometric pattern, and we will save our patterns as a custom library.
1.Introduction
1.1Introduction01:12
2.A Quick Overview of Patterns
2.1What Are Patterns?06:31
2.2Patterns in Adobe Illustrator08:30
3.Create Patterns From Scratch
3.1Create a Repeating Geometric Pattern13:03
3.2Customize the Geometric Pattern10:25
3.3Use Your Geometric Pattern10:33
4.Create a Seamless Pattern
4.1Create a Seamless Floral Pattern09:01
4.2Customize Your Floral Pattern12:27
4.3Transform Your Pattern Into a Seamless Pattern for Different Devices10:20
5.Create Pattern Brushes
5.1Create a Basic Pattern Brush12:03
5.2Add a Corner Design to Your Pattern Brush07:57
5.3Create a Pixel-Based Pattern Brush06:49
6.Create a Complex Pattern
6.1Create a Vintage Pattern08:54
6.2Assemble Your Complex Pattern09:26
7.Conclusion
7.1Conclusion01:20
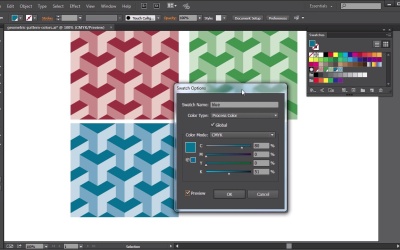
3.2 Customize the Geometric Pattern
Hello, everybody. I am Simona and welcome back to the course Mastering Patterns in Adobe Illustrator here on tuts+, and this is lesson Customize the Geometric Pattern. As you remember from the previous lesson we created a geometric pattern from scratch and added it to our swatches panel. Now let me show you in this lesson how we can customize it. So let's get started. Let's open up Adobe Illustrator. At the same time, go to your source file folder and open up the file called geometric-pattern-colors.ai. Here, of course, you won't see much. But when we have a look at the Swatches panel here, we can see that we have a swatch pattern here called New Pattern Swatch 1. And next to it is a global color called Gray. I've set up the swatch's pattern here with a global color. And global colors are great because if you want to change a color of an object that has assigned global colors, it will update the object all over. Of course we don't see anything on the art board. We only have the tile here in our swatches. Now how could we actually customize this little tile? There's a really easy way. All we have to do, is grab the tile, and drag it out to the art board. And now we can see the shapes that we've created, to create our geometric tile. If we select the Direct Selection Tool, and select one of the shapes, you can see that the color that is set up, if you go to the color. It's called gray, which is the global color. Now if I were to open up the global color by double-clicking it in the Swatches panel, and I take the preview and then change the color, it will update the tile as well. And it will also update it in the Swatches panel. So this would be a good way to create another color of our pattern that we've created. But as you can see we're losing the gray one. So what could we do to avoid that? Let me cancel here for one second. And let show you what we can do so we can create different colors of geometric pattern and add it to our swatches panel. There's a really easy way to keep the gray but update the global color. First thing we want to do is select the black arrow tool or selection tool. Select the tile. And then go and press command + C or ctrl + C on the PC to make a copy of it. After that, we're going to open up the global color and in the swatches option, we're going to rename it, for example, into red. We'll take the preview button, and then we're going to move the sliders to get a red color of our liking. Of course, this is totally up to you. You can create any kind of color you like. After you have the color you like, maybe little bit darker here, just press okay. Now, of course everything has updated. The global color has been updated. It's called red now. And the new pattern swatch has been updated as well. So you might think, but we've lost the gray. But since we first made a copy into the clipboard, now we can just press command + v, or control + v on the PC and our gray tile is back. At the same time we also see the global color showing up in our swatches panel. The only thing we have to do is select the tile and drag it back into our swatches panel. And as you can see now, we have two patterns of the same style but in different color. Now, since it's so much fun, why not repeat this? Since we still have the gray In the clipboard since we have not copied anything else. So the importance is not to select anything and copy it. We can of course again change the gray global color. And let's say we wanted to turn it into a green. So we rename it into green. It's always good to give your swatch a name. Particularly so we can see what's happening on the art board with the color. And then we are going to change the color and we're going to select the green. And if you like the green, if you're satisfied with it, we'll just press okay. And again the swatches of the global color has been updated and a new pattern swatch has been updated. And it has a default name of New Pattern Swatch 2. And since we don't want to lose the gray tile, we're just going to paste it back onto the art board. And here it is. And again, if I move it down here, the gray swatch will show up. The only thing I'm missing is the pattern tile itself. So, all we have to do is select it and drag it back into the swatches panel. And now, since it was really so much fun, let's do this one more time and create a blue. I double click the swatch option, I rename the color, I check the preview so I can see what's happening. After that, I'm going to see what kind of blue I like. Maybe a little bit lighter here. And once I'm happy with the color I'll just click OK. Again, updated swatch, updated pattern swatch. And since I like the gray I will paste it back onto the art board. And here we go. As you can see we have four colors now for our swatches all added into the swatches panel with the tile itself. The only thing we really need to do now is rename the pattern swatch itself. And since we can just select it and double click it, the pattern options tool will pop up. And as you can see on the top here, it says name where New Pattern Swatch 3 is written. We'll just replace that with, let's say, geo blue. And then up here in the menu you see save a copy, done, and cancel. Since I don't want to make any changes, and in later lessons we will go into detail about the pattern option tool, we'll just click done. Now this one will repeat with the green, double click it, rename it, make no spelling mistake, and we click done. And then one more time, for the red, same thing, I'm going to call it geo red, I click done. And then I'm just going to select my gray tile, since this is still missing from the swatches panel, and drag it into the swatches panel, double click it, and rename it calling it geo gray. And we click done and all is updated. Now we have really a set of four patterns. The pattern itself is the same, it's just that the color has changed. Now one more thing I would like to show you. Since we have the swatches panel here and a lot of colors are happening in the patterns and in our global colors. You can just easily decide to just show patterns. So if you go to the little icon down here where it says Show Swatch Kinds Menu, we can choose between Show Color Swatches, Show Gradient Swatches, Show Pattern Swatches, Show Color Groups. So if you want to just have a look at our pattern, we can just say Show Pattern Swatches. Now as you can see, since we don't have any other pattern in our swatches panel at this moment, we only see the patterns we created. We can easily switch back and say Show All Swatches. And we would go back to everything else that is in the swatches pattern. Now if you were to open up a new document, these patterns wouldn't be included in this swatches panel sInce this is the default swatches panel and you will just see default colors and color groups. Now a good practice is, if you have created patterns, to actually save the library of your patterns. Let me quickly show you how we can do this. First thing, I want to clean up everything that we don't need. So I will select everything that I think is not needed and I will just delete it from the sources panel. I'll select the groups as well, and then one more here. And then I'm just left with the pattern and the global colors. After that I want to go to the flyout menu. And on the bottom here you see Save swatches library as ASE or Save swatches library as AI. ASE will be exchangeable. For example if you wanted the swatches to be available in InDesign, but for us I just want the swatches to be available in Illustrator. So I can just save it as an AI, and in the pop-up Illustrator will bring me to the default folder. Of course you can save it anywhere you like. You could save it on your desktop if you have another folder already with swatches. It is up to you. Since the file already has a name, it will take the same file name, so we can leave it as is called geometric pattern colors, and we can just save it in here. So all we have to do is click save, and now our patterns and global colors will be saved. Now if I were to open up a new document, I will get back the default swatches panel with the default colors and gradients and groups. And as you can see right now we do not have our patterns added to the swatches panel by default. This is actually a good thing because imagine you've created hundreds of patterns and every time you open up a new document your swatches panel would be populated by all these patterns and other color groups. And it would be quite tedious to find exactly what you're looking for. But of course, since we saved them as a library, you can easily call them up again. So all we have to do is go down to the swatches library menu. Go to User Defined and in here our two magic pattern colors swatches will be available to open up. So, if we select them, we'll get a new panel. It's called geometric pattern colors, and here we have the patterns with the global colors. So now we can easily create objects again and fill them with our pattern. And if you wanted to, of course you could create new colors as well. And this is it for this lesson. Now let's head over to the next lesson and let me show you how we can change, scale, rotate and create a mock up to show off our patterns that we've just created.


