
 Lessons: 15Length: 2.1 hours
- Overview
- Transcript
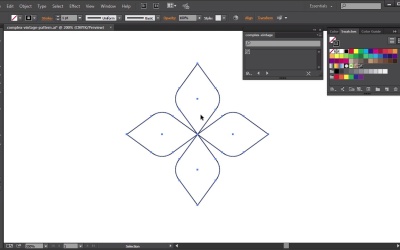
6.1 Create a Vintage Pattern
In this lesson we will set up our shapes and custom brush in order to create a complex vintage pattern.
1.Introduction
1.1Introduction01:12
2.A Quick Overview of Patterns
2.1What Are Patterns?06:31
2.2Patterns in Adobe Illustrator08:30
3.Create Patterns From Scratch
3.1Create a Repeating Geometric Pattern13:03
3.2Customize the Geometric Pattern10:25
3.3Use Your Geometric Pattern10:33
4.Create a Seamless Pattern
4.1Create a Seamless Floral Pattern09:01
4.2Customize Your Floral Pattern12:27
4.3Transform Your Pattern Into a Seamless Pattern for Different Devices10:20
5.Create Pattern Brushes
5.1Create a Basic Pattern Brush12:03
5.2Add a Corner Design to Your Pattern Brush07:57
5.3Create a Pixel-Based Pattern Brush06:49
6.Create a Complex Pattern
6.1Create a Vintage Pattern08:54
6.2Assemble Your Complex Pattern09:26
7.Conclusion
7.1Conclusion01:20
6.1 Create a Vintage Pattern
Hi everybody. I am Simona and welcome back to the course, Mastering Patterns in Adobe Illustrator here on Tuts+. And this is lesson Create a Vintage Pattern. In this lesson we will set up our shapes and our custom brush in order to create a complex vintage pattern. So lets get started. Let's open up Adobe Illustrator. At the same time, go and open up the file called complex vintage pattern in your search file folder. Here, we're going to create our vintage pattern. As you remember from the previous lesson we created a custom brush and we created several custom patterns in Adobe Illustrator. Now, we're going to use all of what we've learned in order to create a complex vintage pattern. I already created the pattern for us, so I just want to show you what it looks like. So if I create a rectangle here, and I fill it with the pattern, that is called complex vintage, you can see here that is quite intricate, it has tons of details to it. So if I zoom in, this is a pattern that repeats seamlessly and you can set it up to be used anything you like. Of course, feel free to create your own custom vintage pattern. You do not have to create the exact same shapes, but I would like to show you how you could, with the help of Illustrator, create such a vintage, complex pattern. Now, let me zoom out again here. And I'm going to delete this, and we'll start creating the shapes and the custom brush we will need in order to create this complex pattern. Of course, as you remember from the pattern we have quite a few repeating shapes. And one of the first shapes that we're going to use is actually a square. So if you reset the stroke and the fill to white and black. And we can do this easily by just hitting D on the keyboard. We can then select the rectangle tool. Set the fill to black, and the stroke to none. And then, we create a square. In order to have a square, all you have to do is hold down the Shift key and start dragging. This will automatically make it proportionate. After that, we are going to rotate it by 45 degrees. And then, we're going to select the top point here with the direct selection tool. And then, we're going to move it up 10 points. My keyboard increments are set to one point, so if I hold the Shift key and press the arrow key on the keyboard for up, it will move it 10 points in one shot. The same thing we're going to do for the bottom. The next thing, we want to select the side points here. The left angle point and as you remember since Illustrator CC we have now live corners, and you can see this little circle here, and if I hover over with the direct selection tools I see a quarter circle, and I could actually pull it, and move it in, and create a curve. But I want to have the exact same on the other side. But all we have to do is just click the circle here, and in the pop up we'll set the radius to 40 points, and then we click OK. And then we're going to select the other anchor point on the other side double-click, set the radius to 40 points and click OK. And now we have our shape coming together. Maybe we want to pull the top a little bit higher, so I'll select again and move it up, by again 10 points. And the same for the bottom. Now, the shape is a little bit big, so let me scale it down. And now, we want to repeat it three times. And since we can make use of the rotation tool, we just select the rotation tool here. Then we're pressing the Alt or Option key and we're pressing on the bottom corner. And in the pop up we will choose 90 degees. And we can check the preview. And as you can see we are rotating it counter-clockwise by 90 degrees. And, of course, we want to click Copy. And while the shape is still selected, we'll just press Cmd+D or Ctrl+D on the keyboard to repeat this, and now we repeated the shape. This is one of the simple shapes we need for our complex pattern. Now, one thing I would like to do, I would like to select all of the shapes and I would like to turn them into an outline. And after that, I would like to have the same shade inside. And without much effort, we can do this by going to Object > Path, and Offset the Path. But instead of a positive value, we want to set it for a negative value. So let's try minus 10 points, and let's check the preview to see what will happen. And if we like the distance, we'll just press OK. After that, we want to, of course, change the stroke into a fill again. And we can do this easy with the shortcut Shift and X. This will switch always between fill or stroke, depending which one is set at the moment. This now is our more complex shape we need for our vintage pattern. The next small shape that we need consists of two circles, so all we have to create is two circles, one bigger than the other, about this size here, and then we move them together, and all I want to do is I want to align both shapes in the middle, so I will open up the align panel. And I will choose Horizontal Align Center. After that, I would like to combine both shapes. So I will go to the Pathfinder and I will select Unite. Now, I would like to have a tiny stem on the bottom here. So all we have to do is create a rectangle with the Rectangle tool. And then, I will select the top two anchor points together. You can do this by selecting the direct selection tool and click on one anchor point, then hold the Shift key on the keyboard, and press the other anchor point, and then we're going to open up the chain tool, and we can easily do this by pressing Cmd or Ctrl and Alt and J on the keyboard. In the pop up, we will choose both and click OK. Now, we move up the shape a little bit, and again select all. Go back to the Pathfinder Panel and Unite them. Now, this is another shape we need for our complex pattern. As you can see, it wasn't very complicated to create those shapes, but once we have all the shapes created and then we duplicate them and put them together they will create our nice vintage pattern. Now, the next thing we have to do for our vintage pattern. I would like to create with you a pattern brush. For our custom brush, we need a diamond shape. So first, let's set the stroke to none. And the fill to black. And then, we will select our rectangle tool. We'll create a square. The size is totally up to you. And then, we will rotate the square by 45 degrees. Now, we need another square for our guy. So we create another square, approximately about this size. We set it to the stroke, we'll select both of the shapes, align them vertically and horizontally, and maybe this outer bounding box is a little bit too big right now. So we'll scale it down to approximately the size. And again, this is totally up to you. And we want to make sure we keep the stroke set to 1 pt. And then, we select both of the shapes. The outer stroke square and the diamond inside, and we'll make a copy. Now, in order to create a pattern brush out of our first shape here, we need to cut the outer square. So we will just select the cut tool by pressing C on the keyboard, or we select it from the Menu, and then we will click at each point where we want to cut it. Since I want to just have a top and the bottom line, of course, I have to cut it in all four corners, and then I will delete the sides. And this is what we will be left with. Now, we just select all the shapes that we need for our pattern brush. We'll open up the brushes panel, let me drag it out. And then, we'll add the shapes to the panel. In the pop up for New Brush, we will select Pattern Brush, and then we click OK. Now, when we get the pattern brush options, let's give the pattern a name and let's call it diamond. Of course, you can call it anything you like and here for the corner tile, it already selected the corner tile for us, and it's the autosliced one. And this, in my opinion, looks really good. So all we want to do is set for the inner corner tile the same, we'll go to autosliced then for the color method, of course, we can leave it as black or we could set un-shift or tints and shades, then we press OK. Now, we have our custom pattern brush. Now, all of these elements we will use to create our complex vintage pattern. But let's do so in the next lesson.


