
 Lessons: 12Length: 1.7 hours
- Overview
- Transcript
4.4 How to Save Files for the Client
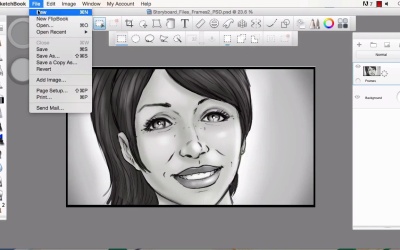
In this lesson we will go over some of the tools within Sketchbook Pro to prepare and output your files. We will go over the formats that support layers and also how to make our mockups for quick file transfers.
1.Introduction
1.1Introduction01:11
1.2Tools and Resources02:05
2.Creating a Frame Template in Sketchbook Pro
2.1Understanding Scale and File Size When Creating Storyboards05:27
2.2Creating a Template for Our Storyboard Frames07:34
3.Taking the Script to Rough Pencils
3.1Briefing Over the Script07:12
3.2Laying Out the Rough Pencils15:00
3.3Revisions to the Rough Pencils and Camera Angles11:25
4.Refining the Artwork
4.1Understanding When and How to Use References14:46
4.2Creating the Refined Artwork17:16
4.3Looking at the Finished Work Objectively04:53
4.4How to Save Files for the Client10:57
5.Conclusion
5.1Course Conclusion and Main Points02:42
4.4 How to Save Files for the Client
Welcome back to Storyboarding in Sketchbook Pro, I'm Robert Marzullo. We'll now cover chapter 4.4, how to save files for the client. Okay, so now our artwork's done, and we're ready to save the files for the client. Now, again like I said earlier in the course, you want to design the frames based on what their needs are. So if they needed 9 by 16 at 300 dpi, then you want to start somewhere in that range to make sure that there's no loss of clarity in your digital art. And we've done that here. The frames are a little bit smaller, but they're still plenty big enough where there's gonna be no loss of clarity. And I'll show you that right now. So if we take the selection tool, and I'll grab it with the framing around it. Go to Image > Crop to Selection. Now go to Image > Image Size, and we've got 5.7 by 10.1 at 300 dpi. Now just to show you what I'm talking about, I'll go ahead and zoom in pretty far so that you can see where the clarity is in the image right now. And I'll go ahead and bring that up to exactly what the final output needs to be, 9 by 16. If you wanted a true 9 by 16, you could take off Keep proportions. It's such a small numeric value that it's not going to distort. And we'll again zoom back in. And if you notice, there was no loss of clarity. I mean, if there is a small blurring of the edging, it's pretty much undetectable, and that's what you want. So if you're already in that range, you can do a little bit of sizing and it's not gonna affect your frames negatively. Now the next thing to do is to save these out into a format that your client might need. The native format to this software is a TIFF file with layers. Now, the beauty of this software is you can also save out to PSDs, and I'll show you that now. Okay, so now we can go to File > Save As, and I've created a folder here, Storyboard Files. And we've got TIFF, which again is the format that Sketchbook Pro relies on, JPEG, which will in turn flatten the layer but it's good for web transfer, so is PNG. PNG also supports transparency. And the ones I like to use the most, and I find myself using the most with directors and art directors, is Adobe Photoshop files. Pretty much everybody uses these in one way or another. So if you go to an Adobe Photoshop file And save out as that. And I generally keep the extension in there. It makes it a little bit quicker to read from a glance. So I'll say that these are PSD files, and often times I'll actually make another folder. And this is all specific to what you like to do, and the way that you like to work. But this is the way that I do it. So I'll show you that. And this would be instead of Storyboard_Files_3_Frames1, I'll just call this Frame1. And you could even do one of three, or whatever works for you. So I'll save that there. Now the reason why both TIFFs and PSDs work really well is the ability to add the layers. So if this is going to be an animatic and animated, they may ask you to draw certain elements as separate pieces. So for instance, say they want to animate her arms for the animatic. You would have drawn these or separated these as an individual piece, and painted the table behind them. And sometimes they're gonna want that, other times they're not and they're just gonna work with the flat layer like this. But the beauty of the PSDs and the TIFFs is that you can give them those layered files and still keep it as one unified document, so that's nice. Okay, so now we've saved frame one. Now hit Cmd+Z to go backwards and get back to our original document. You gotta be careful not to save in between or save a backup copy, so that you can Ctrl+Z back or Cmd+Z back. But if you save in between that, you can lose the rest of the information. So I generally always make a backup before doing this. So now we'll hold spacebar, scroll down. I'll tighten into the shot a little bit more, and do the same thing and repeat this process. Select around our frame. Image > Crop to Selection. Image size, 9 by 16. Again, it's right in the range, so very little to no distortion would happen. Hold space bar, we can zoom in, check for any loss of clarity. It's still very good for a frame, as far as tightness and resolution. And same thing, we go to File > Save As. We'll make this a PSD, like the other one. Click on this and Frame2, or Frames2. Save there. And we can still Cmd+Z back, because we saved a different file. We didn't save over the original file. Probably just move that selection right down and do the last one. Crop to Selection. File > Save As. So just repeating the process. This part's nice and easy and quick to do, which is great cuz after you put all the time and effort into the frames, it's nice to have something easy to kind of finish up the work. Okay, so there's that. And we can also just go Cmd+Z, and just in case there was any changes, now that we're back to the original document, we can save again. One of the things I live by is save and save often. It's, when working with digital art, you never know when something could crash and go bad, so you gotta make sure to save copies and back up those copies. And it'll always protect you against losing large amounts of your time. All right, one of the other things I'm gonna show you as far as saving layers. Oftentimes, when you're working with a few clients, you'll have to send the progress and samples to be approved before all your frames are finished. So let me go ahead and show you that also. So if you were take this layer that's got everything flat and then combined. And we want it to look a little bit cleaner than the sketch lines on the outside, the notes. We'll just go ahead and disappear that layer, remove the visibility on it. And we'll go ahead and bring in the files that we saved by going to File > Add Image. We'll select each one of these frames and bring them in. Scale them down to the width of the canvas. Hit Enter or X to release. Go ahead and move that up. Okay. File > Add Image. Grab frame two. And, this just gives you a little bit better presentation to showcase your work. And, we're gonna go ahead and save this one into a JPG format. Again, so it'll be easier for web transmission or sending back and forth through the web. Grab frame three, scale it down. No, actually that one's already scaled. Move that down. Okay, I guess we can get rid of this layer. Okay, so we've got our three layers there. And you can get in there and really line them up and make sure that the overlap of the frame is a little bit nicer. Now remember if you grab this tool up here and pull in one direction, it'll distort either width or height, or vertical or horizontal. Grab frame three, same thing. And when it's something like three frames, I'll generally stack them like this. If it was four frames, I would probably do two up, two down. And I just kind of go with whatever looks like it fits the best into a typical screen. The vertical frames like this are nice, because a lot of applications scroll downward, whether it be their, you gotta think in terms of what somebody might be viewing this on. Whether it be a tablet or a phone, chances are that's what the majority of them are being looked at on these days, so vertical's pretty conducive for that. So I can select around these frames, Image > Crop to Selection. And now I'm ready to save my JPG. Now, the JPG will flatten these down and it'll disregard the one that's no longer visible, but that's fine for what we want. So File > Save As. And I'll actually create another folder here. And I generally put something like, ready to email. I do a little bit of shorthand there, that's just for my eyes only. Storyboard, and then we'll put all three frames. And just type whatever you can read properly. All three frames ready to e-mail, or something like that. And again, I like to put the extensions in there, just so I can read them quicker off the fly. Jpeg, and with Macs, it's always good to type in the JPG, just so you know. And I'll go ahead and save that. And it warns you here for this image format, all layers will be merged. That's what we want, so thank you. And one thing you can do is even check the size of the file when you're done. 2.3 meg file is gonna be nice and quick to email, and it shows the dimension here. So it's a really large file as far as the visibility. But as far as the megabytes, it's gonna transfer really well. So that's exactly what we want. All right, so that'll complete this chapter. Next we'll head over to chapter 5, our conclusion.


