
 Lessons: 12Length: 1.7 hours
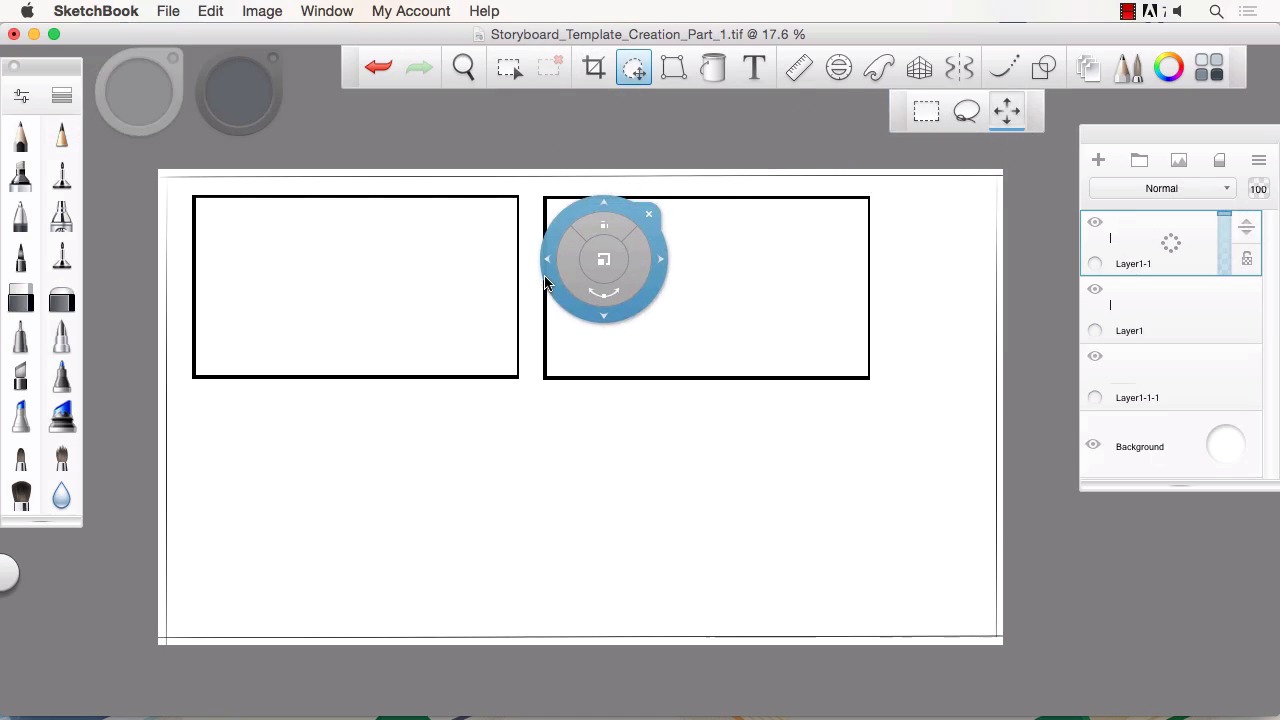
- Overview
- Transcript
2.2 Creating a Template for Our Storyboard Frames
In this lesson we will create a template for our storyboard frames that will allow us to begin the drawing process while making sure to stay at a quality resolution and scale. We will use the layers system to easily copy and create as many frames as the project needs.
1.Introduction
1.1Introduction01:11
1.2Tools and Resources02:05
2.Creating a Frame Template in Sketchbook Pro
2.1Understanding Scale and File Size When Creating Storyboards05:27
2.2Creating a Template for Our Storyboard Frames07:34
3.Taking the Script to Rough Pencils
3.1Briefing Over the Script07:12
3.2Laying Out the Rough Pencils15:00
3.3Revisions to the Rough Pencils and Camera Angles11:25
4.Refining the Artwork
4.1Understanding When and How to Use References14:46
4.2Creating the Refined Artwork17:16
4.3Looking at the Finished Work Objectively04:53
4.4How to Save Files for the Client10:57
5.Conclusion
5.1Course Conclusion and Main Points02:42
2.2 Creating a Template for Our Storyboard Frames
Welcome back to Storyboarding and Sketchbook Pro. My name is Robert Marzullo. And in this lesson, we'll be covering, creating a template for our storyboard frames. So, let's go ahead and get started. Okay, so now we're gonna go ahead and create our frames and we're gonna do something like this. This basically shows two up, two over, so a four frame layout, obviously. And I'll show you how we're gonna create something like this pretty easily and probably even do it a little bit different. There's no one right or wrong way to do this. This is whatever works best for you. But like we said, we'll go with the 9 x 16 by 300 DPI. So what I'm gonna go ahead and do, is get rid of some of these layers we don't need by deleting these, clicking over to the right. And I'll keep this one here but I'll delete this information that's on there just by clicking on the layer and hitting the delete key. So now, let's make sure we're at the right size to start with. And we're not so uncheck Keep proportions, 9 by 16 at 300 resolution gives us a 49 meg file, which is a pretty good size, but as long as your system can handle it, then there's no worries. Now one way I like to do this is just grab the ruler tool, put it at a 0 degree angle, which it will show you down at the bottom right, right here, and right there at a zero degree angle. And just put it just far enough where you've got a bit of a border there and draw a line across. Grab the middle and that'll keep the roller from re-angling. Bring that all the way down. Somewhere in there. And again, I'm just going off of visual representation. It doesn't have to be perfect. Bring that to a perfect 90 right there. You can obviously use the edge of the canvas to make sure your alignment's proper. Do this on each side. There and that'll give us our board of representation. Take the selection tool here. And then go Edit, Invert Selection and now I've got that border selected like I wanted. So, I'll add a new layer, grab the fill tool. Make sure, it's on black and select in there. Hit Cmd + D or Ctrl + D on a PC to deselect and there's my quick border. Now, I can simply take this layer, scale it down interactively, making sure not to distort it. So I grab this middle button here, click and hold or click and pull. And I'll just scale that down, move it over. And there's my first frame. Hit the X key to release. Okay, so now that we have that beginning frame we can just hold here, click over, duplicate, grab the move tool. Grab the outer ranges to move and I'll go ahead and space them just a little bit apart, like that. I can now hit Cmd + E to merge that down, duplicate again. Grab the move tool and just repeat this process. And you can do this as many times as you need, so if you're working on 8 frames, 12 frames, it's always gonna vary. Some frames are gonna get dropped in a production, other frames are gonna get added. You just have to really stay fluid when it comes to storyboarding and be ready for pretty much anything. So, this is a basic setup of how I like to work. And another thing that you could do, it's not totally necessary, but you could do it, is add some kind of guidelines underneath, I'll create a new layer and actually just lines for text or notes. Which that's why I like to leave a little bit of space around the frames, cuz I can add notes that way. You know, just something as simple as this. And you can do this more elaborate or whatever you feel is adequate to how you want to do it. I don't need this extra space around the perimeter. So I'll take my selection tool, I'll give myself just a little bit of border. And go to Edit. Where's it at, where is that image. Sorry, Image, Crop to Selection, just like that. So now we've got our four frames template ready to go and you can just merge these down. Again, Cmd + E, or Ctrl + E if you're using a PC, and that gets your overall template ready to start illustrating. Now the last thing you might wanna check, if you remember we started off with a 9 by 16. So it's basically 9 by 16, like that. But you want to make sure that the overall file size is adequate. So we'll go to Image Size. And we're down to a 38 meg file, since I cropped Cropped down, the overall canvas is eight by 13. I like to work a little bit larger than that. I wanna know that my 300 resolution gives me plenty since I've scaled these down. Now, since this was just pen line art, it wouldn't really matter too much. But if I wanted to take this to color and add more shading and more depth. Then I want a little bit more resolution and file size to play around with. And this is subjective. This is just something that you're gonna wanna pick, based on your system and your final output of work. So, for the sake of this tutorial, I'll just go ahead and go with a 55 meg file, 10 by 16. I know that my scale here is still 9 by 16 and the final way that I check it is I just doodle something in there. I'll do something really basic, obviously. So there's my doodle, all right? And I can zoom in and just look at the line clarity. I'm not trying to impress you with my art at this point. So, that's all I'm looking for, is the line clarity, how the line reacts in there. Actually, I'll make sure I grab a deep black and the line looks good. So if I draw something like that and I zoom into the line. Yeah, there's plenty of resolution there for me to do what I have to do. So I'll get rid of my little stick man here. And that get's us ready for the next stage. All right, so that'll conclude this lesson, next we'll head over to lesson 3.1 Briefing Over the Script.


