
 Lessons: 11Length: 1.4 hours
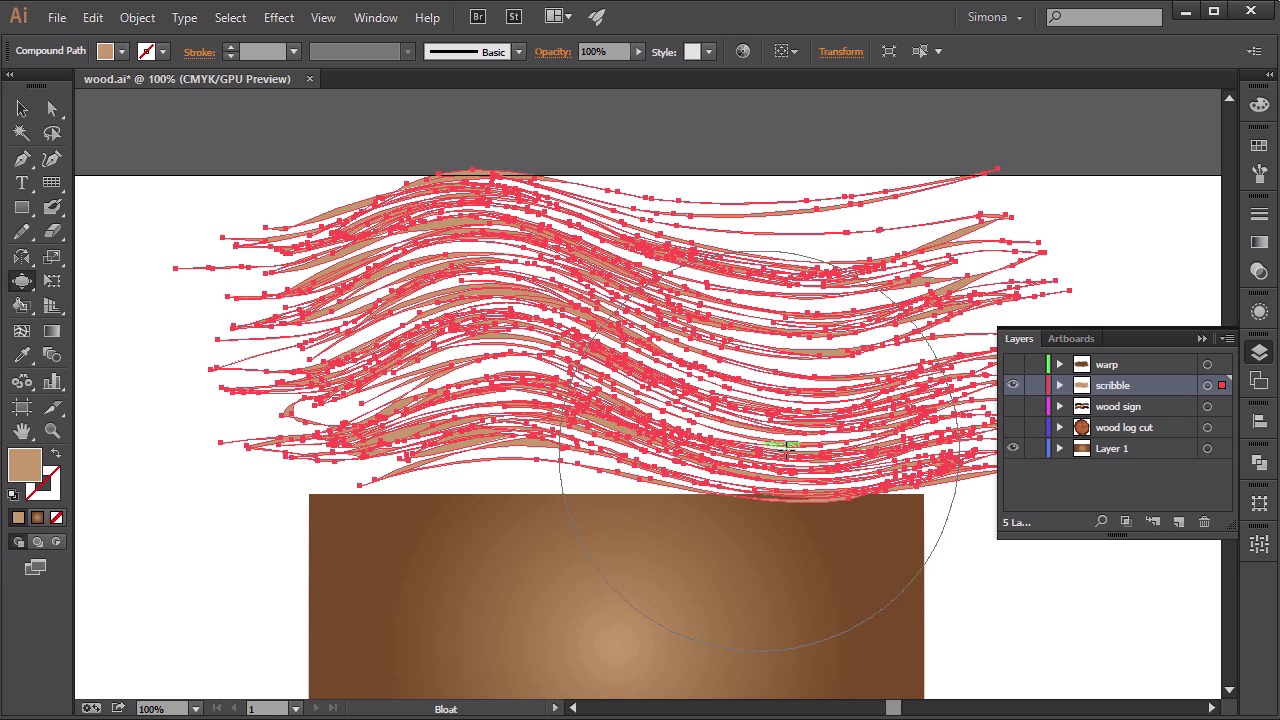
- Overview
- Transcript
3.2 Create a Wood Texture
Illustrator can do it too. Learn how to create a cool wood texture with the Twirl Tool and Roughen effect.
1.Introduction
1.1Introduction01:16
2.Organic Textures
2.1Create a Grass Texture08:36
2.2Create a Sand Texture08:20
2.3Create a Snake-Skin Texture11:21
3.Material Textures
3.1Create a Brushed Metal Texture09:17
3.2Create a Wood Texture07:41
3.3Create a Leather Texture09:20
4.Textile Textures
4.1Create a Denim Texture06:41
4.2Create a Wool Texture09:48
4.3Create a Carpet Texture11:11
5.Conclusion
5.1Conclusion01:43
3.2 Create a Wood Texture
Hello there, and welcome back to custom textures in adobe illustrator here in tuts+. I am Simona and we're about to start the lesson Create a Wood Texture. So let's start right away and let's open up Adobe Illustrator. In the last lesson, we've created a metal texture. And in this lesson, I would like to create a wood texture with you. Usually people create wood textures as well in Photoshop, but I would like to show you how we can create them here in Adobe Illustrator. We will use the Warp tool and the Blob tool and then I will show you how we can create some awesome grain textures. So the first thing we have to do, we want to create a rectangle. Just a simple rectangle here on the artboard, nothing fancy. After that, we want to fill it with a gradient and I have already created one. So if you have a look here in the Swatches panel, let's apply a radial gradient to the rectangle. It is a gradient from brown, from dark brown to light brown. As you can see. And if we open up the Gradient panel here, we can see all I have done is set it to Radial, light brown to dark brown. After that, we want to create our wood grain texture, and I would like to show you how we can make use of the Blob tool. So let me show you how we can create it with the Blob tool. We will select a lighter brown and then we will select the Blob tool, which we can find here underneath the Paint Brush tool. And then we create just some horizontal lines from left to right, right to left, nothing fancy. Just a scribble like kind of texture. Just create it like I'm doing here right now in the art board, from left to right, and right to left. Just go crazy, it can be looking like anything you want. Let me show you the scribble texture that I've created earlier for us, and this is it. As you can see here, the fill is with the light beige or light brown, and because we use the Blob tool, everything is one solid shape, not a stroke. After that, we want to use the Warp tool. Let me show you how we can turn our scribble-like shape into a wood grain texture. So let's double click on the Warp tool icon, and in the pop up, you'll see the Warp tool options. Here, we'll set the Width to 400 pt, the Height to 400 pt as well, the Angle is 0, the Intensity 4%, Detail 2%, and Simplify 50, then we can click OK. Now when we select our scribble shape, and then apply the Warp tool to it, just start pushing it upwards on one side again and again just like I'm doing right now. And on the other side, we start pushing it down, then up again, and then down again. It is really up to you how much you would like to warp it. Little bit here and maybe a little bit over there. After that, we want to create some space in between and we can use the Blob tool for this. So again, we'll double-click to open up the Options panel, so we can add some space in between. Again, it's 400 pt for the Width, 400 pt for the Height, Intensity is 4%, Angle 0, Detail 2, and Simplify 50. Now when we start clicking, we are adding space in between our scribble-like shape. Again, this is totally up to you how much you want to put in between. As you can see, now we have pretty much a good looking texture. And if I move it over our rectangle, you can see that we are getting the effect of a wood grain texture. I have finished one for us, so let me show you what this looks like. So if I turn it on here, you can see I applied a darker brown to it and if I move it over the rectangle, our wood texture is really coming together. It's just a darker brown instead of a lighter brown I've used. So let me hide all of this here, and let's delete also the rectangle. I would like to show you how we can create with Illustrator a circle or wood grain texture. So the first thing that we want to do, we want to create a circle with the Ellipse tool. After that, we want to fill it with a lighter brown or even a beige and now we have a circle in the middle and then we want to create a line, a horizontal line. And we can use the Pen tool for this, so when I select the Pen tool and I select a darker stroke for the Pen tool, I will just create a line across the circle. After that, we want to place it in the middle. And then we want to use the Twirl tool. Again, I will select the Twirl tool and then I will double-click it, so we will get the pop-up Options panel. Here, again, we have the width set to 400, the height as well to 400 and then we want to pay attention to the Twirl Radius, which is set to 180 and Detail 2 and Simplify 100, Intensify 4. Press OK and now with the line selected, we start clicking approximately into the middle. And keep the mouse pressed and it will start twirling, and twirling, and twirling. And please, don't get hypnotized and forget to watch the rest of this lesson. And again, what we are trying to create is a circular wood grain texture. After that we can let go. And now we've created this with wood grain texture. And now we can size it down a bit, so it will fit into our circle. I think you are getting the idea. Next, I would like to apply an effect. We can find this effect here under Effect > Distort > Roughen. Here, we will set it to Absolute, Smooth the size 1 point. 10 for the inch relief, the Detail. And after that, if we are satisfied, we'll press OK. And as you can see and if I zoom in, we've applied a little bit of a roughen effect to our circular texture here for our grain. Now I would like to show you what I have done with those wood textures that we've just created, the circular one and the other one. So let me hide this here. If I show you the first grain texture that we've created, I've applied it to a wood sign. And here are four versions. The wood sign is the same. It's just the color varies from light to dark, a little bit a reddish one. And then I would like to show you the circular one we've created, as well. Here I applied it to a cut log. And as you can see in the middle, I've used this twirl effect that we've made out of one single line with Pen tool. And this is it. We've created some awesome wood textures. And I think you get the idea how you could apply them to your designs. Now let's move on to the next lesson, and now let's create a leather texture.


