
 Lessons: 11Length: 1.4 hours
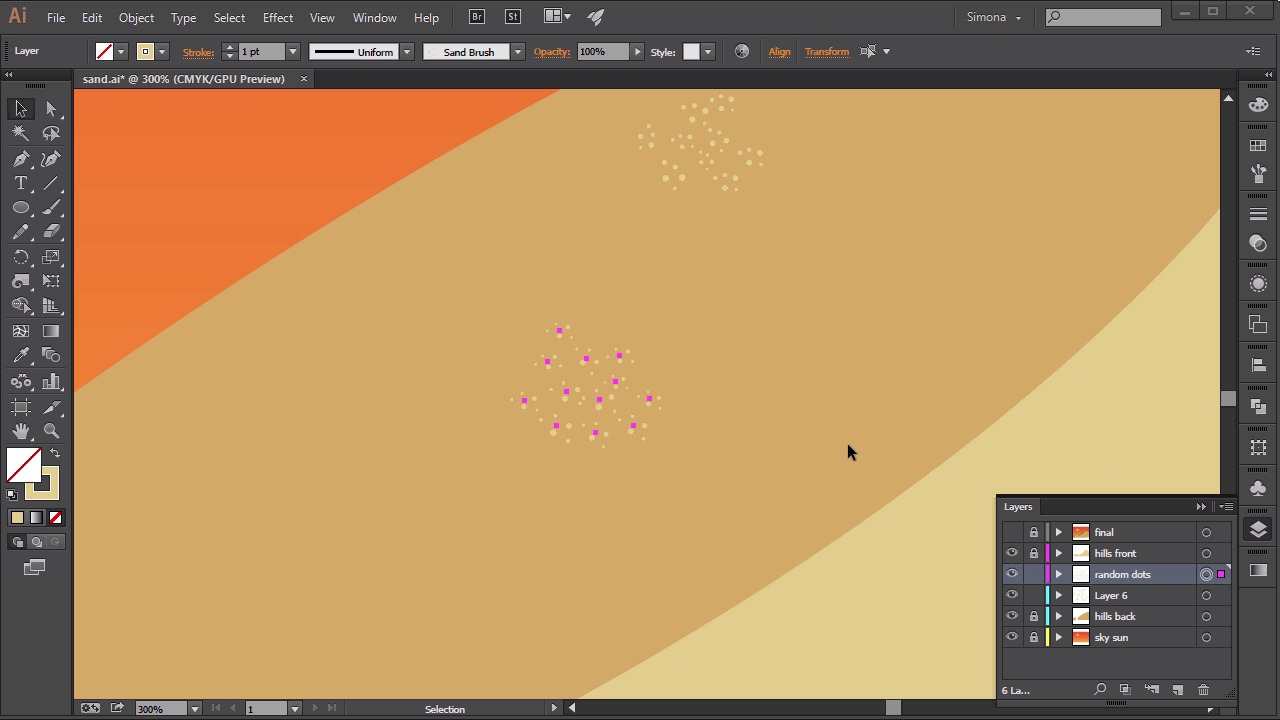

- Overview
- Transcript
2.2 Create a Sand Texture
Create your own Scatter Brush and make a sand texture out of it.
1.Introduction
1.1Introduction01:16
2.Organic Textures
2.1Create a Grass Texture08:36
2.2Create a Sand Texture08:20
2.3Create a Snake-Skin Texture11:21
3.Material Textures
3.1Create a Brushed Metal Texture09:17
3.2Create a Wood Texture07:41
3.3Create a Leather Texture09:20
4.Textile Textures
4.1Create a Denim Texture06:41
4.2Create a Wool Texture09:48
4.3Create a Carpet Texture11:11
5.Conclusion
5.1Conclusion01:43
2.2 Create a Sand Texture
Hello there and welcome back to custom textures in Adobe Illustrated here on tuts+. I am Simona, and we are about to start the lesson Creators and Texture. So let's start right away, and let's open up Adobe Illustrator. I created a small illustration to demonstrate how we can create a sand-like texture and applies to a graphic. You can find this exercise file in the source file folder of this course. Here we have a desert scene, and it would be cool to add a sand texture to the sand dunes. Now to give a texture to dune shapes, let's create a neat pattern with circles. The best way to start is to create some circles. So, let me zoom in about 1200%. I will lock the layer with the illustration, so they don't get in the way. And then we want to create a few tiny circles, about five of them. I already have a darker color here in the swatches panel, and of course you can choose any color that you think would be good with sand. So these circles will be really tiny. So that's why we had to zoom in really big. The first circles that I want to create has a size of 1.75 points. So I will use the Ellipse tool. The shortcut for this is L and then click once on the art board. And I will set the size to 1.75 for both the width and the height. Then I click OK, and here we have a tiny circle. Then we make a duplicate of it. I click it, hold the Option key or Alt key, and drag it to the side. I'm gonna repeat this step and then use the free transform tool to size it down just a tiny bit. Just so it's slightly different from the first one. You might have to even zoom in a little bit more. After that, a few more duplicates. One here and another one over there. And now we have a tiny pattern of dots. But this is not all and we won't use the pattern tool yet. First we want to create a scatter brush, this will help us to create a more random pattern. So let's select the circles, and then open up the Brushes panel on the side. If you don't see it, just go to Window > Brushes. Then we just drag the circles that we selected into the panel, and then we will get a pop-up window. Here, we will select Scatter Brush and then click OK. Now, we will get the scatter brush options panel. Here, we want to give our brush a name. I will call it sand. So, I start typing sand here. And then, after that, we will alter some settings. First, we will set the size to random. And then, the percentage, over here to 125, and the second one to 75. Then we go down to the rotation, and set this as well to random, and then the first value over here will be 40 degrees. And then the second value 100 degrees. You can play around with this, and it doesn't matter what percentage you use. It really is up to you how randomly you want your scatter brush to be. After that, we set the colorization to U shift, and then we will click OK. Now the fun part starts. Select the brush tool, the shortcut for this is B. Then select the scatter brush you just created here. And start randomly adding small paths on the artboard. It is really just all about randomness. All I'm doing here is just clicking. And just by clicking once, I'm adding the scatter brushes to the artboard. I already played around, and here's a set of brush strokes that look pretty random. Now, we want to create a pattern out of it. So let's select all of them and then we will go to Object > Pattern > Make. Here we will get the pattern options panel. Now with this kind of sand pattern, we really want to stay focused on the randomness of it. There's no right or wrong way. Just play around with it. First, let's give it a name, and let's call it SandDunes. Now we see we have some holes in our pattern here. But we can fix this easily. Just select some of the circle groups and as you can see, the brush was already expanded when we created the pattern. And now we can just create copies and fill the holes here. All I'm doing again is just selecting it and making copies of it. I just press the Alt or Option key, and drag it up here or down there, just to fill the holes. It is, again, a random thing, so just play around with it. I will add some over here, then some over there. I just want to make sure that nothing is overlapping. Once you are satisfied with the look of the pattern, just click Done. And when we go to the swatches panel here, we will found our sand dunes pattern as a swatch. Now we just need to make a copy of the sand dune shape here. And then we can fill it with the pattern. So I'm making a copy into the front. Then I'm going to select a pattern from the swatches panel. And wha-lah! We added some sand-like texture to the sand dunes. It's subtle but we just really want to add some noise to the shape. Now you might want to play with your opacity. Set it to Overlay or to multiply. It all depends on the look you want to achieve. Also you can easily adjust the pattern. All you have to do is double click on the swatch in the swatches panel here. And then in the Pattern Options tool make changes. Always click Create a Copy. If you want to create a new pattern out of it and want to keep your original one. Small tip here, if you want to change the fill color of the pattern, you can select all the shapes, and then you might think you can just change the color for the fill now. But since we use a scatter brush, we will get bounding boxes around the dots. The scatter brush was expanded, but we still have a bounding box. Now, if we were to change the fill like I'm doing now, you can see now that it will end up with rectangles. So this is not something we want to see, so let me undo this here. In order to get rid of the bounding box, all we need to do is open up the path, find the panel here on the right. If you don't have it open just go to Window, Pathfinder and then click on the Trim. And as you can see, by now we can fill the dots with another color. Remember this tip any time you expanded a brush. You can easily get rid of the bonding boxes by selecting them, and then clicking Trim in the pathfinder panel. The same works with expanded patterns and such. Now let me show you some stuff I added to the illustration. Here is a layer with extra shapes. I added a gradient merged to the sand dunes here. And as you can see all I have done is added the illusion of rolling sand. Then I also created a gradient layer for the back here and now the sand dunes have a bit more dimension. And this is pretty much it. We are at the end of this lesson. It wasn't too complicated. And of course, you can always take it a step further. Maybe add some more details like extra waves into your sand or a ripple effect, or even maybe more noise. Be creative. I know you have it in you. But let's move on to the next lesson, and let's have some fun with creating a snake skin texture.


