
 Lessons: 11Length: 1.4 hours
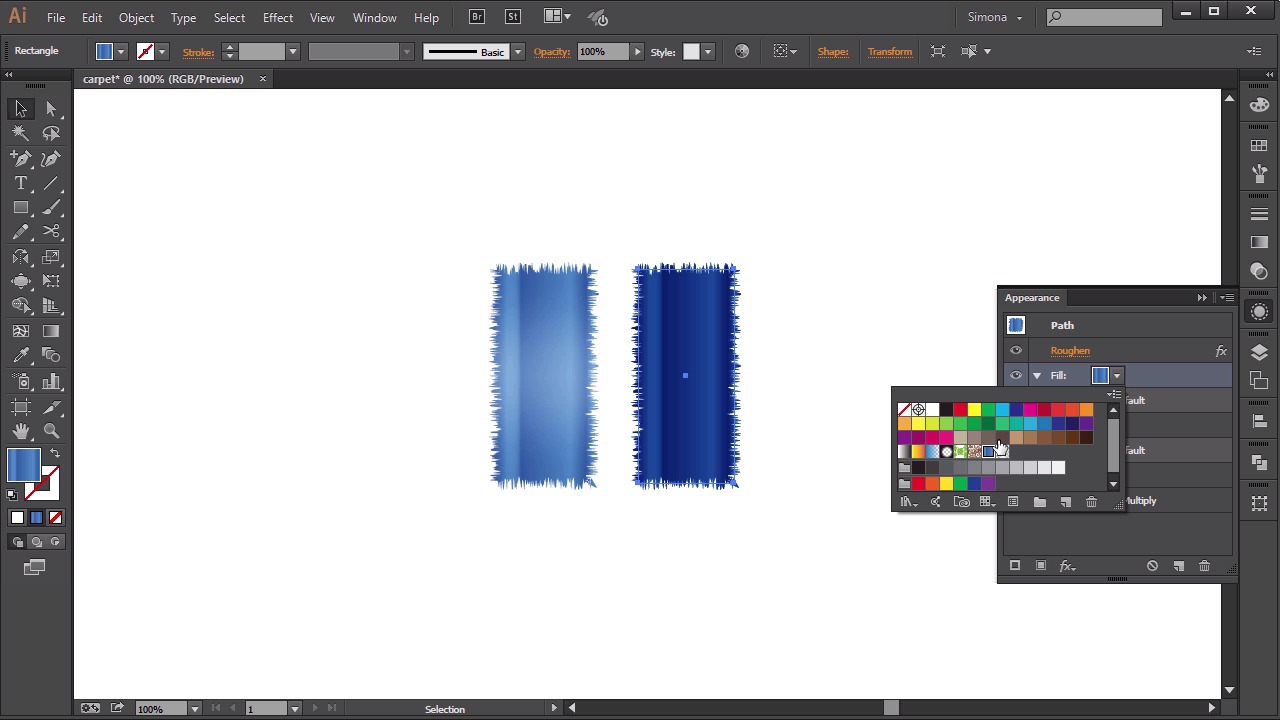

- Overview
- Transcript
4.3 Create a Carpet Texture
Again, Illustrator can do it too. Use effects and simple shapes to create an intricate carpet texture.
1.Introduction
1.1Introduction01:16
2.Organic Textures
2.1Create a Grass Texture08:36
2.2Create a Sand Texture08:20
2.3Create a Snake-Skin Texture11:21
3.Material Textures
3.1Create a Brushed Metal Texture09:17
3.2Create a Wood Texture07:41
3.3Create a Leather Texture09:20
4.Textile Textures
4.1Create a Denim Texture06:41
4.2Create a Wool Texture09:48
4.3Create a Carpet Texture11:11
5.Conclusion
5.1Conclusion01:43
4.3 Create a Carpet Texture
Hello there and welcome back to creating custom textures in Adobe illustrator here on tuts+. I'm Simona and we're about to start a lesson create a carpet texture. So let's start right away, and let's open up Adobe Illustrator. Here in this lesson, I would like to create a carpets extra with you. We will use some effects, we will use the pattern tool, and we will create our tiny little architecture. Sort of an intervolving texture. First thing though what I would like to show you is the document color set-up. If we go to file and go to document caller mode, I want to change it from CNYK to RGB. After that let's start with creating the shapes we need for our architecture. So let's select the rectangle tool here in the tool bar. And let's create a rectangle here on the art board. Right now, the fill is wide. But I would like to set it to a gradient. I've already created a gradient for us. So if I open up the swatches panel here, here is a blue gradient. So let's apply this to the shape. And as you can see, this is a gradient from lighter blues to darker blues. You can create your own kind of gradient. And since blue is my favorite color, or one of my favorite colors, I've chosen a blue gradient. Let me show you what it looks like actually here in the gradient panel. I've added quite a few stops here, and I gave them different blue colors and then I used also the diamond between the gradient stops to move the gradients closer. I just wanted to create a little bit of a dynamic gradient not a simple light to dark gradient. But feel free, please, to use any kind of color or gradient you want your carpet to be. In order to create our carpet texture, we need a few things. We need two of those shapes, and then we will create a pattern out of it. And I want to achieve an interwoven kind of look. But first, we need to distress the shape a little bit. Right now, it's quite flat looking and I don't want it to be looking like this. I want to achieve the look of the thing that the carpet fibers on the edges are sort of distressed. So how can we achieve this? We'll first go select a shape and then we're going to effect, distort and transform, roughen. Here in the pop-up, I want to change the settings. Under options, I want to change it from relative to absolute. So we're getting point size instead of percentage and then I want to bring a detail up all the way to the right to 100. Then I want to change the points from corner to smooth. And then we're playing with our point size here, but before we do that, let's check the preview. And as you can we are already getting a distressed look here at the edges. So if you play with the size here, depending on how much we want, we can bring it up and down. I think 14 points is pretty good. If you want it a little bit more distressed of course increase the size. Then you'll press OK. Now we have our first piece for our carpet. Next, we need to create another piece. All we have to do is select the shape and make a copy. By selecting it, pressing the Option+All key and dragging it to the side. If I press the Shift key at the same time. I can have it in the same position horizontally. Now this is the same color. And instead of changing the whole gradient altogether, let me just make a copy in front. And then I will go to opacity and change it from normal to multiply. As you can see, now we have the same shape with the same distressed edges, but darker. And we didn't really much. All we did was a copy and we set it to multiply instead of normal. The next thing I want to do, I want to create a highlight. I have already created a highlight in the swatches panel here. And it's a gradient from transparent black to white, back to transparent black. If you have a look at the gradient and we'll open up in the gradient panel. You can see what I've done. The gradients stop here on the side is black. If I select it, you can see it's set to 0% capacity. Same on the other side. And in the middle the gradient is white 70% opacity. Now instead of creating another rectangle on top and filling in with the gradient, we can make use of the appearance panel. So we select a shape here. Then we're gonna go to the appearance panel and here we're going to choose new fill. And here, I will set it to the gradient that I've just talked about. After that I want to play with the opacity, set it to soft light, and then I'm opening up the gradient panel. And here, with the shape still selected, I will change the radius from zero to 90 degrees. Now our highlight falls in the middle. Now let's do this to the other shape as well. We go back to the appearance panel, new fill, select this, change the opacity to soft light. And then we're going to the gradient panel and we're changing it to 90 degrees. Now we're almost ready to create the pattern. We just need to do one thing. We need to select those two shapes here because it's one on top of the other and group it together. Now we want to create the pattern, so the first thing we have to do we need to rotate the shapes. The first shape here on the left, I will rotate by 90 degrees. And then I will place it on top of the other one. And I want the shape to be in front, so I'll make sure I put it in front. Then I'll select both shapes, and in the Align Panel, I will align it horizontally to the left. After that, I want to create a copy. So first, I move it over here. So now we need to create another copy of it, so I drag it over to the right. But this time, we actually need to change the precision. The lighter one, on top of here, will become the side one, and the darker one the top one. So all you have to do is rotate things around. This becomes the top and this becomes the side. Again we want to put it into the same position, and this part has to go to the back. So I will select both, use the align tool again, and also make sure that the top ones are in the same position. By selecting them both, clicking the one on the left to highlight it, and then align it to the top. Same at the bottom. I select both, click the one on the left, and then I will align it to the bottom. Now one last thing we need to do. We need to group them together. These here together as a group, and the one on the right as a group. And now we are ready to create our pattern. First, we want to rotate them both by 45 degrees. So we select them, use the free transform tool and rotate it by 45 degrees. Then, I will place them into position. Just like that. I want to make sure that the one on the right is in the back. And now I can create two more copies onto the right side. And I make sure that these are in the back as well. And now you can see the pattern that we are creating. Next, we want to create copies underneath, so let me move this up here and drag copies underneath. As you can see now, this is the pattern we want to create. And just to make sure everything is in position, the bottom ones have to be placed to the back as well. Now we can select all of them, and then we can go to object, pattern, make. When we get the pattern options, let's call it right away carpet. And then when I zoom out, we need to remove the space between the tiles. Again, we use the tile tool, select it, and now we can change the size of it. And we have to move it inwards. As you can see now I'm closing the gap on the left and the right. So I move it in a little bit more, till we're satisfied with the gap, or the non existent gap. And then I will do the same to the top. Maybe a little bit more, and now we have our pattern. Maybe a little tat more, maybe we have to move in on the side a little bit. And if we like it, all you have to do is click done. Now if I move these tiles out of the way, and I open the swatches panel, we can see that we now have our carpet pattern in the swatches panel. Now I will create a carpet. So I will use the rectangle tool, I'll create a rectangle here on the art board, then I will fill it with the pattern, and of course it's way too big. So I will use the Scale tool and I want to make sure that I uncheck Transform Objects because you only want to transform the pattern and maybe I'll set it to 25%. And then I click OK. Now here we have our carpet. Now let's create one more border around it. I'll go Object > Path >Offset path, and in the preview, I'll set it to ten points or maybe a little bit more. Maybe to 14 points. And then I click OK. Now I will send this to the back, and I'll switch the fill to the stroke. Then I will go and increase the stroke size to approximately 20 points and I want to show the options and send it to the inside. After that, I will create a copy to the front, go and change the opacity settings from normal to multiply. And now if I zoom in, so you can see better what I've created. Here's our little carpet and this is it. This is really an easy way to create a carpet, texture, or pattern. And of course, you can change the colors. You can create other kind of carpets. It's really up to you. And now we are at the end of this lesson and we are also at the end of this course. I hope you enjoyed all the textures you've created so far. So right now, let's head over to the conclusion and let's talk a little bit more about textures in Adobe Illustrator and what we could create.


