
 Lessons: 12Length: 1.2 hours
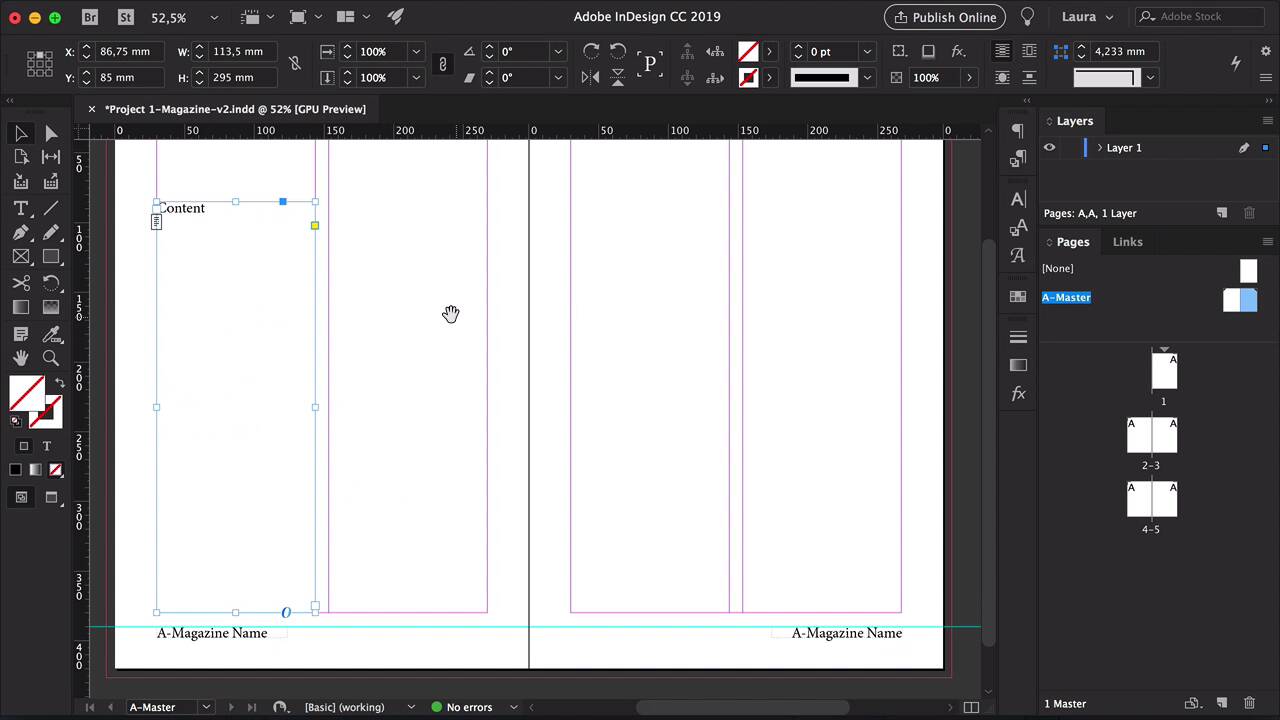
- Overview
- Transcript
2.3 The Structure of Your Document
Setting up the structure of your document is essential to creating a great layout. In this lesson you'll learn about applying master pages, changing page sizes, and setting up the Layers panel.
1.Introduction
1.1Introduction01:20
1.2InDesign vs. Affinity Publisher04:41
2.Getting Started
2.1The Essentials07:09
2.23 Ways to Create an Effective Workspace08:23
2.3The Structure of Your Document05:55
3.Design Elements
3.13 Foolproof Ways to Choose a Color Palette03:42
3.24 Typography Tips14:35
3.33 Essential Steps for Importing Images05:14
3.45 Ways to Create Impact in Your Design07:36
4.Printing
4.14 Steps to Get Your File Ready for Print04:26
4.2Exporting Files for Print05:01
5.Conclusion
5.1Conclusion01:59
2.3 The Structure of Your Document
Hi there, welcome back to this course. In this lesson I will show you how to structure your document. We will talk about master pages, how you can change the margins in the columns, how to overwrite masters, and how to organize your layers panel. So we'll start by setting up the master pages now. In InDesign, head over to the Pages panel and double click on A Master. And the first thing that you want to do, if you're doing a magazine, is to set up folios and page numbers. So, using the text tool we'll create a text box. Right-click > Insert Special Character > Markers > Current Page Number. And I'll just put Magazine Name here, we'll make this bigger so that way you can see it. Now, I'll duplicate it to the opposite page. So, if we go back to our normal pages you will see that, Each page now has a page number. Let's go back to A Master, place this at the bottom And now let's say that since the folio is at the bottom, I need more margin. And I want to change this on all the pages, so make sure that you are into the Master pages. Head over to Layout > Margins and Columns. And here I'll show you something neat. I want all the margins to be the same, but in doing so, I want to adjust, let's say, the layout. So, check the Adjust Layout option. You'll notice that the pages are disappearing, because the text box is too small. So, I want the font size to also be adjusted, and that will change automatically the font size. And you can also set up a font limit, so if you don't want it to go under a certain size, you can also do that. Here you can add or take columns out. And of course, change the margins. And if you are not happy with that, you can hit Cancel. But here, we want to change the margins. So, I'll go back here, and set the margins to 30 millimeters, and the bottom one to 40. I want the gutter to be 10 millimeters, click OK. And the page number looking a little bit too low, so I'll grab a guide. And I want it to be lined up to the margin. Make sure that you have the Smart Guides activated. And that will help you snap elements to be aligned. If you are working on a magazine, you might want to have a body copy text box and a headline text box setup. So, go back to master, I'll duplicate this text frame. I'll have content here Let's say I want four different boxes. Delete this content. Now, let's go back to our normal pages. And you can see the outline here. Go back to A Master. I'll lower the text boxes and add a headline textbox. And before we move on, let's take care of our layers. So, it's always useful to have a text layer, an images layer, and a background layer that you can hide and show and lock and unlock. So, for instance here I'll create a background. And if I head over to the normal pages, I can't really touch the background and that's because it is under my master pages. So, we can hide and show. Let's go back to A Master and delete it. Now, you see that it's also deleted from the normal pages. So, if you want to activate these text boxes from the normal pages and start adding content, press Shift+Option and select the text box. And then you'll be able to start adding your own content. So, here, for instance, Fill with Placeholder Text. And because these text boxes are threaded, then the content will just flow. And the same for the following pages. Let’s say you want to work with a dark background. For that you need to change the color of the folio. So, press Shift+Option, select the folio. Select the background layer, so you can add the dark background. And because the folio is under the text layer, you can change the color easily. Activate the rest of the textboxes, Add Content. And the same here, you can change the color of the text. Covers don't usually follow the same design as the interior pages. So, we'll select everything, Shift+Options, select everything and Delete. And there you have it, that's how you set up the structure of a document. That's how you set up your master pages, you can change the margins, the columns and adjust the layout to that. So, now that you have the structure of the document all set up, we're going to move on into color palette. In the next lesson I will show you three fool-proof ways of choosing a color palette. I'll see you there.


