
 Lessons: 12Length: 1.2 hours
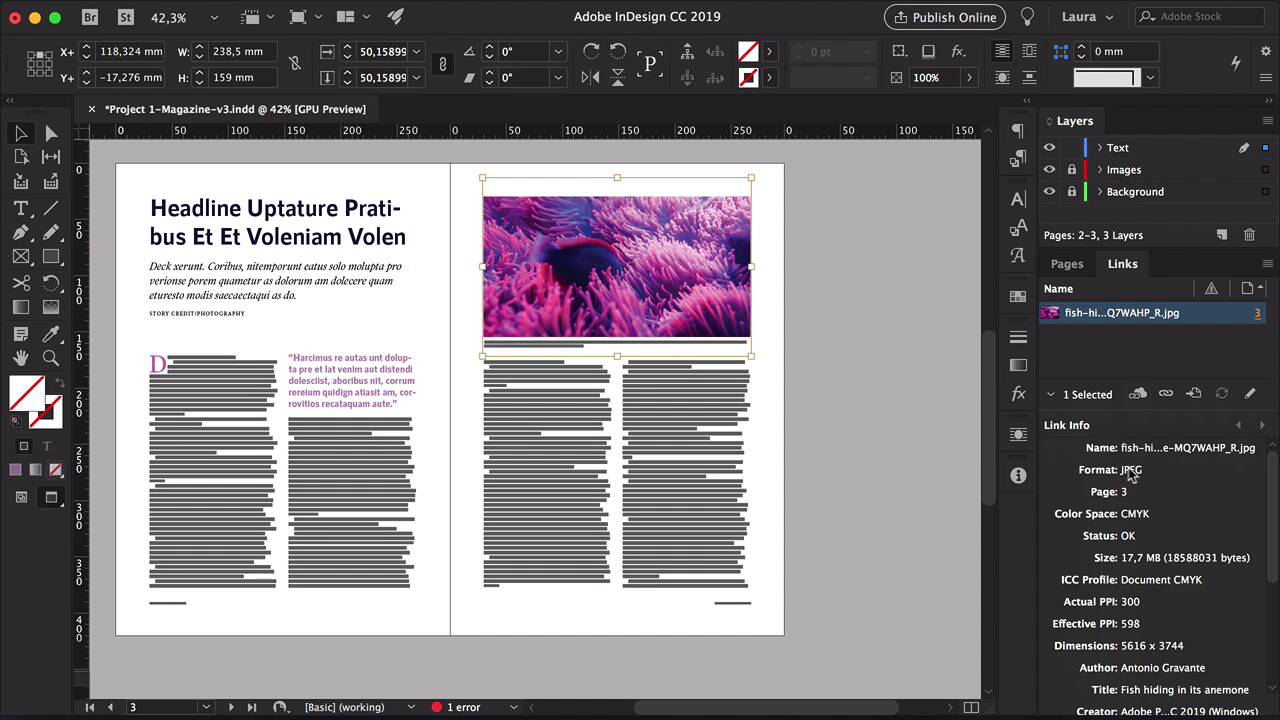
- Overview
- Transcript
3.3 3 Essential Steps for Importing Images
Did you know we need to treat images before importing them into InDesign? As a beginner designer, I didn’t either. In this lesson, we’ll look at the three important steps you can’t skip if you want high-quality print images.
1.Introduction
1.1Introduction01:20
1.2InDesign vs. Affinity Publisher04:41
2.Getting Started
2.1The Essentials07:09
2.23 Ways to Create an Effective Workspace08:23
2.3The Structure of Your Document05:55
3.Design Elements
3.13 Foolproof Ways to Choose a Color Palette03:42
3.24 Typography Tips14:35
3.33 Essential Steps for Importing Images05:14
3.45 Ways to Create Impact in Your Design07:36
4.Printing
4.14 Steps to Get Your File Ready for Print04:26
4.2Exporting Files for Print05:01
5.Conclusion
5.1Conclusion01:59
3.3 3 Essential Steps for Importing Images
Hi there and welcome back to this course. In this lesson I will show you the three essential steps you need to take if you're going to import images into InDesign. So let's say you have you're layout ready to go, and now you need to start importing images. Many designers neglect this part, which is really a problem because if you are working on a magazine and have all the images already in there, send this PDF to your client, and the client approves everything. But then you get a surprise after printing that the colors are not matching or they don't look the same. That's because we forgot to convert these images or maybe they're pixelated, and that can get very, very costly if you have to reprint them a whole magazine, a whole editorial project. I want to open this image with Adobe Photoshop, and the important part here is to check for Mode. I want to transfer this from RBG to CMYK. So head over to Image>Mode>CMYK Color, click OK, and it's converted. Next we want to check for the resolution. If you acquire a lot of images online, they will unfortunately be most likely 72 DPI. 72 is only for screens. If you want to print an image, it has to be at 300 DPI. This image is from Envato Elements, so they already know that we as designers take resolution very seriously. And that really dictates how big an image can go. So this is already set to 300 DPI. Of course if you were using it for web, you can change this to 72. That's not a problem. And then the image size will go smaller, which is really helpful if you want to work with a lighter file. So let's put this back to 300 and add an _R. So for me, that's how I save all my files, _R at the end, when I've already converted them to CMYK and 300 DPI. That means R for revised. Click Save, back to InDesign. Make sure that you're selecting the file that is revised, place it into InDesign, and resize. Head over to the Links panel, in here you will see some link info. And this is useful if you have already a ton of images into InDesign and you want to quickly check their colorspace and size. So here I can see that the format is JPEG, colorspace CMYK, perfect, Actual PPI 300, and then we'll go here, lower, and check on the scale. So the scale is 50%, that means that we're using the image at half its original size, so half the size that it can actually be used. So if I want to make this bigger, this scale will change. And now, I'm using it at 100%. You can also check that here at the top. Now let's say I make this bigger, and we can already see this getting slightly pixelated. An image can be used up to 120%. Ideally, you should keep it under 100, but you can use it up to 120%. So I want to go back to a couple of lessons ago where we talked about file organization. Another great advantage is that if you make any changes to the image that you're using in the file, and it's properly linked, all the changes that you make on that image are going to be affect it in the file. So for instance, I'll open the image in Photoshop, and let's say I want to change the color, and because we have a layer on top, I'll save this as a TIFF. So I'll put R version 2, TIFF, click OK, head back into InDesign, Import the image there. So let's do our usual links check, CMYK, 300 DPI, 52%. So let's say that the client wants a different color, they don't like the blue, they want a totally different color. I'll open the TIFF file, change the color, save it. Close Photoshop, head over to InDesign, and you'll notice this warning symbol next to the image on the Links panel. Double-click on that, and the image will automatically update. So this is a great way to handle an image file especially if you will be making pre-touches on top of that. So now that we've covered all the components that you need in print design, we'll touch on how to create impact in your design. In the next lesson, I will show you five ways to keep your readers engaged and interested in your layout. I'll see you there.


