
 Lessons: 14Length: 1.4 hours
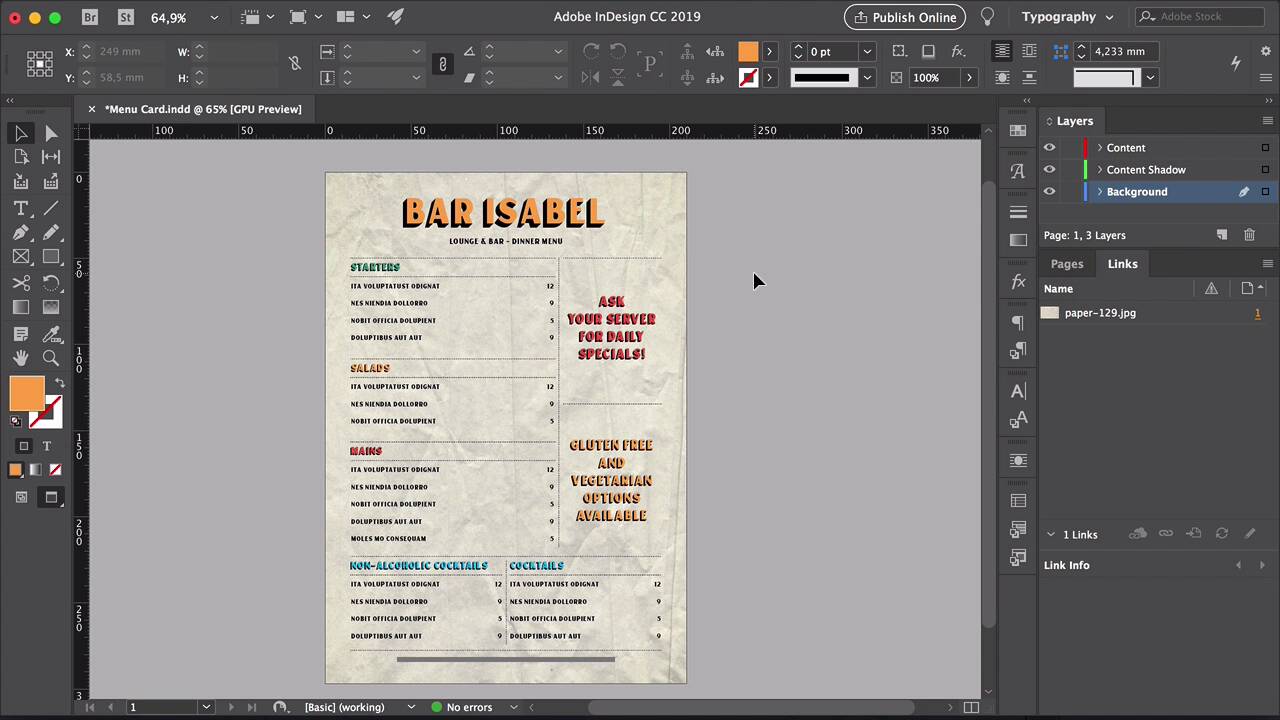
- Overview
- Transcript
2.5 Preparing the File for Print
Preparing a file for printing can be the most daunting step in print design. In this lesson, you’ll learn how to export a single PDF file for printing and the necessary elements you need on a page when sending a file to a professional printer. You’ll also learn how to package a file with all its elements if you want to distribute it as a restaurant menu template.
1.Introduction
1.1Welcome to "Restaurant Menu Design in Adobe InDesign"01:01
1.2Restaurant Menu Design Assets and Software02:04
1.3How to Edit a Restaurant Menu Template12:26
1.4Tips and Tricks05:01
2.How to Create a Menu Card
2.1Setting Up a Menu Card File03:39
2.2Color Swatches and Styles13:12
2.3Using Tables in InDesign05:50
2.4How to Design a Restaurant Menu Card11:44
2.5Preparing the File for Print04:02
3.How to Create a Trifold Menu
3.1Setting Up a Trifold Menu Design File05:42
3.2Color Swatches, Paragraph Styles, and Tables08:05
3.3Completing Your Trifold Menu Design07:56
3.4Preparing the Trifold Menu File for Print03:10
4.Conclusion
4.1Conclusion02:02
2.5 Preparing the File for Print
Hi there, and welcome back to this course. In this last lesson of our single menu card template, I will show you how to export a file for professional printing. And how you can package a file, if you're planning on distributing your restaurant menu as a template. In InDesign, head over to File > Export, or Cmd+E on your keyword. Set the name of your file in the format to Adobe PDF (Print). Under Adobe PDF Preset, select the Press Quality option. On the left side menu, select Marks and Bleeds. In here, I just want to make sure to use the document bleeds settings, and the crop marks, so the printer knows where to cut the page. Click on Export, head over to where you saved the file, the location. For me, it will be in the Menu Card folder, in here, there's a Menu Card.pdf. So let's take a look here at the files. So here, you can see that the background image is extending over the edge of the page into the crop marks. So those are our bleeds, that's what the bleeds are useful for. So when the printer cuts the page, you'll ensure that there won't be any white space around the menu. So if you're printing this from your office printer or from home, you will see a white around the edge. And that's because smaller printers are not made to print all the way outside the edge of the page. So you either can do that, or you can print it without a background. Or maybe if you're using actual craft paper or colored paper, that might be another option, so that's for printing. And now, if you want to distribute your restaurant menu as a template? You need to package the file, in order to grab the right images and the right funds. You just have to make sure that the fonts that you're using are distributable. And the image that you're using is also free for other people to use. So head over to File > Package, and here on the Package window, you will see all of the information. So there are two fonts being used, there is nothing missing, nothing embedded. There's one link found, and that will be the background image, and it's used as an RGB color space. So just make sure that everything is, click on Package, make sure that you save the file first. In here, you can choose where you want to save the folder. So here I will put, Menu Card Template Folder. Make sure that Copy Fonts and Copy Linked Graphics is checked. And also, make sure that you're including an IDML file. Here, you don't have to include a PDF, but I'll leave it as is. The IDML file will make sure that, there will be two InDesign files. So one will be a file that you can open in the current version of InDesign that you're working on. So for me, that would be Adobe InDesign CC. But there are other people who might be using CS5, CS6, and the IDML file will ensure that they can open the InDesign file. So for them, they will have to open the IDML file. And here we have our template folder, there is a Menu Card.pdf, there are two InDesign files, indd and idml. And then we have the links, which is the background and the document fonts. So this is how you create a single card menu template. In the second part of this course, you will learn how to create a tri-fold menu. There, we will show you how to set up a tri-fold document. And we will put into use what we learned this first part of the course, I'll see you there.


