
 Lessons: 9Length: 39 minutes
- Overview
- Transcript
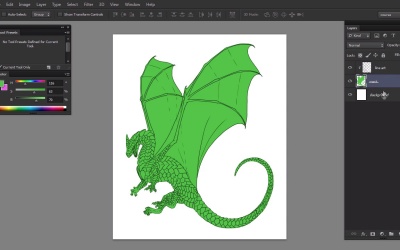
3.1 Simple Coloring
In this lesson I'll show you how to constrain your colors with Clipping Masks. This technique lets you paint freely without any risk of crossing the lines.
1.Introduction
1.1Introduction02:15
1.2Tools and Resources04:32
2.Theory of Shading
2.1Light, Shadow, and Color04:20
3.Coloring and Shading
3.1Simple Coloring05:48
3.2Base Light04:44
3.3Main Light03:26
3.4Additional Lights05:44
3.5Additional Tweaks06:18
4.Conclusion
4.1Conclusion01:47
3.1 Simple Coloring
Hi, welcome back to simple coloring and shading of line art in Adobe Photoshop. My name is Monica Zudrobera and in this part I'm going to show you how to prepare a line art for painting. A line art is supposed to define limits of the painting we want to create. On the other hand we want to paint freely, spontaneously, without limits. To bring these two concepts together we can use something called the clipping mask. A clipping mask is a shape usually painted with a hard brush and a solid color. It doesn't do anything on its own, for this to work, you must clip a layer to it. Let's create a new layer and clip it to the mask by holding ALT key and clicking the line between them. Now, if you paint anything on that clipped layer it will not cross the edges of the mask below. You can clip as many layers as you want to a single mask as long as they're placed directly above each other. If you create the new layer between two clipped ones, it will automatically clip itself. Let's see how to use this tool in our case. What we need to do is to separate the area of the dragon body from the background. The easiest way to do it is to use the magic wand tool on the background and then invert the selection. Then you can create a new layer and fill it with the paint bucket tool. Deselect to finish the process. However, it works only if your line art is clean and precise. If it's just a sketch, the mask will be ragged. In this case, you may need to draw the mask yourself using the hard brush. Create a new layer and draw the outline of the dragon without any gaps. Then you can use the same technique as in the previous method. If you don't have a tablet, drawing the outline may be very problematic. In this case you should use the pen tool. Okay the mask is done. Let's put the line art above the mask and clip it. If you create a new layer between them and paint on it, you can freely color the dragon without any risk of crossing the outline. But what if you wanted to, let's say, paint the belly of the dragon with a different color than the rest of the body. You could paint very carefully and erase the color from the legs, but painting isn't about controlling yourself, is it? It's also very hard to do it properly without a tablet. The solution is to create more clip masks. Unfortunately Photoshop doesn't allow us to create multiple levels of clip mask, so we need to use a trick. First, use the same method as before to paint the parts of the body you'd like to have separate. Use bright, vivid colors for these masks. Create a new layer for each part, or group of parts, and try to make as few of them as possible. These masks are incompleted. If you select them by holding control key and clicking the layer's thumbnail you'll see the real shape concealed by the main clipping mask. In order to remove that redundant part, select the main clipping mask, invert the selection, click the layer you want to clean and cut the selected part. Do the same with every part. There's one more thing. The masks cover each other partially, so they may overlap. We must remove the overlapping to get really clean masks. Set it to one part and get the selection from every other part. Then do the same with every mask. Select each part one by one and see if only the edges of the part are selected. Before we get to coloring, lock your pixels for every layer. This works like a clipping mask within a clipping mask. Give each layer a name that will point you to the part of the body it covers. Now is the most fun part, use any brush you like and add the colors. You don't need to think about the edges so you can even paint with the mouse. Just remember to paint on proper layers. Don't think about lighting and shading yet. Use bright colors as if the dragon was illuminated by the strongest lights as possible coming from all directions. The coloring is done. In next part, we're going to take care of shading starting with ambient light, secondary light, and their shadows.


