
 Lessons: 9Length: 39 minutes
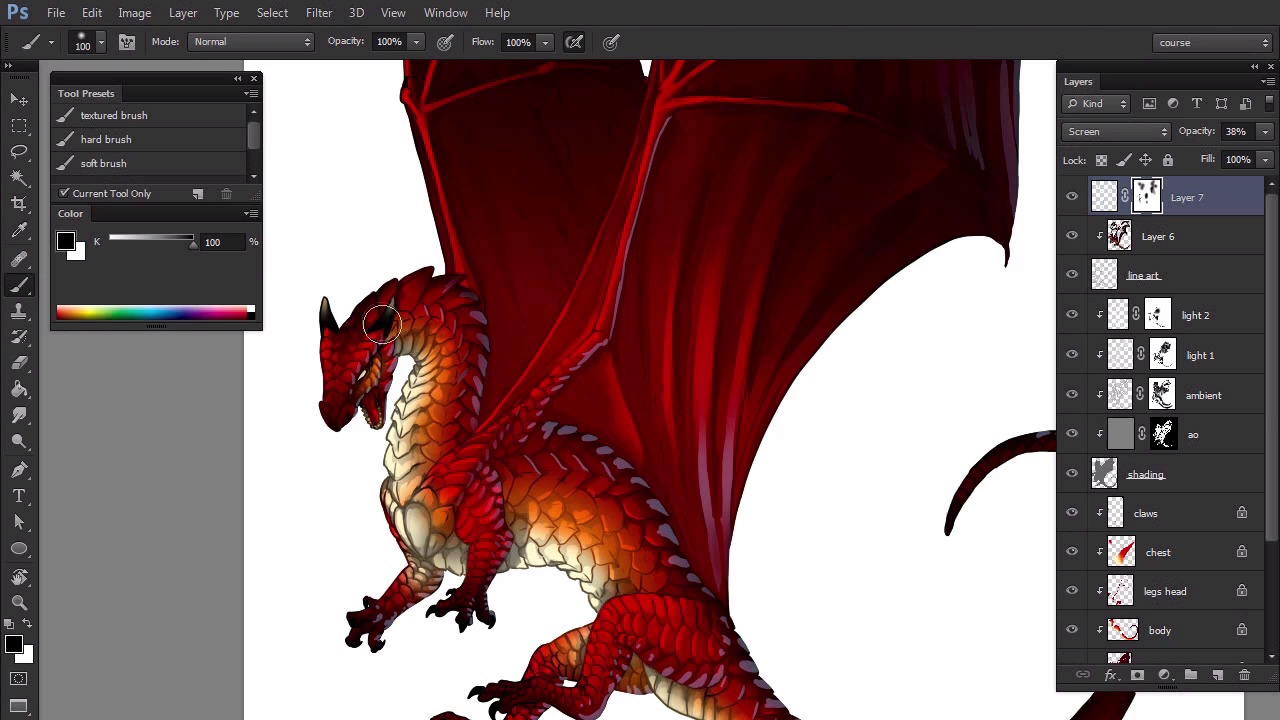
- Overview
- Transcript
3.4 Additional Lights
Even though the dragon is now shaded, we can still add other types of light to make it even prettier. Let's see reflected light, rim light, and specular light in practice.
1.Introduction
1.1Introduction02:15
1.2Tools and Resources04:32
2.Theory of Shading
2.1Light, Shadow, and Color04:20
3.Coloring and Shading
3.1Simple Coloring05:48
3.2Base Light04:44
3.3Main Light03:26
3.4Additional Lights05:44
3.5Additional Tweaks06:18
4.Conclusion
4.1Conclusion01:47
3.4 Additional Lights
Hi, welcome back to simple coloring and shading the line art in Adobe Photoshop. My name is Monica. And in this part, we're going to finish the lighting to make the line art less apparent. First thing we can do is to switch the typical blackness of the line art to more fitting shades. In order to do it, create a new layer over the line art and clip it. Now, use the eye dropper tool to pick a color from the area close to the lines you want to work on. Lower the brightness of the sample, and paint over the lines with a soft brush. Do this every time you enter an area of a different color. If otherwise, you see you've chosen the wrong shade, simply paint over it with a new color. You can hide the colors for a moment to see the difference they make. Now we're going to add reflected light, because we've already covered ambient light, this is not a necessary step but it will make your dragon prettier, so let's do it. Create a new layer. Take a hard brush and select light blue. Just like before, create a selection and paint on the scales on the opposite side of the primary light source. If it looks too apparent, don't worry, it's temporary. Feel free to use the same tricks as with the primary light source, but also stay in the shadow. Reflected light isn't strong enough to be visible in direct illuminated areas. Change the blend mode of the layer to Screen to make it more transparent. Then, lower the opacity to any level you like. Depending on the style you prefer, reflected light can be very obvious or almost invisible. Add a layer mask and use the soft brush to blend the light. This is also a chance for you to adjust the strength of the effect. Now, we're going to work on rim light. Create a new layer over the line art and grab a hard brush. Use the eye dropper tool to pick a color from the illuminated area, make the sample much brighter and then draw over the lines in the area. Be careful, as you're not within the boundaries of a clipping mask anymore. It's impossible to make white lines stand out on a white background. So, let's fill the lowest layer with 50% gray. Now you can safely add very bright lines, but be careful they will look fake anywhere near dark lines. Time for specular light. Create a new layer and paint white dots here and there. But only in the illuminated area. The more sparingly you use them, the bigger their power, so play it cautiously. This is a kind of light that doesn't care about the color of the surface. This is where shine comes from. Finally, lower the opacity of the layer to make the effects subtler. The more visible the white dots, the shinier the surface will look. You can also use a layer mask to finish the blending. The dragon's almost done. Let's go straight to the last part in which we'll work on some special effects.


