
 Lessons: 9Length: 39 minutes
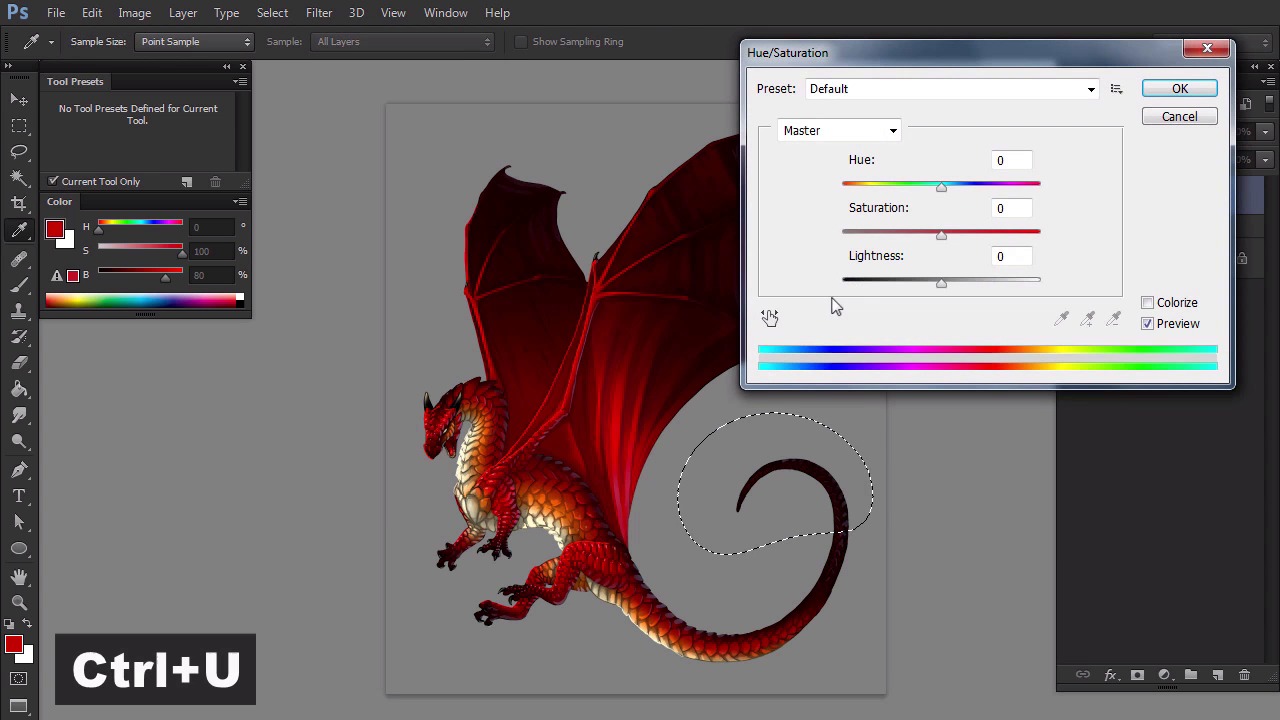
- Overview
- Transcript
3.5 Additional Tweaks
Photoshop is photo-manipulation software at its core, so it has some functions "normal" digital art programs can't dream of. Let's use some of them to add the final touch to our dragon.
1.Introduction
1.1Introduction02:15
1.2Tools and Resources04:32
2.Theory of Shading
2.1Light, Shadow, and Color04:20
3.Coloring and Shading
3.1Simple Coloring05:48
3.2Base Light04:44
3.3Main Light03:26
3.4Additional Lights05:44
3.5Additional Tweaks06:18
4.Conclusion
4.1Conclusion01:47
3.5 Additional Tweaks
Hi. Welcome back to Simple Coloring and Shading Line Art in Adobe Photoshop. My name is Monica Zaraberna, and in this part we're going to add special effects to our picture. Painting in Photoshop isn't only about using a brush. This powerful software has great functions made for photo manipulation, and you can use them to quickly make or paint even more beautiful. After we've created the ambient occlusion effect, it was covered with secondary and primary light. You can make it appear again without any effort. First, double-click the primary light layer. Go to the blend If section, and grab the black marker on the bottom. You'll notice how ambient occlusion appears without affecting the primary light. If you want these effects subtler, hold Alt key before dragging the marker. Apply the same effect to the secondary light layer. The other effects we're going to try must be applied to a single layer, so let's merge the dragon into one. Click the main mask, then hold Shift key and click the layer on the top. Press Ctrl+G to turn all the layers into a group. Double-click the group to create a backup copy. By pressing Ctrl+J, hide one of the groups, then right-click the visible group and select Merge Group. Use the pen tool to outline the part of the left wing that doesn't cover the other wing. Cover the path to a selection with Ctrl+Enter. Duplicate the selection with Ctrl+J. Go to image adjustments, hue saturation, or simply use the shortcut Ctrl+U. Play with the sliders to make that part of the wing very bright, as if light was shining through it. Enter the layer mask and use a soft brush to blend the area. Set it Both layers, right-click, and merge them. Now we're going to use a different selection tool, called quick mask. It lets you select areas by painting on them with any brush you wish. Let's activate the mask. Switch color to black by pressing D and paint on the tail. If you want to fix your selection, just switch color to white. This will work like an eraser. When you're done, go out of the Quick Mask mode and invert selection. Once again, open the hue saturation window to make the tail very light, as it if was covered by mist. This will make it look more distant. Let's go back into the quick mask mode and select part of the right wing. As before, go out of the mode, and invert the selection, then open Filter menu, select Blur, and Motion Blur. You can use it to give a sense of motion to the wings. Play with the slider to choose the effect you want. You can use the same method to add a motion blur to the other wings and to the claws too. Just don't be lazy. If you select a big area at once, you may flatten it. Let's go back to the tail. Select it just like before. Then go to Filter menu once again. This time, select Gaussian Blur to stretch the distance. When the dragon seems finished, look at it from distance and see if there's anything you can fix or refine. In my case, I decided that the claws weren't stretched enough. So I've added white dots of shine to them. You can also add a white glow behind the dragon to make it stand out. Finally, you can open Filter menu and add some Noise. Even if it's barely visible, it may create a nice effect when you scale the picture. Before we save the picture, we need to resize it. Go to Image, Image Size, and adjust the size. It doesn't need to be huge to be good. The dragon should be observed as a whole, not as parts. Don't forget to change resampling to Bicubic, to keep the smoothness. Finally, save your picture to a web friendly format. Congratulations! Your dragon is ready to be published, but don't leave yet. I have something to tell you in the conclusion chapter.


