
 Lessons: 10Length: 46 minutes
- Overview
- Transcript
4.2 Create a Custom Template
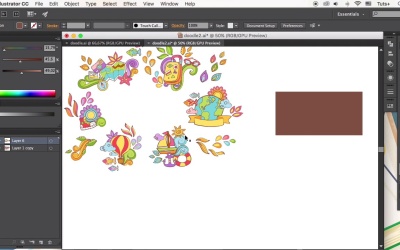
This time, we’ll be combining separate vectorized doodles into a well-balanced thematic composition. Then we’ll create a custom template and showcase some examples of postcards, banners, and layouts.
Related Links
1.Introduction
1.1Introduction02:29
2.Creating Doodle Art
2.1Tools02:32
2.2What to Doodle? 04:03
2.3How to Doodle?04:53
3.Vector Your Doodles
3.1Digitizing Doodles03:47
3.2Image Tracing05:05
3.3Outlining With Brushes07:31
4.Vector Art From Doodle Pieces
4.1Coloring Vector Doodles05:22
4.2Create a Custom Template08:25
5.Conclusion
5.1Conclusion02:06
4.2 Create a Custom Template
Hello guys and welcome back to How to Vector Doodle art course with YuLia Sokolova at Tuts+. In this lesson, we'll be combining separate vectorized doodles into well balance dimetic composition and showing the examples of postcards, templates and layouts that we can design using their doodles. Let's start. So here we have our coloured set of elements. And let's go to View > Hide Artboards in order to give ourselves more space for criteria. Let's combine our elements into small groups creating a thematic set. Some kind of stickers which can be used in designing a travel poster, or brochure template. Let's take the planet doodle and make it a bit bigger. Grab a yellow ribbon and place it on top of the planet. Add a pink and yellow flower at the right side of the planet, depicting a stylized sun. Add fish on top, adjusting the size. Add a couple of clouds and small pink petals. Group the elements and here you have it, our first sticker is ready. Let's make another one. Take the suitcase icon. And add a long swirl, so it goes up from its bottom right side. Place the glasses on top, making them somewhat smaller. Add another swirl on the opposite side and send it to back. Let's fill the left side of the suitcase with colorful petals. To make such petals, just draw one of them and then copy multiple times, recite the copies and apply different colors, and a group of leaves making copies of one and the same leaf as well. And add a few green swirls. Now if we were happy with the result, we can group the elements of the sticker and move on to the next one. Let's take our boat and a couple of blue swirls at the back of it making them look like the sea waves Add the small anchor in front of our boat. Add a life buoy floating somewhere beneath. And place a small sun shining on top of the waves. Add a cloud making it overlap the sail of our boat and spread a few petals at the side. Okay, let's make one more sticker. Take a gumshoe and combine it with the purple flower and the green swirl. Add swirls and peddles making the composition of the sticker look balanced. Continue moving the same way combining the elements moving of them, reflecting, resizing and creating more new stickers. Here are all the stickers that I've created using our trace doodles. And now let's see how can we use the same elements to make some cards, brochures, and other kinds of templates. Take the rectangle tool and make a 500 by 250 pixel shape, this will be the base of our template. Select any color that is not distracting from the main objects. Let's start adding the elements, starting from the bottom right corner. Ungroup the stickers and don't forget to make a copy of our file in order to keep all the variations that were made. Add a boat, and place a map beneath it. And the anchor, the sun, and the cloud and continue adding other elements around, gradually filling the blank spaces around the boat. Move to the upper right corner and start adding the elements there. Put some swirls on the right side. Add a couple fish. Put a compass in the corner and decorate it with swirls. Continue adding more elements moving to the opposite corner of the template Reflect some of the shapes to make them feed the composition and surrounded it with smaller pods. Finally, let's add some text in order to represent the theme of our card, and to fill the empty spot in the middle of the template. Here I use the My Typescript to make the text look handwritten and to give our image a playful look. Adjust the size and object expand the text. Now we can edit each letter separately, making some of them larger, rotating them, moving around to make this lettering look unique and versatile. Let's switch the field color to red. And the stroke color to the same brown color at the outlines of our doodles. Adjust the stroke from the stroke panel. The lining of the stroke from the outside. And adjusting it's weight as well. Now we can work with the background color of our template. Fill the background rectangle with the radial gradient from yellow to pink. And from here we can continue adjusting our image. Moving the elements, resizing them and fill in the blank spots. Here how the end result looks at this step. Let's hide the unwanted parts inside of a frame. Copy the template base and paste it in front and bring it to front putting the rectangle on top of all elements select everything. Click right mouse button and Make Clipping Mask. And there you have it, everything is hidden inside the mask. Here are some other examples of colorful banners and cards which are made using the Travel Doodles. You can make as many variations as you wish. Just use your creativity and be inspired. And this is all for this video. We've learned combining our elements into balanced compositions, and then turn them into trendy templates. In our next video, we'll sum up what we've learned so far during this course and see you there.


