
 Lessons: 11Length: 1.2 hours
- Overview
- Transcript
1.5 Choosing Your Format
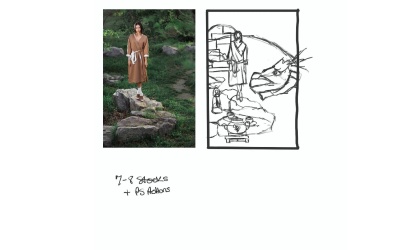
Learn how to set up your piece for a winning combination. In this lesson, we’ll go over the main theme of this graphic while setting up the initial document and format.
1.Introduction
1.1Welcome to the Course00:44
1.2How to Set Up Your Photoshop Workspace04:06
1.3Essential Photoshop Tools05:46
1.4Finding Inspiration03:01
1.5Choosing Your Format04:00
2.How to Create Mixed Media Art in Adobe Photoshop
2.1Using Adjustment Layers06:20
2.2Building the Composition07:46
2.3Photoshop Lighting Effects10:36
2.4Digital Painting Using Photoshop Brushes13:07
2.5Finalizing the Details14:26
3.Conclusion
3.1Conclusion01:15
1.5 Choosing Your Format
[MUSIC] So we have learned a little about Photoshop. Now for the theme I've already started putting a little back story together, and I highly recommend this step. What this is gonna do is help me sit in the environment of my idea. That way I can really start to channel the feeling and all the different energies that I wanna give to the viewer. So for afternoon tea, this is a story of two friends, this lovely model and her dragon friend. I don't really know their names, but they're both just enjoying a cup of hot tea on a breezy late afternoon day. And you know what? That's it. That's the complete basis of this entire visual story. Now, I just have to make sure that everything I do from here on out reflects this simple idea. So, remember, because it is a mixed media piece, we are gonna be pulling off these crazy transformations by focusing on character development, adding accessories to this environment and even making a complete wardrobe change to make these two friends really shine. My colors are gonna be a rich mix of green and gold with colors inspired from everything from Chinese dragons to the never ending story and my favorite good looking dragon Falcon. Now that we have that settled, let's get ready to set up the file. So everything starts with the initial art documents setup. I already have an idea of what it should be, we just went over the theme, right. So once I have that idea in mind, I can jump right into procreate on the iPad, and draw up a really quick thumbnail. And the great thing about other programs and working with other programs is that sometimes they include Photoshop compatible features, so you can draw in procreate, then save it as a PSD file, and pop it right into Photoshop when you're ready. So because I've already drawn this thumbnail, I know immediately that I'm looking for a portrait orientation. You'll need a high resolution file to print the best quality in person. I'll be creating a new file by just pretty much repurposing the one that we already have with this original photo. But just to make sure I'll go to image size, and look over the settings real quick to make sure everything is what I need. Surprisingly once you turn the pixels to inches, it is exactly what I wanted, 16 by 24 inches with a high resolution of 300 PPI. This is basically gonna ensure that when it goes to printing it's not gonna be all crazy, it's not gonna blurry or anything and everything should basically look as clear as you have created it in Photoshop. So now I'll double click the background layer and add it to a new group. This group has no real function by the way, it just helps me flip back to the original whenever I want. I like to do this sometimes because, once you get into the zone you kinda forget everything [LAUGH] so, especially how far you've come. So, if you can spare the extra file space in the beginning, making two separate groups for the before and after can really help your idea. Now we'll go back to the thumbnail selecting and merging all the layers the drawing is on, before using the rectangular marquee tool to copy and paste it into my new file. [MUSIC] This sketch will go on a new layer and the new afternoon tea group. [MUSIC] I'll create another new layer, filling it with white, just so I can see the sketch better before resizing it with the free transform tool. [MUSIC] Okay, good, looks great, so far. So this is the initial document setup, but let's start this project in the next lesson using filters and layer styles for different effects.


