
 Lessons: 11Length: 1.2 hours
- Overview
- Transcript
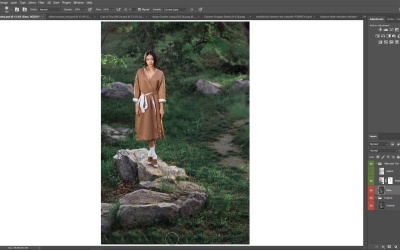
2.2 Building the Composition
Photoshop actions, 3D smart objects, and design templates are all community assets that help speed up your work when creating digital art. In this lesson, we’ll go over the templates used in this course to build the composition from scratch.
1.Introduction
1.1Welcome to the Course00:44
1.2How to Set Up Your Photoshop Workspace04:06
1.3Essential Photoshop Tools05:46
1.4Finding Inspiration03:01
1.5Choosing Your Format04:00
2.How to Create Mixed Media Art in Adobe Photoshop
2.1Using Adjustment Layers06:20
2.2Building the Composition07:46
2.3Photoshop Lighting Effects10:36
2.4Digital Painting Using Photoshop Brushes13:07
2.5Finalizing the Details14:26
3.Conclusion
3.1Conclusion01:15
2.2 Building the Composition
So I think that part of the reason why this composition works is because while we're working on the main picture. All the other side details and accessories come in the form of these amazing 3D Smart Objects from pixel squid 360. And because we can angle and position then into wherever angle we need we get to build this really cool fairy tale scene. For sometimes your references aren't gonna be these really amazing 3d models. Sometimes they're just going to be regular pictures. And as long as you have a reference with clear lighting, you can push the character of your story even more by using it almost like it's a 3d Smart Object. We just got to get rid of that background. Looking at this reference. Let's first take in how beautiful this wooden shelf is. I love that it looks like it's handmade and some of my favorite details are these little dragon carvings like Wyatt. How cool I really didn't expect that until I zoomed in randomly one day. It just seems to add this perfect fit to this story, and I just feel like everything is gonna come together with the shelf. There are so many ways to remove backgrounds in Photoshop. But you know what, let's go old school using magic wand tool to select the background. Then hit Delete Great. Now for these inner boxes within the shelf, we can select them individually then delete them right away. But sometimes the selection gets a little wonky so you can either adjust the tolerance to help. Or use the Polygonal Lasso Tool to subtract the portion you don't need for a clean removal. And you can keep getting rid of these other sections, sometimes it's good to grab more than one at a time by holding the Shift key as you go, then hitting Delete. Once you're through, this shelf can now be planted into our environment, just like the other smart objects. So let's do just that. Now just to get a good idea of the composition, I'll unhide the original layers and set my sketch to divide. This helps me see that the model is a little smaller in my sketch. So I'm definitely going to need to readjust her to fit in the scene so I can add even more details. And I purposely, I'm trying to make her feel smaller in the composition because I want to give her, and this look kind of like that slightly claustrophobic feel. Something that's a bit too crowded to show how big and friendly her dragon friend is. Even if it's kind of looking a little out of place. Select the Polygonal Lasso Tool and make a selection around the model. Copy and paste the selection onto a new layer, dragging it into the new afternoon tea group. Resize the model to match the size we're going to need from the thumbnail. [MUSIC] Then duplicate the original again to set it up as our base. So to get rid of this weird doubling effect we've got going on. We'll use the clone stamp tool to clone parts of the background grass and paint them over the model. Hold the Alt key to grab a good section of grass. Then begin painting with it slowly hiding the model away as you go. I'll do the same for the bottom and the lower stone spilling out. And what's great about the clone stamp tool, is that you can always change up this reference for the paint. So make sure you're grabbing a good handful of grass you don't mind repeating. And switching it up every now and then. This is also when I start to organize my layers a bit. I'll try to section off some of these details to help structure my process a little bit. And you can even color code these layers for more organization. Now that I have a group for each section, I'll copy and paste the garden lamp into the lamp group. Resizing it with the free transform tool and finding its sweet spot for the position. Here, I'm gonna be using the move tool along with the arrow keys. Then I'll do the same with the shelf, copy and pasting it behind the model, resizing it and placing it behind her, so that's a little further in the distance. To fix some of this overlap that's coming in from the model, a simple layer mass can help you take it away. [MUSIC] Or if you notice some unwanted areas, just use the polygonal lasso tool again to select and delete it. [MUSIC] Now, let's do the same for the teapot. You might have to merge the layers together first. Then hold Ctrl A to select copy and then paste it into the new t group. We'll position this below the lamp so that the stones almost kind of feel like a table for our teacups. What I love about the move tool is that even if you aren't feeling something from the original sketch. You can always reposition anything pixel by pixel once you're in Photoshop. So just the perspective then add the teacups. Make sure the first cup is placed underneath the teapot layer, then control j to duplicate it to position the second cup. Now when it comes to this dragon artists be aware this step is going to get a little tricky. I am going to show you how i fumbled this step a bit in the beginning. Just to show you how important it is to be open minded when it comes to changing your design. Now ,originally, the thumbnail shows the dragon wrapping around the shelf and kind of like swooping in and coming in below her. But the 3d angle I chose just really isn't gonna handle this step. So if you want to watch this step and how I work it out a little a bit to try to figure out how am I going to achieve this body language that I'm going for. It just doesn't seem to be working in the end. And it's not that it can't work at all. But for what I'm doing in this course, I don't want to confuse you all with these acrobatic angles. So I'm just gonna copy and paste a normal dragon in, flip it. Then isolate the head on its own layer. It looks a little intense right now, but chopping off the dragon head is gonna allow us to adjust the body language of this piece. To show that the dragon is in a more vulnerable and familiar state to its master, its dragoness friend. [MUSIC] They don't just add a layer mask to remove the ball from its hand. [MUSIC] So yeah, look at that. Here is the initial composition with all of the elements in place. We have already done so much in this piece and we haven't even begun painting yet. But before we get to that step, let's learn a little bit more about the power of adjustment layers.


