
 Lessons: 14Length: 1.7 hours
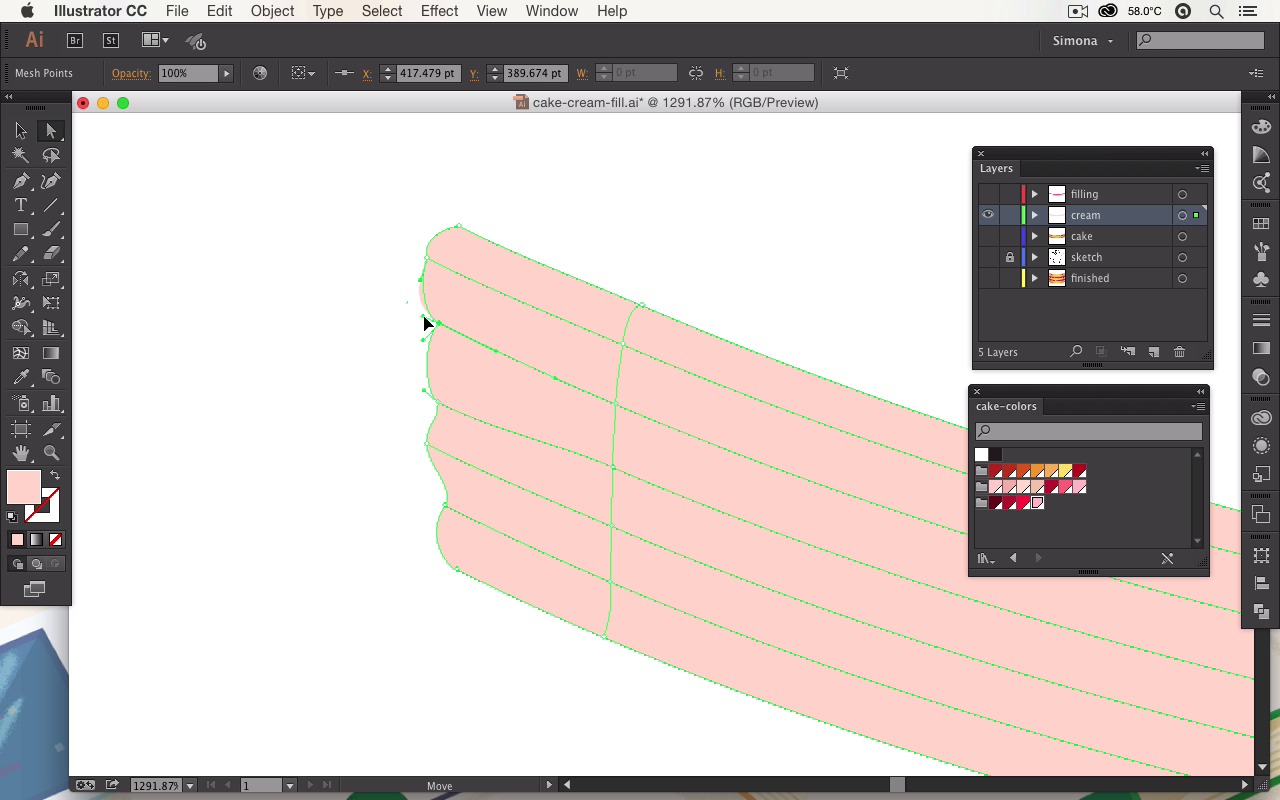

- Overview
- Transcript
2.3 Finalize the Cake Shapes
Add extra shadows and highlights to give the cake base a three-dimensional look.
1.Introduction
1.1Introduction01:12
2.Create the Cake Parts
2.1Set Up the Main Shapes11:13
2.2Add Mesh Points and Color09:32
2.3Finalize the Cake Shapes11:07
3.Create the Cake Glaze
3.1Set Up the Shape for the Glaze06:34
3.2Add Color to Your Glaze Shape06:04
3.3Create Drips of Glaze08:07
3.4Finalize the Glaze Drips08:29
4.Create the Fruits for the Cake
4.1Create a Raspberry09:48
4.2Create a Blueberry05:38
4.3Create Green Leaves07:28
5.Create a Background and Reflections
5.1Add a Mesh Background08:05
5.2Add Reflections05:43
6.Conclusion
6.1Conclusion02:16
2.3 Finalize the Cake Shapes
Hello everybody, my name is Simona and welcome back to the course, Advanced Gradient Mesh in Adobe Illustrator here on tuts+ and this is lesson, Finalize the Cake Shapes. Here we will add extra shadows and highlights to our cake shapes, the cream, and the filling. And as you remember from the previous lesson, we started adding some mesh points and color to our shapes. So let's continue, and let's finish up the cake shapes all together. Now let's open up Adobe Illustrator. Here you can see what we've created in the last lesson. Here we have our cake shape. And we added mesh points and color. We have the cream filling without any mesh points and extra color and the filling itself. Now when I zoom in let's start adding some extra mesh points here to our red filling. Again we want to add probably around three extra mesh points which will create three extra horizontal lines. So we're going to choose our mesh tool again, and we're going to zoom in and click on the outside line here. And as soon as you can see the plus point, that means that we're going to add a mesh line. Now we add another one, and then one more over here. As you can see here if you go all the way to the other side, we've added three extra mesh lines. Now let me zoom out. And now we can start adding some color. So we're going to select our direct selection tool. And then we're going to start selecting an end point over here. Now let's zoom in so we can see the mesh point much, much better. The mesh point we want to select is not the first one here. It is the second. So when we select this second point here, you can either directly click on it or draw a rectangle to select it. We want to go into our cream color spectrum here and we want to select the lightest color which is this light pink here. And as you can see now we've added a highlight. Of course we want to do the same thing on the other side. So when I zoom out and we're going to move over to the other side, again we want to zoom in so we can see the points much better. I'm selecting the direct selection tool. And again, we're not selecting the second line here. We are going to select the third line here or the third point. And we're going to fill it with the lightest one. Now when we zoom out, you can see that we've added a highlight on our cream filling. Now the same thing we want to do with our other cream filling here. But before we add some extra mesh points, let's hide our cream one here. I'm sorry let's hide our fill one here and at the same time hide the cake one as well. We don't want to actually select the other shapes. We want to make sure we're just working with the cream shape over here. Again we'll zoom in and I'm selecting the mesh tool. The shortcut for this is u on the keyboard. And then when I hover over our line here, I get the plus that means now I can add mesh points. For the cream filling here, we want to add approximately five extra horizontal lines. So I'll add one over here, another one below, and the third one, a fourth one, and then last one down here a fifth one. At the same time when we zoom out we also want to add some vertical mesh points. And what I mean by vertical is as soon as we click here we'll get another vertical line downwards. One here maybe one closer here to the edge. Maybe you want even one in between, same thing over here, and another one here. The reason why we're doing this, we want to create highlights and shadows that would represent some kind of cream getting smushed between two cake layers. So we need to add some dynamic to it. But before we go any further let's zoom in at the end here on the left side and let's select some points with the direct selection tool. We actually want to transform the shape in this area a little bit. We want to grab some of the anchor points and pull them out. We basically want to create the illusion that this is a little bit more of a dynamic shape. And as you can see if I drag one handle, the other one moves as well. But remember from the pen tool? When I select the pen tool and then I press the option [INAUDIBLE] on the keyboard, I can just select the handles one by one without affecting the other side. And this is what we want to do. We want to actually transform them a little bit. And sometimes we have to switch back and forth, and pull it out. Others we can just drag out a little, just like this. And I'm simply using the direct selection tool here. And we want to just transform it a tad. We want to create the illusion that this is cream that is sort of coming on the outside from the cake. Now once we have done this sometimes you have to play around with a little bit. And it depends what kind of effect you want to achieve. But I'll stop here for now. And let's add some color. The first thing we want to do, we want to add some color here at the edges. And again I'm choosing the second group here. And I'm going to add some dark edges just like this. If you find it too dark, just play around. Maybe the other one works actually a little bit better. Then we are selecting this point here, and I'm going to add another dark part, and then I'm going to move into the middle. Now I want to select this point, and I'm going to give it a darker color. And as you can see, it spreads out quite a lot. And an easy way to control this is via the handles here. We can pull those handles tighter, and as you can see, the closer I pull them to the point, the less it gets spread. If I select the point up here, and I actually extend the handle, you can see how it's getting pushed towards the darker part. And this is how we can create or control the spread of two colors. Now if I wanted to actually create a little bit of more an overlapping thing, all I have to do is drag this point below on top. And as you can see now we're getting a little bit more of a straight line. Sometimes you really have to play around with it and to see what kind of effect you want to create. But an overlapping effect here with a cream I think would really make this thing more realistic looking. Now again we want to move along of the points and want to select some here for example, this point and that and add a darker color just like this. And then we're going to the outside, maybe on top of here we're going to add a darker color. And then sometimes we even want to add a brighter color or something more pink. It really depends what kind of look you want to achieve. As you can see I added some pink over here. And then I'm going to move over to the other side. And I'm going to create some shadows down here. And I'm not going to add black, but I'm going to add the darker pink here. I think you're getting the idea now what I'm doing. Again if I add something darker here, and I think it is just a little bit too much, I can control it again by playing with the handles. So if I select the point and I pull the handles closer I'm controlling how far it spreads. Or I can pull the whole point downwards and then have the other one follow. And as you can see now it gets squished a little bit together. And this is pretty much the principle of working with mesh. It all depends where you put your highlights and where you put your shadows and how you control the mesh points, with the handles itself. Now I would like to show you the finished parts. I've already finished them for them, so you don't have to watch me adding all the colors one by one. And here's the cake. As you can see, this is the cake we've worked on earlier. It's not really complicated. The top part here has the shadows. We put a highlight in the middle and we put some shadows here on the side. Let me zoom in for the cream. As you can see, this is how we transformed it a little bit. And sometimes when we have a gap we can easily fix it and we'll just pull of the points downwards so we don't have a gap in between. Yeah our cream looks like it's coming out between our two cake shapes. As you can see here the darker point added. Here are some highlights. Again, I moved some points around and moved them closer together. So the colors are just a little bit tighter together and are not spreading too much. And then we move over here, you can see again that I've tried by just altering the mesh points to make it look like it wraps around. And as you can see, if we have a little gap we can just move the whole part. Sometimes we even have to go in and maybe bring the points closer together. Make sure that we don't have any gaps in between so it just looks like a little bit more as if they were working all together. Now If I zoom out you can see that we have our cake shapes three times repeated. I did not go and change them, but of course if you want to, you can change them just a tiny bit so they don't look the same. And the same thing I have done with the cream and the fill. Just repeat it again and this is now the base for our cake. Three cake layers, cream and filling. And if I turned it off here and show you our sketch you can see this is what we've created. Now let me show it to you again, and here it is. Now we're at the end of this lesson and as you can see we've finished our base for our cake icon. Now let's move on to the next lesson, create the glaze. This will be really a fun part. And I would like to show you how we can create a rectangle into a dripping glaze on top of a cake. So see you then.


