
 Lessons: 14Length: 1.7 hours
- Overview
- Transcript
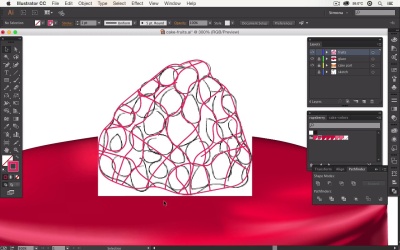
4.1 Create a Raspberry
Use the Gradient Mesh Tool and create a raspberry from scratch.
1.Introduction
1.1Introduction01:12
2.Create the Cake Parts
2.1Set Up the Main Shapes11:13
2.2Add Mesh Points and Color09:32
2.3Finalize the Cake Shapes11:07
3.Create the Cake Glaze
3.1Set Up the Shape for the Glaze06:34
3.2Add Color to Your Glaze Shape06:04
3.3Create Drips of Glaze08:07
3.4Finalize the Glaze Drips08:29
4.Create the Fruits for the Cake
4.1Create a Raspberry09:48
4.2Create a Blueberry05:38
4.3Create Green Leaves07:28
5.Create a Background and Reflections
5.1Add a Mesh Background08:05
5.2Add Reflections05:43
6.Conclusion
6.1Conclusion02:16
4.1 Create a Raspberry
Hello again, I'm Simona and welcome back to the course, Advanced Gradient Mesh, in Adobe Illustrator here in Tuts+. And this is lesson, Create a Raspberry. Now as you remember, we finished the cake and we finished the glaze. And now let's do another fun part. Let's create a raspberry with gradient mesh objects. So right away let's open up Adobe Illustrator. Remember from the previous lessons, this is what we have so far, the cake, the cream, the filling, and the glaze. And if I hide everything here and I show you the sketch again. Now we're going to create the fruit parts. I sketched out here two raspberries, some blueberries, and some green leaves. In this lesson we want to start with the raspberry. So I'm going to hide the sketch again. And let me turn on the cake part and the glaze. And I have a sketch as well for the fruits. This one here is a tiny sketch of a raspberry. Of course it doesn't look like much, but we're going to add highlights and shadows. We're going to add the colors, and all that with the gradient mesh objects. So now, let's get straight to it. First, we want to make sure that this particular sketch is locked. If you wanna follow along you can find the sketch in your source file folders as well. So I'm going to lock it and I'm going to zoom in. I would like to show you a technique how we can create all those shapes without having to draw every single one. As you know a raspberry has all these tiny roundish shapes. But instead of creating them one by one and then trying to make them fit to each other, we will create an outline first. And then we're going to create the parts in between. And with the help of the pathfinder, we can easily make those shapes be right next to each other, fit perfectly like a puzzle and then turn them into mesh objects. So the first thing we want to do, we want to grab our Pencil tool. Now the Pencil tool is over here in the Toolbar and the shortcut for this is N. Now with the Pencil tool, what we want to create, we want to create an outline. It doesn't have to follow the sketch exactly. Just an outline that we can use so we can draw our tiny pieces in between. Now when I zoom out, of course we don't see anything because this pencil path that we've just created has no color. So right away, let's give it a color, and let's give it the color of a raspberry. Again, I've already created swatches for us. And you can load them up. And you can find them as well in your source file folder. So I'm going to give it the color and then I'm going to choose the Pencil tool again. This time, I want to sort of, make diagonal lines, throughout our outline here. So instead of drawing the shapes one by one, I'm just going to wing it and I'm going to create lines like this. And then I want to create a line going through here, imagining that I'm following the pieces of a raspberry. After that, I'm going like this straight across and I'm following maybe the pieces of the raspberry. After that I'm following like this. Imagining I'm following the pieces of the raspberry. Then again, I might do this here. And so forth. And I'm just creating these shapes in between. I want to make sure that all of those shapes are overlapping another path as well. I think you're getting the idea. What we're creating is pieces in between. And sometimes I'm just going to create another line and so forth. Basically I want to create a sort of grid. So if I continue here. And I go down like this, across like that. Down like this again. I'm just imagining I'm cutting those pieces in half. Again, just like this. If I have tiny ones in between, it doesn't really matter. Sometimes I can even make shorter lines, that's okay as well. I just want to make sure that I have pieces that I can cut afterwards with the Pathfinder tool. Now maybe we need one more in between here and maybe we need to connect this one. And maybe we need to connect this one over here. Now if I select all of the lines I've created, and then I'm going to open up the Pathfinder panel. I want to select Divide. Now watch what happens. Everything outside of our outline got cut off, and we might have to do some little bit of cleanup to have one little point over here. With the Direct Selection tool, I can just select it and then delete it. Now, this is important because we want to have pieces that we can turn in two. Now, this is important because we have pieces that we want to turn into mesh objects. Now, the next step is that we're selecting all of the lines and we're turning off the stroke. Of course right now we don't see anything, but it will make sense in a second. Then we want to create a rectangle on top, give this a fill. Maybe already a base color of our raspberry colors. Then select all of it, make sure that all of your other layers are locked. And then we're going to click the Pathfinder Divide again. Now with the Direct Selection tool, we want to select the rectangle with the rest of it, delete it. And now in between here we are having single shapes. And they're all matching each other just like a puzzle. And this is important because we want to make mesh objects out of them and fill them with highlights and then the whole part will come together like a raspberry. Now let's start actually giving the whole raspberry some color. Again we select all of the shapes. And let's start with the darkest color. So we're going to apply the darkest color from our swatches. Now after that we've given it a color, let's hide the sketch. And this time we do not want to use Toggle Off This Ability. We just want to use the Mesh tool right away. And as you can see when I hover over it, I can place a mesh point. So by simply clicking once I've added a mesh point. Now let's say I want to add another one and I click in the middle here. I've added another one. And this time now I can actually start placing a highlight. Since we want to create raspberry parts, we need shadows and highlights so it actually doesn't look flat. So first let's create a highlight right over here. And maybe select the other one. And as you can see we already have a highlight. After that we might want to select those points and give it a lighter reddish color. Just like this. The outside parts we might want to keep darker. And this technique will apply to each and every single piece that we have here. And of course, since I don't want you to watch me color it all in. I think you really understand now how to use the Mesh tool. I've already prepared a final finished raspberry for us. So let me show you the finished raspberry. Here it is. I'll hide the other one and let's zoom in a little bit. As you can see here, each of the shapes are matching just like a puzzle. And I didn't really add many gradient mesh points. Just a few. As you can see this part here is very light. The next one is a little bit darker. And the darkest one in this corner. And I'm telling you I've only used those colors here that I've provided for you as swatches. Now sometimes we see a few gaps in between. And of course we need to fix this. So let me zoom out. And an easy way to create an exact outline of mesh objects is by selecting everything, then we're going to Object > Path > Offset Path. But instead of putting a value for offset, we are going to set it to zero. When we preview you can see that it creates an offset path to the exact same size of our outline. Then we click OK. Now you can see it created a shape the same exact size as our raspberry with the mesh objects. Of course we do not want to have to fill in black so we're going to choose the darkest color and maybe set the fill to the darkest color as well. Now any gaps that we might have between our shapes are filled with a color. Now let's select all of it and let's group it. And this is pretty much our raspberry. So when I zoom out you can see that we have now a raspberry sitting on top of our glaze. And this is pretty much it, how to create a raspberry with gradient mesh objects in Adobe Illustrator. Now let's move on to the next lesson, and let's learn how we can create a cool looking blueberry with the same techniques.


