
 Lessons: 14Length: 1.7 hours
- Overview
- Transcript
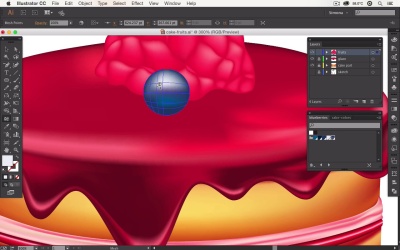
4.2 Create a Blueberry
Learn how to make a blueberry with a gradient mesh.
1.Introduction
1.1Introduction01:12
2.Create the Cake Parts
2.1Set Up the Main Shapes11:13
2.2Add Mesh Points and Color09:32
2.3Finalize the Cake Shapes11:07
3.Create the Cake Glaze
3.1Set Up the Shape for the Glaze06:34
3.2Add Color to Your Glaze Shape06:04
3.3Create Drips of Glaze08:07
3.4Finalize the Glaze Drips08:29
4.Create the Fruits for the Cake
4.1Create a Raspberry09:48
4.2Create a Blueberry05:38
4.3Create Green Leaves07:28
5.Create a Background and Reflections
5.1Add a Mesh Background08:05
5.2Add Reflections05:43
6.Conclusion
6.1Conclusion02:16
4.2 Create a Blueberry
Hello everybody, I'm Simona and welcome back to the course, Advanced Gradient Mesh in Adobe Illustrator here on tuts+. And this is lesson create a blueberry. In this lesson we're going to learn how we can make a blueberry with gradient mesh. So let's get right to it and let's open up Adobe Illustrator. Here you can see is our cake and the raspberry we've just created in the previous lesson. Again, I've created some swatches for us and you can open those in your source file folder. The file is called blueberries. And we've got some blues here. Again, you know the little triangle shows you that these are already global colors. Just in case you want to change the colors later on yourself. And do it on the fly. Now let's zoom in a little bit. And it started creating the blueberry right away. The first thing we need to do. We need to select the ellipse tool. And then we're going to create a circle, not that complicated, and this is about the size of the blueberry we'd like to have. After that right away, let's give it a color of a dark blue. Now we can go to Object, Create Gradient Mesh and turn it into a gradient mesh and set both to one or we could just cancel. And just select right away, the mesh tool and start clicking for a point. Now before I do that, I want to switch to color. So we have to unselect that shape that we've just created, the circle. We're going to select the lightest color here. Then we're going back to the mesh tool and then we're clicking once on our blueberry. And right away as you can see the place to highlight. Of course a blueberry doesn't look like this. So let's zoom in a little bit more. Let's make sure nothing is selected and then we're picking a darker blue again. Than we're picking the mesh tool, short cut for this is U. And then we're clicking for more mesh points. For example let's click once here. Since you already preselected a color, it will apply this color. So select another one over here, and then maybe one right here. Again we want to grab this point since it's way too light and choose a lighter color. Maybe a different kind of blue. And since we're working towards a highlight, this cannot be a dark blue. We need a lighter blue as well, maybe just like this. After that we might even want to have another highlight here in the middle. So if I select this point, you can see in our color picture over here. The color gets selected. Now when I select the mesh tool again and press next to it, it will add that same color. Maybe we want even a little bit more highlight down here. And we can try out what happens. So maybe we need just to create a little bit of a lighter color. Sometimes you can even open up the color picker and then play with the brightness and maybe set a brighter color. So if I click OK now it will apply this color to our shape. As you can see this is what I'm creating here. Afterwards, I might want to choose this kind of color, the mesh tool again and I'll add more mesh points. Maybe right here. Now if this is still too dark, of course we can lighten it again. So I'll grab a lighter color. And maybe I do not want this part on the outside of the blueberry, so dark. So I can set another lighter color as well. Even this one here in the middle I think should maybe be a tad lighter. And since we already picked other colors, we can use the Eyedropper Tool again and for example we can just pick something in between here. It doesn't have to be an exact mesh point. We can sample color anywhere. So, if I select this one, it looks much better. And now when we zoom out, we can see that our blueberry is coming to life. But of course, the blueberry needs some other parts. We need to create the top part for our blueberry. Right now, this just looks like a sphere. I have already created the part for the top of our blueberry. And let's zoom in to see what I've created. These are just some simple shapes. I've created rings and I've given them some kind of gradients, sometimes moving towards transparency. If I open up the gradient panel here. And I've used the colors from the swatches and I've just colored it in to give it some tone mention and this is really that there's all to it. Of course you can take reference photos, you can study where the highlight falls for blueberry, please feel free to get inspired. And of course, you can select both shapes. And then we can duplicate them. You can put one in the front and one on the side. And as you can see now, we already have more blueberries on our cake. And at the same time, we could play with the rotation a little bit or we could even reflect it. It is really up to you. And this is it for this lesson. Now we're really coming together with our cake with fruits on top. So in the next lesson, we're just going to create some nice looking leaves. And at the end we're going to finalize the whole piece, create a background, and put a little bit more shine to it. So I'll see you in the next lesson.


