
 Lessons: 14Length: 1.7 hours
- Overview
- Transcript
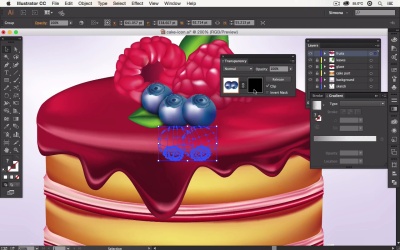
5.2 Add Reflections
Use an Opacity Mask to add a final reflection to the cake.
1.Introduction
1.1Introduction01:12
2.Create the Cake Parts
2.1Set Up the Main Shapes11:13
2.2Add Mesh Points and Color09:32
2.3Finalize the Cake Shapes11:07
3.Create the Cake Glaze
3.1Set Up the Shape for the Glaze06:34
3.2Add Color to Your Glaze Shape06:04
3.3Create Drips of Glaze08:07
3.4Finalize the Glaze Drips08:29
4.Create the Fruits for the Cake
4.1Create a Raspberry09:48
4.2Create a Blueberry05:38
4.3Create Green Leaves07:28
5.Create a Background and Reflections
5.1Add a Mesh Background08:05
5.2Add Reflections05:43
6.Conclusion
6.1Conclusion02:16
5.2 Add Reflections
Hello again I'm Simona and welcome back to the course Advance Gradient Mesh in Adobe Illustrator here in tuts+. We are about to start the last lesson. In this lesson or we're just going to add some extras to our cake icon. So let's get right to it and that's open up Adobe Illustrator. Here's our awesome cake icon, remember we just created a background. And I tweaked it a little bit. And let me just show you the mesh points that I've added. I've just added a few here and I tweaked it and pulled it out a little bit. And then made my wavy line for the cloth that I wanted to create a little bit more dynamic. Now what I would like to show you is actually stuff that I've added to the fruits. So now let me select the background here and lock it. And le's unlock the fruits. The fruits here is all one group right now. But if I'm going to ungrouped it. You can see that I've created a shape that falls exactly along our raspberry. And I've added a gradient to it. It is a simple gradient from black to white but I've played with the opacity. And as you can see here I set to 40% for the black point and if I select the white point I set that 20%. Now, of course, I set the opacity to multiply. And it's on top of our raspberry. Now if I pull this out, you can see that it's just adding a little bit of a dimension to the bottom here of our raspberry. The same thing I have done to the other raspberry. Now, let's add another shine. Now let's add some reflection to our blueberries here. The simplest way to add a reflection really quickly, is actually an opacity mask. Now let me show you how we can do this. So I grab those two blueberries in the front. I'm going to reflect them. So I'm going to object, transform, reflect. And in our pop-up window. I can play with the preview so I see what's happening, and I'm going to reflect it horizontally. And then I want to press copy because I don't want to actually reflect our original blueberries. So let's press copy. Now we have a copy. And we're going to pull them down. Of course we have to put them underneath the blueberries and then we move them downwards a little bit. The best way right away is to group them. And now we would like to create an opacity mask. We want to create a reflection as if the blueberries are reflecting on our shiny glaze. So let me select a group. Then we're going to open up the transparency panel. I'll pull it out so we can see better what's happening. And then I'm clicking make mask. Remember, we are now active in the mask, and everything is black. Black hides everything. So we need to create, actually, a rectangle, and fill it with a gradient. So if I just create a rectangle, where our blueberries were, you can see now because I selected my transparent grader in from before, it will add it to it. So, I'm slightly going to change that. I'm simply going to make a regular black and white gradient. So, I'm sending this to 100% black. And white to 100% as well. I want to hide the bottom part of the blueberries so I have to make sure that I pick my black and pull it higher. You can still see down here and wondering why is it not hiding it. There's a simple answer to this. We have to choose actually a rich black. Right now, if I click on it, we're working in RGB, we would actually want to have it 100% black. So we need to set the values to 0, 0, 0. After that, we have to pull our black point further up. And as you can see, now the bottom part of our blueberries are disappearing. Then we can play a little bit around with it to see how much detail we want to see. But I think this is pretty much good. So here I'm making it a little bit stronger by moving the diamond as you can see here in the Gradient panel. And once you're happy with it, all we have to do is we have to leave the transparency mask. So I will click on the something there here. And now I left the transparency mask. And I can move away without being stuck in the transparency mask. And as you can see if we zoom out, this looks actually pretty good. Maybe we want to pull down the capacity a little bit, maybe to 60%, if you find it's too strong. I think I'm pretty happy with this. The only thing i would like to change is maybe grabbing the leaf here and moving it actually to the other side. I'm not too crazy about the position so i think I just want to move it right behind here of the blueberries but now i have to make sure that i'm actually moving it onto the fruits layer. Cuz I would like to have it behind the blueberries but in front of the raspberry. And this is it, I think this looks pretty good and I'm really pleased with all the objects that we've created and that everything is in mesh. If I turn on the outline, you can see that we have tons of meshes here. So let's switch back. And this is it. We're now at the end of this lesson. And we are at the end of this course as well. So the only thing that's left to do is go over to our conclusion, talk a little bit more about mesh objects in adobe illustrator. And I hope you've learned some things that you didn't know about meshes. And I hope that you try and create more icons here in Adobe illustrator.


