
 Lessons: 14Length: 1.7 hours
- Overview
- Transcript
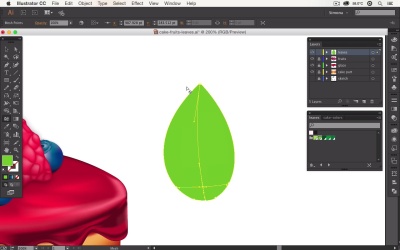
4.3 Create Green Leaves
Use simple shapes and the gradient mesh to create some leaves for the cake.
1.Introduction
1.1Introduction01:12
2.Create the Cake Parts
2.1Set Up the Main Shapes11:13
2.2Add Mesh Points and Color09:32
2.3Finalize the Cake Shapes11:07
3.Create the Cake Glaze
3.1Set Up the Shape for the Glaze06:34
3.2Add Color to Your Glaze Shape06:04
3.3Create Drips of Glaze08:07
3.4Finalize the Glaze Drips08:29
4.Create the Fruits for the Cake
4.1Create a Raspberry09:48
4.2Create a Blueberry05:38
4.3Create Green Leaves07:28
5.Create a Background and Reflections
5.1Add a Mesh Background08:05
5.2Add Reflections05:43
6.Conclusion
6.1Conclusion02:16
4.3 Create Green Leaves
Hello everybody I'm Simona and welcome come back to the course advanced gradient mesh in Adobe Illustrator here on tuts plus. In this lesson, create a leaf in gradient mash. So, we've created the cake the glazing and the fruits. So, now let's go and create some green leafs. Let's open up Adobe Illustrator. As you can see here, this is the raspberry we created and the blueberry. I created another raspberry just on the other side, with a different perspective but the steps really are simply the same. And then I duplicated the blueberries. Now, we would like to create some leaf. We're going to use the techniques we've just learned and I've already prepared again, some swatches for us. And you can load them up and you'll find them in your show's file folder. So, first we want to create a rectangle. I'm setting the base color into a light green, then i'm selecting the rectangle tool,. And when I move here over to the side, I'm just creating a simple rectangle. Again, as you remember, we can turn simple shapes into a gradient mesh objects, so let's do that again. We'll go to object Create gradient mesh. We'll set the rows and the columns to one and click ok. Now, let's zoom in a little bit more and let's see what we have to do. When we select the anchor points here on the outside, we'll have again, the handles. And since I want to create a leaf out of it, I need to move those anchor points together. If I do so, you can see what happens. The handles are moving together as well. So the first thing we have to do, we have to grab the handles and move them very close to our point. The same on the other side here and you can see, you can easily grab it and just move it to the anchor point. Then again, I can grab my anchor point and move it into the middle. Since we would like to create a leaf, I graph the anchor point here on the long side, and pull it out. Then I select the other anchor point, move it in, and then grab the handle and move it out as well. Now for the bottom part here, we have to do the same. The only thing here, I'm not moving the handle very close to the anchor point. Just a little closer and the same for the other side. And the reason is, when I move both points together, I can craft a longer handle and move it out and I'm creating a leaf-like shape. As you can see now, it looks much more like a leaf. Now, I grabbed the other anchor point and move it close but then, i grabbed a longer handle and move it out. Now, we can see this is the reason why I did not want to move the handles so close together on the bottom. You still want to have a little bit of a rounded shape here on the bottom. We just need to do a little bit of a tweaking and then, we have to shape ready. So I pull this out a little bit more and grab the other side. Grab the other handle and I'll make it a little bit more into a leaf and here's our leaf. I think it looks pretty okay for now. Maybe a little tiny to big down here and that's about it. Now, let's add some color to it. Since we moved our points together very well, you can see when we choose the mesh tool. And we add an anchor point in the middle right here, that we're creating one vertical line, all the way to the top. Now, we would like to add more mesh points on the left side and the right side. Approximately, we want to create three more mesh points. So one here, one there, and one closer to the edge nd then, just maybe two on the other side. Just like this. You can see now our mesh lines fall really nicely to the top. Now, let's select the anchor point here in the middle, the one on the bottom And let's choose the darkest green that we have. As you can see now, we've created a divide, But we're not picking the top anchor point and coloring it dark as well. You want to have fall off from the dark to the light And since we placed our lines like this. it makes it look like that the leaf actually dips into the middle And we all achieved that out of a rectangle. If he had just drawn the shape, We wouldn't get these lines, So by tweaking the rectangle. This really helps us to create a nice looking leaf. Again of course, we're going to create some more shadows on the outside here. so I'm grabbing this anchor point and I'm selecting the dark green again, and I'm applying it to it. I used the same over here. I'm not going to pick the top ones yet. We'll tweak them later. After that, I might want to select this anchor point and give it a little bit of a darker green or even a lighter one. We'll have to play around with this. Maybe a light one And then, here we're going to select this one as well and giving it a lighter green. Now after that, we can just start tricking our lines. I can grab the handle here and push it to the outside. I do the same here. I just push it to the outside a little bit more Or I can push it closer. It really depends what you want to do. Maybe we want to choose a little bit of a darker green or a lighter green or even really light. This is really up to you. Here you can play around with it. Now, let me zoom out And I think our leaf is pretty good looking. Now, of course, it's a little bit too big. So, we can just like scale it down a little bit. If you're not happy with the tip we can, of course, work on this as well. Sometimes, you just have to assume really so you can grab some of the points. Make them darker see what happens or have a lighter green, darker green it is really up to you. But I think this is pretty good looking. Or if you want a more dramatic look you can select all of the top anchor points and give it a darker green maybe just like this. So now, if I zoom out and I'm going to rotate a little bit, I can move it towards my fruits. And of course, I have to place this behind the fruit, so i'm just moving the layer and this is pretty much it. This is our leaf. You can scale it up. You can scale it down. You can make the points lighter. Really, you have to play around with it. After that, we can make a copy. Rotate it maybe to the other side. Make it much smaller and then, place maybe below, our blueberries here. So let's zoom out and let's have a look. I think this is pretty awesome looking. We still need to do a few refinements but we'll go over this in the next lesson. Where we're going to talk about how we can create a nice looking background. Creating some shadows and highlights and maybe, even some reflections.


