- Overview
- Transcript
3.3 Create Drips of Glaze
Learn how to manipulate a mesh shape to create drips of glaze along the cake base.
1.Introduction1 lesson, 01:12
1.1Introduction01:12
2.Create the Cake Parts3 lessons, 31:52
2.1Set Up the Main Shapes11:13
2.2Add Mesh Points and Color09:32
2.3Finalize the Cake Shapes11:07
3.Create the Cake Glaze4 lessons, 29:14
3.1Set Up the Shape for the Glaze06:34
3.2Add Color to Your Glaze Shape06:04
3.3Create Drips of Glaze08:07
3.4Finalize the Glaze Drips08:29
4.Create the Fruits for the Cake3 lessons, 22:54
4.1Create a Raspberry09:48
4.2Create a Blueberry05:38
4.3Create Green Leaves07:28
5.Create a Background and Reflections2 lessons, 13:48
5.1Add a Mesh Background08:05
5.2Add Reflections05:43
6.Conclusion1 lesson, 02:16
6.1Conclusion02:16
3.3 Create Drips of Glaze
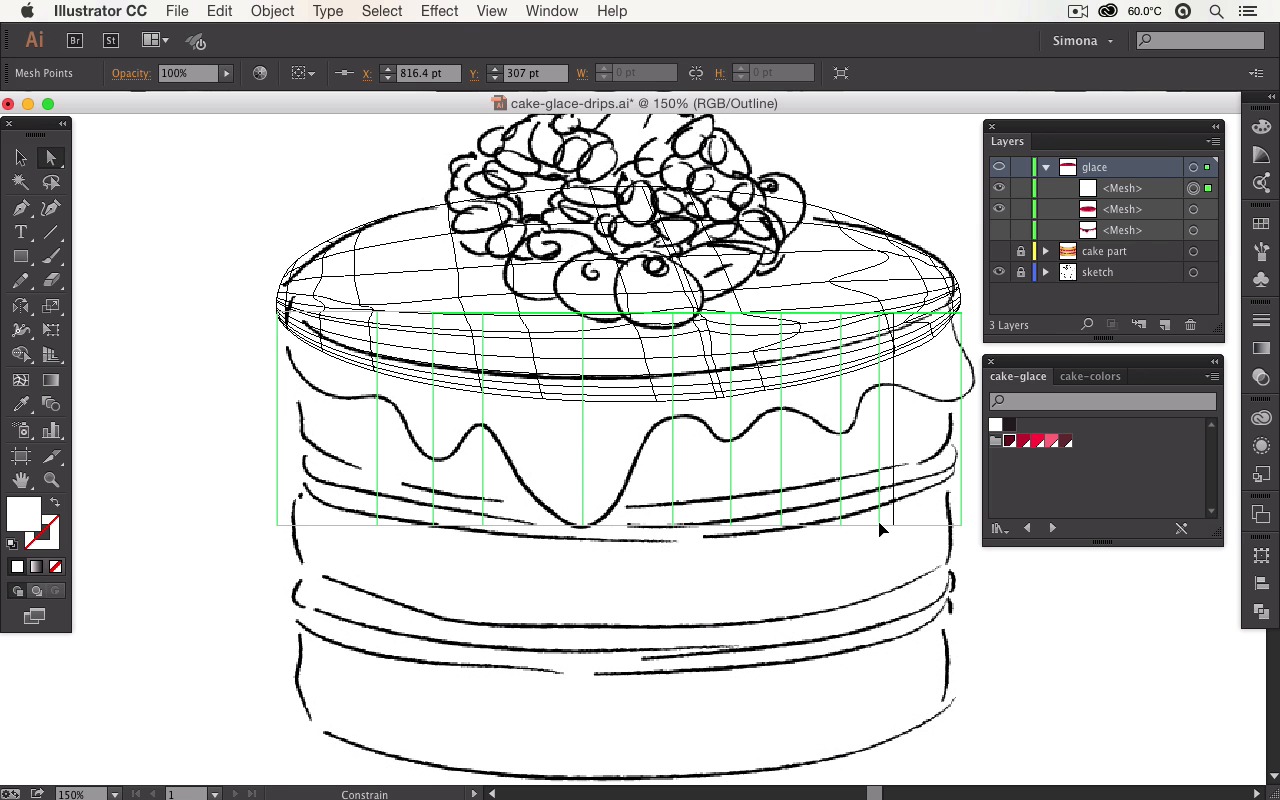
Hello everybody. I'm Simona and welcome back to the course Advanced Gradient Mesh in Adobe Illustrator here on tuts+ and this is lesson Create the Glaze Drips. In this lesson, we are going to create our glaze drips for our cake icon. And as you remember in the previous lesson, we started with building the top part for our glaze. So let's start right away, and let's open up Adobe Illustrator, and let's continue. These objects don't really make much sense, and they look a little bit displaced. But once we're creating our drips for our place that is going over the cake part here, you will see that everything is coming to life. This part is really fun, because we are going to use just a simple rectangle. And then we are going to transform it into the glaze strips running down on the cake here. And all that with gradient mash objects. So again, I have the cake part locked on my layer, I'm hiding the sketch, but just to remember the sketch I made. Let me show it to you again, you can see how the glaze is dripping down on the side here. So this is what we actually want to create. So let's keep the cake part hidden and let's select the rectangle tool over here in the toolbar. Now we are just creating again, a simple rectangle shape approximately the width of the top part, and then the height of the glaze, that you can see here in the sketch. Probably to about right here. Of course, again right now, it's white fill, and then we're going to object > create gradient mesh. But this time, we need to pay attention to the rows and column. For this particular gradient mesh object we want to keep the rows as one, but now for the columns, you want to set up more columns. So first let me cancel here, and now let's toggle off and on the visibility. And now we can see with the shape selected, the drips we were having here. And since we have one drip coming down here, then the second one, a third, a fourth, a fifth and a six. But this part we don't have to pay attention to because it will be the outer corner. We actually have to add ten columns for our gradient mesh object. So let me go back and let's choose Gradient Mesh. And in the column row here, we're going to put ten, as you can see, now from the preview, it added ten columns for us. And why ten, and not just five, for the drips you might ask, the reason is we need a mesh point in between the drips. So the outer point here, we have a mesh point, then we need another one where the drip goes up. One where the drip goes down, another where it goes up, where it goes down, where it goes up, and so forth. So let's click Ok, now let's see how we need to transform those mesh points. Again, I'm going to zoom in so we can see better what's going to happen. As you can see here. These two match points, you need to select, and we need to move a little bit to the right since our glaze here is going upwards. So all I do is I select with the direct selection towards both points. And I'm going to use the keyboards arrows on the keyboard, and I'm moving it to the right, just simply like that and everything will stay still in place. The same thing we're going to do with the other point. I'm just moving them onto where the drip comes down. Then this one here, we can keep but the mesh lines for the big one, we need to move to approximately here. After that, we move this one into place, and as you can see, I'm just aligning those lines with our sketch. And this one we want to move here as well, the next one, again, onto the bottom point of the drip and the last one approximately into this position. Now we are ready to actually make the transformations so this mesh, that's right now still a rectangle, will look like a drip. Now let's continue to transform the shape. So with the direct selection tool we want to grab this anchor point on the bottom left here, and we want to move it up. Just close to the sketch where the glaze is starting to drip. Then we'll select the second one and we'll move it up as well. As you can see right now we can already grab some of the handles and move things into place. Then we're going to grab the next anchor from down here, move it close to the sketch. Again, the next one, moving it up. And now we can see how we already forming a curved line for our drip object here. And this is really what it's all about. We want to transform this particular gradient mesh shape into a drip like shape. So we can add more mesh points to it. And then we can add our highlights in our shadows. So let me continue here and let me pull this one up, and right away I can grab the handles and alignment better, and I continue to do so. So again, I grab an anchor point, again, the next one. And I don't really have to do much, as you can see, it really falls nicely into place. And this is because we added, when we created the gradient mesh object, we set the columns to ten. So here let me move the last one up. And again it's all about tweaking it, and sometimes it takes some time. Sometimes you have to just play around a little bit. But you can see right now it's really falling into place. And once you're happy with it we just have to make sure that we're selecting all of the points on the top line here and then we're going to pull them down. The only points I'm not selecting are the end points here. And as you can see, we're just pulling it down a little bit more, pulling it into place. And this really just takes a little bit of practice and working with the handles in between. And once you are used to it, it's really fast to manipulate. Now I'm moving it into place. I have to do a few tweaks here with the handles. I have to make sure that I'm not selecting the other shape. And if you continuously select the other shape that we've created in the previous lesson, just lock it. And here you can see, we have some handles going a little bit out of place. So again, we'll move the handles close to the points. And we can even move it in a little bit, and manipulate more. And this is pretty much the base shape for our glaze. We still need to fix the corners. But instead of watching me fixing everything, I think you pretty much know now how to do this. I already prepared the finished transformed plate shape. And let me show you how it looks. And this is it here, this is the shape that I've transformed. I decided that I want this particular drip a little bit longer. So all I have done is, I moved the point on the bottom here, the anchor point downwards a little bit, and I extended these parts. And you can see that when I zoom in here I have not rounded it up in this corner at this anchor point, because we want it flush to our top part. Basically, when we're going to add the color to it we want that our second shape for our glaze will match the first shape that we've created. So I'm trying to really align it along this particular shape that we've created in the previous lesson. So we can set the same colors to it. And then in the next lesson we're going to add the extra mesh points and we're going to add the colors, the highlights in the shadows and make sure that will match the top of our first shape for the place. So let's move right on and let's go to the next lesson. See you then.


