- Overview
- Transcript
3.3 Using Other Brush Types
Combine what you know about Photoshop’s brushes with other helpful tools. This lesson will show you the benefits of using alternative methods for painting, like the Eraser and Smudge tools.
Related Links
1.Introduction1 lesson, 01:04
1.1Introduction01:04
2.Master Brush Basics4 lessons, 13:32
2.1Start With Basic Brushes03:16
2.2Brush Efficiency and the Layers Panel03:28
2.3Get to Know Pen Pressure03:46
2.4Learn How to Blend With Brushes03:02
3.Brush Application3 lessons, 09:48
3.1Hard vs. Soft Brushes03:00
3.2How to Use Texture Brushes03:04
3.3Using Other Brush Types03:44
4.Photoshop Brush Resources3 lessons, 08:38
4.1Installing and Using Custom Brushes03:03
4.2How to Create and Organize Custom Brushes02:51
4.3Take Advantage of Photoshop Brush Presets02:44
5.Conclusion1 lesson, 02:45
5.1Conclusion02:45
3.3 Using Other Brush Types
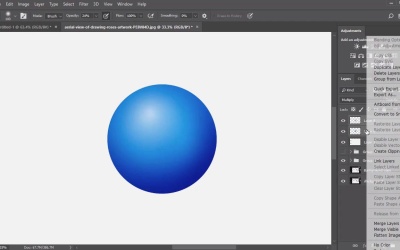
Hello, everyone, and welcome back to this course. For our seventh tip, we'll be diving into the reasons why it's important to look at other brush types, aside from the Brush Tool. If you look at the tool Itself, then right-click, you'll see that there are many other options aside from the Brush Tool available. For example, you've got the Pencil, Color Replacement, and Mixer brush all within the same section. There are also other brush like tools that get incorporated into digital art and design as well. My favorite is the Eraser Tool, but many artists like to incorporate the Blur and Smudge tools for smoother blending. Let's explore the benefits of these alternatives. You can always use these alternatives in collaboration with the original Brush Tool. The Eraser Tool, for instance, can be used for a whole lot more than just erasing. I like to think of the eraser as the same way a traditional artist uses their kneaded eraser. In traditional art, a kneaded eraser is used to add highlights back into your drawings by erasing some of the pencil in the areas where you need a simple highlight. Similarly, you can use the eraser tool to help you sculpt more realistic details. Let's create a simple selection with the Elliptical Marquee Tool, then fill it with a color you like. Create a new layer, and hold the alt key to sample that color. Change the Layer Blend Mode to Multiply, then paint towards the edges of the selection for a shading effect. Pretty cool, right? You can adjust this effect easily by incorporating the Eraser Tool. Just use a soft brush with low opacity to take away the areas where there's too much shadow. Alternatively, you can select the original fill layer and use the eraser tool to create subtle highlights for a more natural look. I also like to use the eraser tool to lift some of the paint off the canvass. Doing this can create the soft or atmospheric effects you need without having to worry about painting them yourself. One more way you can use the Eraser Tool is to sculpt your brush work. When I didn't have a tablet, I used to create tapered ends this way. But a subtle eraser with a hard edged is essential for cleaning up your work. So diminish the blurred look often created by using soft brushes. Many artists also use the Blur and Smudge tools for their work. When using these tools, use them in moderation and try not to let them dominate your workflow. Let's see a few examples where they apply. Use the Blur Tool for subtle blurring. If you have harsh edges in the skin and hair or around the composition, holding the blur tool over those areas can create a subtle blended effect. You can also use the blur tool to help with depth of field and mimic the look of motion. This is especially effective in action illustrations where things are moving fast, past, or around your subject. Now for the Smudge Tool. The Smudge Tool can be used after laying down a few core details. It works great with highlights, for instance, by smudging them slightly for a realistic effect. With practice, you can use the smudge tool for some portions of blending. But keep in mind that it does push the direction of the paint around, so it may force some details out of position. As mentioned before, use these tools in collaboration with the Brush Tool for highly effective results. They can help save valuable time by creating realistic blurred effects without having to paint them manually. Now that we've explored these alternative tools, let's learn more about the various Photoshop brushes that are available online. In our next lesson, we'll learn how to install custom brushes from your favorite places around the web.


