- Overview
- Transcript
4.2 How to Create and Organize Custom Brushes
You can also create your very own brush packs to sell and share with the world. This lesson will show you how, using stock, textures, and custom drawings. You’ll then learn how to organize them in easy-to-use folders.
Related Links
1.Introduction1 lesson, 01:04
1.1Introduction01:04
2.Master Brush Basics4 lessons, 13:32
2.1Start With Basic Brushes03:16
2.2Brush Efficiency and the Layers Panel03:28
2.3Get to Know Pen Pressure03:46
2.4Learn How to Blend With Brushes03:02
3.Brush Application3 lessons, 09:48
3.1Hard vs. Soft Brushes03:00
3.2How to Use Texture Brushes03:04
3.3Using Other Brush Types03:44
4.Photoshop Brush Resources3 lessons, 08:38
4.1Installing and Using Custom Brushes03:03
4.2How to Create and Organize Custom Brushes02:51
4.3Take Advantage of Photoshop Brush Presets02:44
5.Conclusion1 lesson, 02:45
5.1Conclusion02:45
4.2 How to Create and Organize Custom Brushes
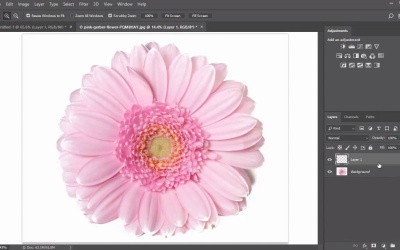
Hello and welcome back. We're closing in on the final lessons of this course. So now it's time to dive into tip nine and learn how to create and organize your own Photoshop Brushes. I highly recommend revisiting our earlier lessons to remind yourself how to use Photoshop Brushes before proceeding. After all, getting to know the Brush Tool and all the different ways it can be used will help you understand which kind of brushes you may need, and should create for yourself. And there are many ways you can create your own Photoshop Brushes. You can scan brush work and splashes you've made traditionally with paint or ink, use a graphics tablet to draw some custom doodles, or even download stocks and shapes to help you create simple and easy brushes. So let's try some of these out. Open your ink or paint swash into Photoshop, select the rectangular marquee tool and create a selection around the swash. Now go to Edit to find Brush Preset, and name your new brush, all done. Hit F5 to open the Brush panel and consider playing with different settings to make your personal workflow even better. Add a beautiful taper with shape dynamics, make it scatter with scattering, or even add more texture by combining it with a special pattern. You can follow this same method whenever you wanna create other types of brushes too. Custom brushes are many artist's go-to method for creating smarter digital art. You can use them to paint grass and nature quickly or to add quick and easy grunge effects. Use the rectangular marquee tool to select your shapes, doodles or stock photos. Then go to Edit > Define Brush Preset, customize your brush with more settings or leave it as is for a simple go-to brush. Another way to create brushes is directly from the brush panel. Let's add a dual brush to this tapered one for more texture. When you're happy with the result, simply go to Create New Brush and name your brush to save it with the existing settings. Another great addition to Photoshop Creative Cloud is that now you can reorder and group your brushes together. Not only are the presets located in preorganized groups, but you can drag and drop your favorite brushes into new ones for a clutter free work flow. Just click the Create a New Group button, then drag and drop your favorites. Keep the ones you want, and delete any others to declutter your work space. No matter the project, creating your own Photoshop Brushes ultimately improves your experience by giving you fast options to create various textures and shapes. Share them with others or even sale them online to make the most out of your creations. Now let's wrap up this course with our final lesson, which will cover everything you need to know about Photoshop's Brush Presets.


