


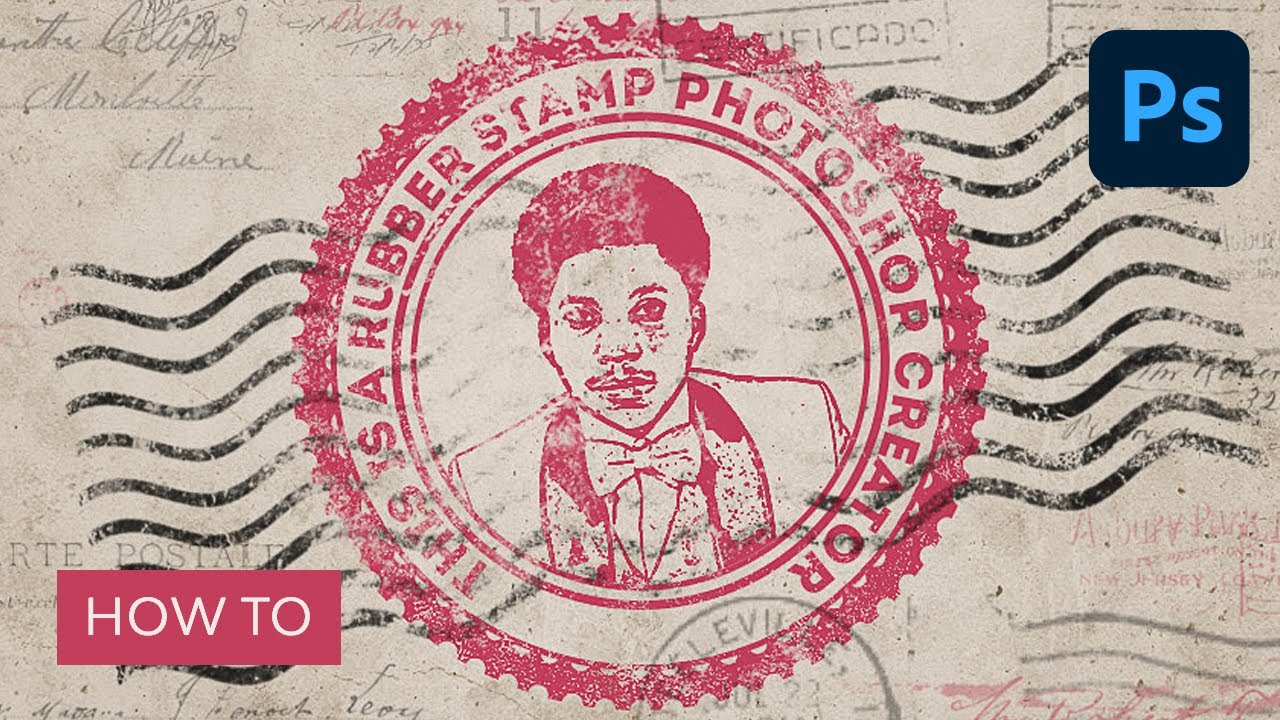
In this tutorial, I'll show you how to make a rubber stamp in Photoshop. Turn any photo into a rubber stamp image in just a few quick steps.
After learning how to make a rubber stamp from scratch in Photoshop, you might need some ready-to-use resources for when you're strapped for time. Envato has a big selection of stamp effect Photoshop add-ons, stamp textures, and stamp PNGs for a variety of projects. And it's all included for a flat monthly fee subscription.
Prefer video tutorials instead? You can follow along with us over on our Envato Tuts+ YouTube channel to learn how to create a stamp in Adobe Photoshop:
Jump to content in this section:
- How to Create the Grunge Paper Background
- How to Create the Rubber Stamp Outline
- How to Add Text to the Rubber Stamp
- How to Create the Photo Stamp Effect in Photoshop
- How to Add a Grungy Effect
- How to Create a Multi-Colored Rubber Stamp
- Congratulations! You're Done!
- 5 Top Stamp Effect Photoshop Add-Ons From Envato
- Discover More Cool Photoshop Tutorials and Resources
What You'll Learn in This Tutorial on How to Make a Rubber Stamp
- How to create the grunge paper background
- How to create a stamp in Adobe Photoshop (outline)
- How to add text to the rubber stamp
- How to create the photo stamp effect
- How to add a grungy effect
- How to make a multi-colored rubber stamp in Photoshop
What You'll Need to Create a Stamp in Adobe Photoshop
The following assets were used during the production of this rubber stamp texture tutorial:
- Grunge Stained Paper Texture
- Rubber Stamp Photoshop Brushes
- Old Envelope Stamp Brushes
- Grunge Photoshop Brushes
- Circle Photoshop Shapes
- Man Portrait Stock Image
- Intro Font Type
1. How to Create the Grunge Paper Background
Step 1
Let's start to learn how to make a custom stamp. Create a new 850 x 550px document. You can, of course, use another size for your PSD file, but you have to proportionally adjust all the sizes used in this tutorial.
Add the Grunge Stained Paper Texture in a new layer.


Step 2
Go to Layer > New Adjustment Layer and add a Gradient Map adjustment. The colors used for the gradient map are #7a6849 and #fffbf7.


2. How to Create the Rubber Stamp Outline
Step 1
To make a rubber stamp effect in Photoshop, now we need to make a stamp outline. Pick the Ellipse Tool. Keep the Shift key pressed while you draw, to create a perfect circle. Call this layer Circle 1.


Step 2
Hit Command/Control-J to duplicate the Circle 1 layer three times, and call the layers Circle 2, Circle 3, and Circle 4.


Set the Fill of the Circle 1 layer to 0% and also add a Stroke of 6 px, color #000000.


Step 3
For the Circle 2 layer hit Command/Control-T to scale the shape. Make sure to click on the Maintain Aspect Ratio button and set the scale to 95%.


Set the Fill of the Circle 2 layer to 0% and also add a Stroke of 4px, color #000000.


Step 4
For the Circle 3 layer, hit Command/Control-T to scale the shape. Make sure to click on the Maintain Aspect Ratio button and set the scale to 75%.


Set the Fill of the Circle 3 layer to 0% and also add a Stroke of 6px, color #000000.


Step 5
For the Circle 4 layer, hit Command/Control-T to scale the shape. Make sure to click on the Maintain Aspect Ratio button and set the scale to 75%.


Set the Fill of the Circle 4 layer to 0% and also add a Stroke of 4px, color #000000.


Step 6
Download the Circle Photoshop Shapes and load the CSH file in Photoshop. Go to Edit > Preset Manager and choose Preset Type > Custom Shapes. Click the Load button to load the CSH file.
Set the Foreground color to #000000. Pick the Custom Shape Tool and make sure you have the Defined Proportions option checked. For this tutorial, I used shape no.17, but you can use any shape you like.


3. How to Add Text to the Rubber Stamp
The next step in how to make a rubber stamp is the text. Click on the Vector Mask Thumbnail of the Circle 3 layer. Pick the Horizontal Type Tool and move directly over the circle path. The cursor will change to an I-beam with a dotted wavy line through it.
I used the Intro font and color #000000 for the text. You can use another font type and another color.


4. How to Create the Photo Stamp Effect in Photoshop
Step 1
You can't learn how to create a stamp in Adobe Photoshop without adding a photo. Add the Man Portrait stock image on a new layer.


Step 2
Keep the Control key pressed and click on the Vector Mask Thumbnail of the Circle 4 layer to make a selection.


Click on the Add Layer Mask button from the Layers tab to add a mask for the Man Portrait layer.


Step 3
Make sure the Foreground color is set to #000000 and the Background color is set to #ffffff, otherwise the next photo effect will not look right.
Go to Filter > Sketch > Stamp and set the Light/Dark Balance to 4 and the Smoothness to 1.


Step 4
Open the Layer Style window of the Man Portrait layer. The Blend If sliders are at the foot of this dialog. Use the sliders called This Layer to remove the white color. Simply drag the right slider to 180 to hide the white color.


Right-click on the Man Portrait layer and choose Convert to Smart Object.


5. How to Add a Grungy Effect
Step 1
Now let's add a grungy stamp texture to our work. Select all the layers (the Circle layers, the Text layer, and the Man Portrait layer), right-click on the layers, and choose Convert to Smart Object.
Add a Layer Mask to the Man Portrait Smart Object. Pick the Brush Tool and set the Brush Size to around 800 px. Also, set the Foreground Color to #000000. Use the Grunge Photoshop Brushes to create grungy stamp effects, and try using different brushes.


Step 2
Create a new layer and call it Stamp Lines. Pick the Brush Tool and from the Rubber Stamp Photoshop Brushes, use the stamp-lines brush.


Add a Layer Mask to the Stamp Lines layer. Again, use the Grunge Photoshop Brushes to create grungy effects and also to hide some parts of the stamp lines that cover the stamp.


6. How to Create a Multi-Colored Rubber Stamp
This is the last step in learning how to make a custom stamp. If you want to create a multi-colored rubber stamp, you can add a Color Overlay layer style to the Man Portrait Smart Object using the color #d9a4ae, or you can add different colors for the layers inside the Smart Object.


For the final touches, create a new layer and call it Old Envelope Stamp Brushes. You can use the Old Envelope Stamp Brushes to add a realistic old envelope effect. Use color #b24659 and color #b24659 to add different stamps.


Congratulations! You're Done!
In this tutorial, you've learned how to make a stamp from scratch using Photoshop brushes and textures. I hope you've enjoyed this tutorial.


5 Top Stamp Effect Photoshop Add-Ons From Envato
Now that you know how to make a rubber stamp, you might be looking for alternatives for when you're short on time or when you need something ready to use.
In that case, visit Envato. For a flat monthly fee, you'll be able to download unlimited stamp effect Photoshop add-ons, stamp images, stamp PNGs, and more. Here are five top stamp texture Photoshop add-ons you can use to speed up your designs:
1. Photoshop Ink Stamp Effects (PSD)


This stamp texture is perfect if you want to make a stamp in a few clicks. It's a complete kit that includes 20+ ink stamp letterpress text effects, all in one PSD file. Create unique stamp images for logos, branding, creative projects, and more!
2. Ink Stamp Photoshop Layer Styles (ASL, ATN, PDF)


If you prefer to work with layer styles, this stamp effect Photoshop add-on is for you. The set consists of 12 individual layer styles with different textures, one grunge action for creating irregular edges, and a color Photoshop action. The stamp outlines and stamp images you'll make will surely stand out!
3. Morning Coffee Stamp Brushes (ABR, BRUSHSET)


Who doesn't love a nice coffee stamp outline design? This complete set comes with 20 stamp outline brushes that have a coffee-inspired design! And the best feature: you can also use them in Procreate and Affinity Designer!
4. Letter/Ink Press Vintage Text Effects (PSD)


Give your stamp PNG designs a vintage feel with this kit! This one is specially made to make a stamp with a retro feel. You'll get 12 text effects in fully layered PSD files.
5. Letterpress Vintage Text Effects (PSD)


If you're working mainly with text in your stamp PNG design, take a look at this pack of text effects. These ten unique effects will quickly transform any text into a vintage stamp image!
Discover More Cool Photoshop Tutorials and Resources
This has been a detailed tutorial to learn how to make a rubber stamp in Photoshop. If you liked this and would like to discover more awesome Photoshop tutorials, check out some of these:

 How to Create a Silhouette in Photoshop


 How to Create a Photo-to-Cartoon Effect in Photoshop


 How to Remove Green Screen in Photoshop


 How to Create a Rainbow Gradient in Photoshop

 How to Make a Heart Brush in Photoshop


 How to Center Something in Photoshop (Text, Images, Objects)


 How to Use the Lasso Tool in Photoshop

 30+ Best New Photoshop Actions & Photo Effects (Updated for 2024)


 How to Create a Letterpress Text Effect in Photoshop


 How to Design Your Own Camouflage Pattern


