
 Lessons: 22Length: 1.5 hours
- Overview
- Transcript
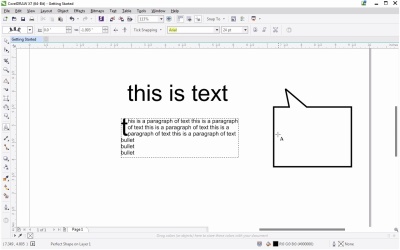
2.3 Text Tool
In this lesson I’ll give an overview of the Text tool, showing a variety of ways that text can be added to an object or a document as well as ways to modify text without using dockers.
1.Introduction
1.1Getting Started With CorelDRAW01:10
2.The Toolbox
2.1Curve Tools07:17
2.2Shape Tools07:40
2.3Text Tool03:55
2.4Shape Effect Tools03:46
2.5Interactive Tools08:07
2.6Color and Attribute Tools03:37
2.7Connector Tools03:15
2.8Artistic Media Tool04:07
2.9Mesh Tool03:18
3.Commonly Used Dockers
3.1Property Bar and Object Manager04:01
3.2Object Properties02:57
3.3Manipulating Objects03:38
3.4Coordinates and Transformations04:05
3.5Text03:07
3.6Corner Properties03:04
4.Patterns and PowerClips
4.1Creating Patterns03:03
4.2PowerClips03:19
5.Let's Create an Infographic
5.1Part One04:47
5.2Part Two06:37
5.3Part Three04:35
6.Conclusion
6.1Conclusion01:09
2.3 Text Tool
Welcome to getting started with CorelDRAW. I'm Mary Winkler for tuts+. In this lesson, we'll be checking out the text tool, and some of the ways to add and edit text within an image. Head on over to the toolbox and grab the text tool, shortcut F8. If you simply select a spot, you can start typing with the tool to add text anywhere on your image. This is text. With the pick tool you can resize your text as needed and move it around your page once you've selected it. In the property bar you can change the font to whatever's on your machine and compatible with CorelDRAW X7. The drop down menu will give you options in alphabetical order as well as recent font choices you may have made. You can also change the size of the font in the drop down menu. Or, enter a number in manually if it's is larger, smaller, or not one of the default size choices. It's simple, straight forward, and similar to your average word processor's options. Go bold, italic, or underline your text if your chosen font allows for it. Using the text tool, select a rectangular area to create a bounding box in which to type. You can fill it in with assorted information as I'm doing here or copy and paste whatever content you may need within the box. Let's quickly add some content so we can explore some of the paragraph options found in the text tools property bar. You can go up to the property bar and choose a new paragraph alignment option. Currently it's set to None. If you hit Center, your text will be centered. If you hit Right or Left, your text will be aligned to the right or the left. Full Justify and Force Justify are also options, allowing you to fill your paragraph box with wall-to-wall text. If we select Bulleted List, shortcut Ctrl+M, each line group becomes a bullet point. These options are wonderful for assorted infographics and presentation materials you may be creating within the program. Other options include, creating a drop cap for classy paragraphs and content layout, or opening up the text docker, which we'll cover more fully in chapter three of this course when we explore commonly used dockers. Let's explore typing within and around an object. I'm going to use a callout shape from the Perfect Shapes explored in the previous lesson. Using the text tool you'll notice that if you hover over the outline of the shape, edge appears in blue next to your cursor. Clicking this as a place to type allows you to add text around the edge of a shape. Try it out now and type with whatever words or nonsense you desire. Basically, you're typing on a path. That path being the outline of whatever object you had selected. Delete this text and hover over the shape near its edge so you see a small A and B inside a box. This will allow you to type inside of the object's boundaries. Fill your object in whatever way you desire. With the boundaries still selected, go to Text, Paragraph Text Frame, and select Insert Placeholder Text. Like magic, your box will be filled with placeholder Latin ready for the layout and design mock-ups waiting for future content. Repeat this with as many shapes as you want. Select your initial this is text line. And in the property bar hit Edit Text. The edit text box should pop up showing what your text currently looks like. Select your text, delete, and change your text quickly and easily to whatever you want. You have font and paragraph options at the ready so you can preview changes in your text without committing to them. Let's change this answer to a script font and adjust the font size. Once done, hit okay and your new text will have replaced what was there before, allowing you to customize those features before changing your image. Next, let's explore typing on a path. Using the pen tool draw a simple curved line, then the grab the text tool and select the line so it says edge and you can type on it. Your text will follow the curve of the path perfectly. Let's fill it up, after all typing text on a path is easy. In the property bar you'll notice a drop down menu that controls text orientation. Play with the options within the menu to get a feel for which each one does. You can also manually shift and move your text along the path to the left or to the right. Or move it to the other side of the path if you prefer. While this isn't everything you can do with text in CorelDRAW X7, it's quite a start in getting to know the program and adding various amount of type to your graphics. Thank you so much for joining me in getting started with CorrelDRAW's text tool. In our next lesson, we'll get to know the shape edit tools which manipulate objects and shape in a variety of interesting and fun ways.


