- Overview
- Transcript
3.6 Corner Properties
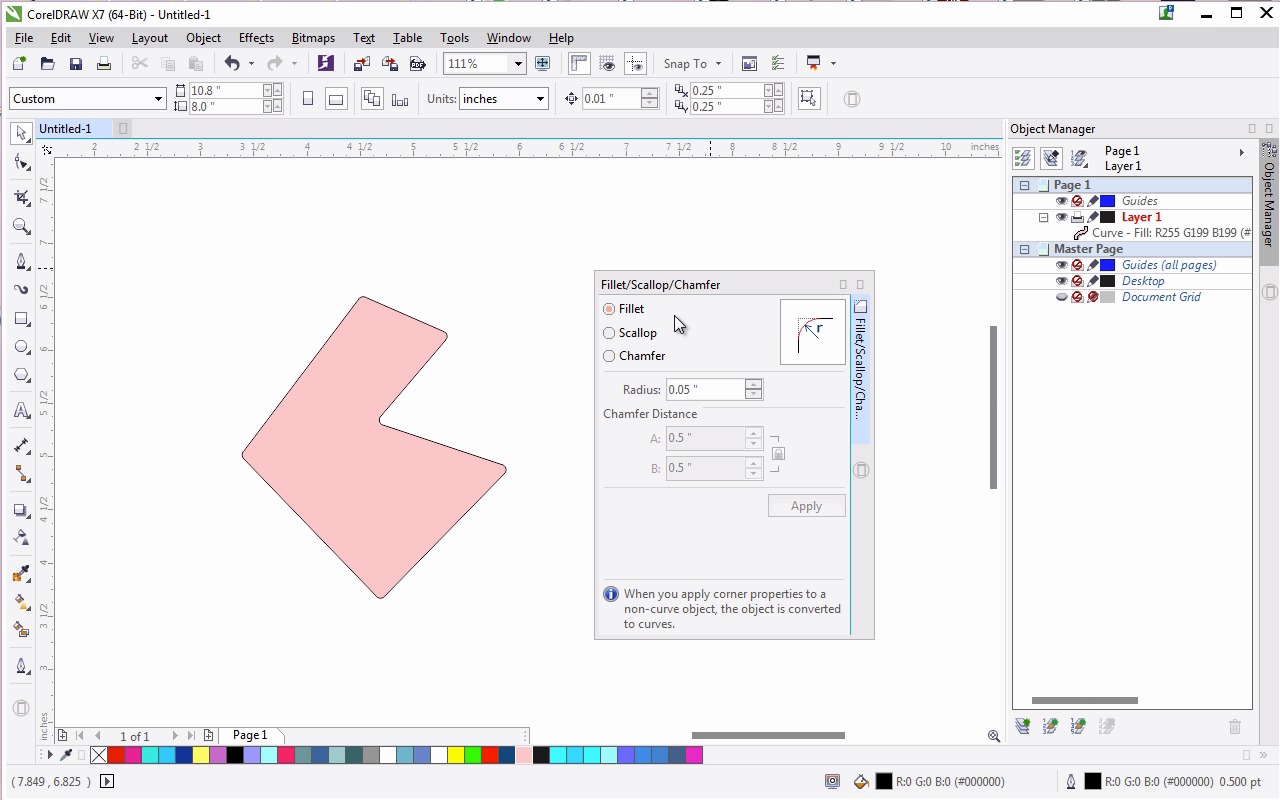
This lesson goes over the Fillet/Scallop/Chamfer docker which allows you to manipulate the corners of an object and various types of curves.
1.Introduction1 lesson, 01:10
1.1Getting Started With CorelDRAW01:10
2.The Toolbox9 lessons, 45:02
2.1Curve Tools07:17
2.2Shape Tools07:40
2.3Text Tool03:55
2.4Shape Effect Tools03:46
2.5Interactive Tools08:07
2.6Color and Attribute Tools03:37
2.7Connector Tools03:15
2.8Artistic Media Tool04:07
2.9Mesh Tool03:18
3.Commonly Used Dockers6 lessons, 20:52
3.1Property Bar and Object Manager04:01
3.2Object Properties02:57
3.3Manipulating Objects03:38
3.4Coordinates and Transformations04:05
3.5Text03:07
3.6Corner Properties03:04
4.Patterns and PowerClips2 lessons, 06:22
4.1Creating Patterns03:03
4.2PowerClips03:19
5.Let's Create an Infographic3 lessons, 15:59
5.1Part One04:47
5.2Part Two06:37
5.3Part Three04:35
6.Conclusion1 lesson, 01:09
6.1Conclusion01:09
3.6 Corner Properties
Welcome to getting started with Corel Draw. I'm Mary Winkler for Tuts+. In this short lesson we'll tackle corner properties with the Fillet/Scallop/Chamfer docker. Open the docker under Window > Docker > Fillet/Scallop/Chamfer. I've drawn out several shapes within my working document with help from the object tools from the toolbox. You can follow suit or create your own objects. Select one now, preferably a square and let's start with the Fillet option. This option rounds off the corners of an object. You can define the radius in the docker itself by using the arrows or entering in a number, and then hitting Apply. The Scallop option is next. This option rounds a corner inward, creating a concave edge. Like the Fillet option, you're able to define your radius by using the arrows or entering in the number itself. When satisfied with the radius measurement, hit Apply. You'll notice that this cannot be applied to the objects that have already had the Fillet option applied. Either undo the Fillet command or draw or select the new shape to apply the Scallop option. When you hit Apply your object is automatically converted to curves. Speaking of which, you'll notice you can apply Scallop to an object multiple times, whittling away your square as though it's Swiss cheese. The Chamfer option applies a new angle to your corners, cutting them off. You can adjust two points to create that distance either locked together or separately. What about an asymmetrical object? Use the Pen tool from the tool box to draw a multi-cornered object and fill it with whatever color you want. Starting with the Fillet option set the radius to an arbitrary number and hit Apply. Even though this object was already a curve multiple corner options can be applied to it as long as it has corners. Undo and cycle through various options to get a feel for what this docker can do to different types of objects. What happens when an object has both curves and angles? Delete your object and use the Pen tool to draw a new one. Give your object multiple angled corners and curves. Mix it up a bit. Go from curve to angle, and curve again and back to angle. In playing with a new docker or tool, give yourself options to really check out and understand the behavior of the docker or tool. Give the object the fill color of your choice. You can do so on the Color docker, Windows docker, Color or in the Object Properties docker. I really dig blue so once again here's a blue object for us to play with. I'll resize the object so the changes that we apply to it are easily seen by you. Once again, I'll start with the Fillet option. Adjust the radius if you wish and hit Apply. In my case, it only rounds out the bottom left corner of the object. What did it do to your object? Scallop, on the other hand, has very light preview lines showing you'll be creating a few concave curves within my object's edge. It may help to change the fill color of your object if you're having a hard time seeing them. Apply Scallop a few times to see how the object changes over multiple applications. Sometimes the scallops are concave, and on rare occasions they are convex. Undo these applications and let's check out Chamfer for a final look at this docker. The preview lines are again, very light and slight. I'll change the distance to something greater so that it's more noticeable, hit Apply and watch as the left side of the object's cut off a bit in straight lines. Thank you so much for watching this short lesson on the Fillet/Scallop/Chamfer docker. And once again altering the radius of object corners. In the next lesson, we'll move onto chapter four in which we'll create our very own patterns with the help of tools and dockers that we've covered previously.


