
 Lessons: 11Length: 1.4 hours
- Overview
- Transcript
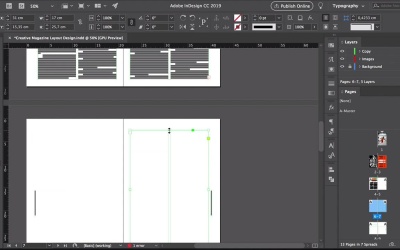
4.2 Designing an Article
In this lesson, we will take a look at how to use the Paragraph Styles we created in a previous lesson. We will add text boxes with multiple columns, and you’ll learn how to thread them when you come across a long piece of body copy. You’ll also learn about baseline grids to align text columns through the spread.
Last, we will look at how to enhance the layout by adding images and pull quotes. You’ll also learn how to use the Text Wrap panel around different elements.
1.Introduction
1.1Introduction to Creative Magazine Layout Design01:24
1.2Design Assets and Software01:21
2.Setting Up an InDesign File for Magazines
2.1Creating an InDesign File, Creating Grids, and Organizing Layers03:56
2.2Typographic Hierarchy: Designing a Preliminary Article and Paragraph Styles12:00
2.3Creating and Grabbing Color Swatches05:13
2.4Creating Master Pages and Consistent Folios05:05
3.Designing a Magazine Cover
3.1Designing a Magazine Cover: Tips and Tricks09:03
4.Creating Layouts
4.1Designing a Contents Page08:39
4.2Designing an Article10:58
4.3Breaking the Rules23:48
5.Conclusion
5.1Conclusion01:55
4.2 Designing an Article
Hi there, welcome back to this course. In the last lesson, we created a contents page that was placed on the custom grid and learned how to use the Glyphs panel. In this lesson, we will design a basic magazine article and use a paragraph styles we created previously. Let's take a look. Select pages 4 and 5 from the pages panel, and just before we start placing any text, we will apply a baseline grid. Right-click on the document, Grids & Guides, select Show Baseline Grid. This helps us so when we have multiple columns, all the texts will be on the same grid, so no lines of text will be misaligned, everything will be the same. So using the text, we'll create a small text frame and fill with placeholder text. I will hide the guides here so we can see what we're doing. To a text frame, I've applied a copy regular style and you can see that not all of the text is falling on a specific line. Some of it is falling writing between the lines. So here, I will be using the paragraph panel. At the bottom, there are two buttons. And we want to choose the one on the right, the align to baseline grid. So click on that, and you can see the difference now. I will turn this text frame into two columns so that way, you can see better, what I mean by aligning all of the columns. So press Cmd+B, two columns, click OK, there we go. So here you can see it not aligned and this one is aligned. This is also perfect if you're using subheadlines embedded into a text because subheadlines, sometimes can have different lightings. And that can throw off all of the aligning. So we want to do is prevent any misaligning and try to align everything. So head over to InDesign, Preferences, General and choose the grids option from the left side menu. We will change relative to top of margin and increment every 10.8 points. So 10.8 points is the lighting that we're using for our body copy, and click OK. And you will see that the baseline grid has slightly changed now. Let's go back and set them relative to top of page. So we get the baseline grid on the whole page, then click OK. Let's try adding a space in between these two paragraphs to make sure that they're aligning. So these are not aligned, and now they're aligned. Perfect. I'll get rid of this. This green dots, show the frames that we set up on the master pages. If you want to override the items, press Shift+Cmd and either select all of the items you want to override, that means that you want to activate them. So now, there are no green dots around the frame. They're solid frames, that means that we have activated them. I'll bring back the guides. And let's start here with the headlines. So here, add a headline, placeholder text. I'll add an intro, and body copy. And you will remember that we set up this on the master pages and gave each of the frames already a paragraph style. So that's why they're already formatted. On the swatches panel, all change the headline to orange. I want to use the Drop Cap on the first paragraph of the body copy. The only thing that we forgot to set up was the indent style. So we can go back and change that. On the Paragraph Styles panel, double click on copy regular, check the preview box, select the Indents and Spacing option from the left side menu. Set the first line indent to 1 centimeter, align to All Lines, and maybe I'd like to keep the alignment to left, justified to just lose the ragged lines. Since we're aligning this to a baseline grid, we can't forget about the Copy Drop Cap otherwise, the first paragraph won't be aligned. So double click on Copy Drop Cap, select Indents and Spacing, align to All Lines and click OK. Now, let's say that you want to thread the story. So the story is very long and it covers more than those two pages. So let's go into pages 6 and 7 and override the items by pressing Shift+Cmd and select the text frames. I'll delete all the frames on page 6 because that's where I'll be using a photo. I'll activate the body copy frame on page 7. And just to show you, I'll shorten these two columns on page five. I'll extend this, since we made the frame shorter on page 5. You will notice there's a plus sign that means you have more text. So click on that and then click on the text frame on page 7. So all the text from page 5 will extend to page 7. So if I will make this smaller, it will appear on the next page. If I make it even smaller, we will just keep extending. So I'll extend this back and add more placeholder text here. And now we've got a two spread story. Let's add a few images. Press Cmd+D on page 4. So like the main in the city fashion shoot, click Open, and draw the image frame on the second column of the first page. Using the Direct Selection tool here, we'll resize it. Open the Text Wrap panel by going to Window, Text Wrap, while selecting the image, click on the wraparound bounding box button. Press Cmd+D, let's add the ballerina ballet dance image. They use this on the second page on both columns. Use the Text Wrap panel to create a bounding box as well. If you place these images on the copy layers, you can select them and move them into the images layer. Using the text tool, I'll create here a small text frame that fits one column. I'll style it with a photo caption style from the Paragraph Styles panel, I'll fill it up with placeholder text. If orange is too bright, we can change the color to black on the Swatches panel. It just like the image, open the Text Wrap panel. And so like the bounding box button, you can adhere a margin of 0.2 centimeters all around, so that way the text under can move down a little bit more. Duplicate this, and place it on page 5 under the ballerina photo. And since that already has the Text Wrap margin apply to it, there won't be any problem. Create another text frame and here, we'll add a pull quote use a Paragraph Styles panel to style it. All center aligned is in place it in between these two columns on page 5, use the Text Wrap panel again, and add a 0.2 centimeter margin. Maybe we need a little bit more since the text is big, let's try 0.4 centimeters and let's make it shorter, that looks better. So we don't repeat the same layer as a page before, maybe I'll shorten the text from page 7 and add a pull quote right at the top. And then on page 6, we can add a full page image. Press Cmd+E to place an image and select the portrait of Caucasian young man, click Open. Using the selection tool, resize the image, don't forget to press Shift+Option+Cmd to resize everything evenly, and use the direction tool to move the image around to center in. I'll extend the text from page 7 so that way, I can delete the excess. Click on the + sign and then you can create a small texts from on this side and then delete what you don't need. Here, I'll copy and paste the intro on page 7 and restyle this for a pull quote, center line. Change the color to orange. Perfect. You will notice in some magazines, at the end of a story or an article, they have a small symbol and this means that that's the end of the article. And that's called an end mark. So, that's what we'll do here. Use the ellipse tool to create a small circle and under Swatches panel, select the orange color. And all you have to do is select it, Cmd+C to copy, activate a text frame and Cmd+V to paste. We can do the same for a story that continues on the following page, so for example, we can do this on page 5. Create a text frame and add two arrows pointing towards the right, that means that the story extends to the next page. Set the frame to the copy regular paragraph style and change the font style to black. Convert this text frame into outlines and you can do so by pressing Shift+Cmd+O, select the arrows Cmd+C to copy and paste into the paragraph. And this is how you design a simple article by using the Paragraph Styles and the Text Wrap panel to make room for additional elements. In this lesson, you also learned a few things about threading tags for articles that go beyond a spread. In the next lesson, we will design an article that is breaking the rules and grids that we learned previously. I'll see you there.


