
 Lessons: 12Length: 1.3 hours
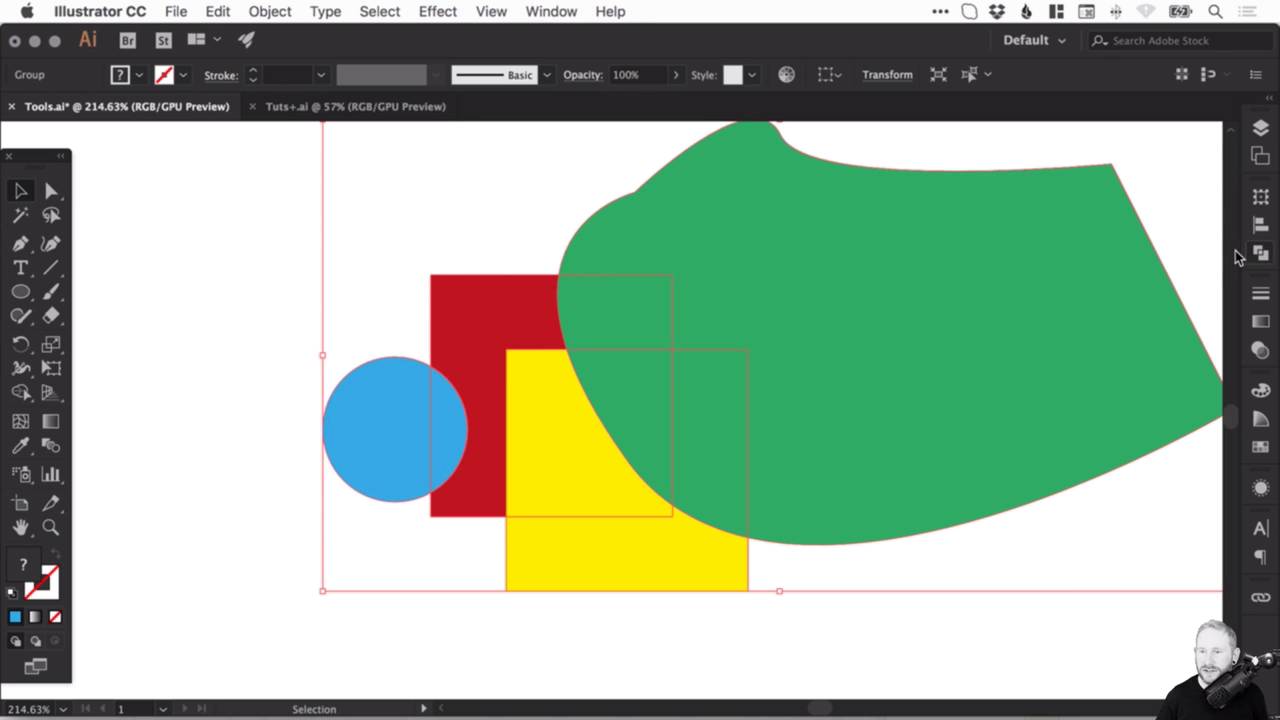
- Overview
- Transcript
3.4 The Pathfinder Panel
The Pathfinder panel is enormously powerful in the hands of a logo designer. In this lesson we’ll examine its options and learn how to use it for combining shapes in a variety of different ways.
Related Links
1.Introduction
1.1Welcome to the Course!00:36
2.Adobe Illustrator’s Tools
2.1Shapes and Lines05:40
2.2The Pen Tool04:50
2.3The Selection Tools04:07
3.Useful Panels
3.1The Stroke Panel06:24
3.2The Layers Panel01:49
3.3The Transparency Panel03:21
3.4The Pathfinder Panel08:47
4.Other Essential Features
4.1Global Swatches05:08
4.2Gradients03:48
4.3Additional Tools04:32
5.Practical Application
5.1Designing Our “d” Logo26:22
3.4 The Pathfinder Panel
[MUSIC] So next we're gonna move on to the Pathfinder tools and the shape builder tool. Now this is really cool. So the Pathfinder tools, let's create some shapes. And we'll go back to our good old red and yellow squares, classic. And if you haven't got the Pathfinder panel on the right here, just to go Window, down to Pathfinder, and this is brilliant and incredibly useful when designing logos. So let's just create four copies of this. So I'm just dragging, holding Alt and Shift, and I can repeat that last action by pressing Cmd or Ctrl D. Twice, there we go, fantastic. In fact, we'll just do one more. Now, there's a lot of different Pathfinder options here. These all do behave slightly differently and it's worth experimenting with them. The ones we're going to be focusing on are the shape modes here, and then this one here, the first one, divide. In my experience, using these five key tools within the Pathfinder options create all the effects you would ever need to create a merge, combine and cutout shapes. So, we're gonna show you that right now. So the first one, if I drag over both the red and the yellow square, go to the Pathfinder panel and select the top left one. This is unite and we can click on that and it combines these two shapes into one shape. So if I go back and go into outline mode, remember that's Cmd or Ctrl Y. You can see this is how it looks. I can select them both and unite them together or add them together, and it will combine those into one shape. And whereas before they had a question mark as the fill, because there isn't just one fill, there's multiple fills, so it can't tell you which color it is specifically. Once those are combined, it will then take the color of the shape on top, and it will add that into the fill down here. Now, the next one along is called minus front. Or you can think of this as subtract. And what it will do is, it will take the shape that is on top and it will subtract it from the shape that is below. So the shape on top is the yellow one. So when we click that, you can see it knocks it out from the red one below. And of course, that has changed the path of the shape as well. And next, if we select these two here, we're gonna go to the next option along, this is intersect. And if we click this, you can see the point at where the shapes intersect is retained and everything else is discarded. And for the last one, this is exclude. And of course you guessed it, it does the exact opposite of intersect. We click that and it discards the middle where the shapes cross over and it retains everything else on the outside. Now the last one down here is divide and the reason that I want to show this one specifically from the Pathfinder options is because it is incredibly useful. So I am just going to use the pen tool to create a rather terrible shape and we will just give this some more color. So this is a design. Please don't take it seriously but this is supposed to be a design. We're just merging lots of shapes together. And if I go into outline mode you can see that these shapes overlap each other at lots of different points. And if I drag over everything, and in the Pathfinder panel select divide. Well you can see nothing happens. However, it does. What it does is, where these shapes all overlap, all of these parts that we're looking at here, it separates those into separate shapes. And what that allows us to do is we can use the direct selection tool to pull apart all of these individual pieces. Pretty cool, right? Or what we can do is just go to object. If I just kind of go through that process again. So use the divide option and then go ungroup and then I can use the main selection tool to do the same thing. So, essentially, whichever tool you use, it combines these, it breaks these all apart into separate shapes. And we can pull those out. Now, the shape builder tool. The shape builder tool is slightly different. The shortcut for outline mode is Cmd or Ctrl Y. Incredibly useful. So the shape builder tool is something that you'll be able to use if you have a more recent version of Illustrator and it's incredible. It's a huge, huge time saver, and we'll be using that later on in the course. So if I select all of these shapes, and then select the shape builder tool, you can see that I can mouse over all of these different elements. So where lines intersect, it creates a break and I can essentially select each individual segment. Now, the way this is brilliant is you can left click, and you'll see it starts drawing a line. It's not actually drawing a line by the way but I can drag into other segments and the dotted area is marking what's gonna be combined together. So if I drag through these different segments here and let go you can see it combines all of this Into one shape. And let's go back into outline mode. This is a really good way of using outline mode, because you can take out all the color and focus on actually connecting all the dots, combining all the shapes in the right way. And it's a lot easier to do it this way because there's less distraction as well. But if I wanted to remove this segment here that I've got highlighted, you can see by default there is a plus next to the arrow icon. What I can do is hold down the Alt key, and that changes to a minus, and I can left click and it will knock out that part of the shape. So even though all of these were individual shapes to begin with, when you select everything and then use the shape builder tool, you can work with them and add bits in and remove bits all as if it were one complete shape. So let's create something even more complicated just because this tool is fantastic. And we'll add lots of color in here. Please don't judge me. This isn't the extent of my creative work, honest. There we go, we'll duplicate that holding Alt and dragging. Right lots and lots of circles, looks very fun. Okay, cool, so just remember to drag over everything with the main selection tool. Select the shape builder and now we can draw a path all the way through all of the different segments. And it will combine those like so. And we could then just knock out some of these shapes. Now, another really good use of this is if you wanted to create a cloud, for example. So you can see here I'm literally using just all the basic shapes, circles, and the rectangle tool to create the shape. But of course it looks like that in outline mode. And well, that's fine, we want to kinda tidy that up. It's best practice to kind of keep your shapes merged where they should be merged, just keep it all tidy and everything. So we can drag over this. And then use the Shape Builder Tool to just go all the way through. And voila, we have a complete cloud. So that's just a really really quick example. Okay, I love those tools, they are fantastic, but let's move on.


