
 Lessons: 8Length: 42 minutes
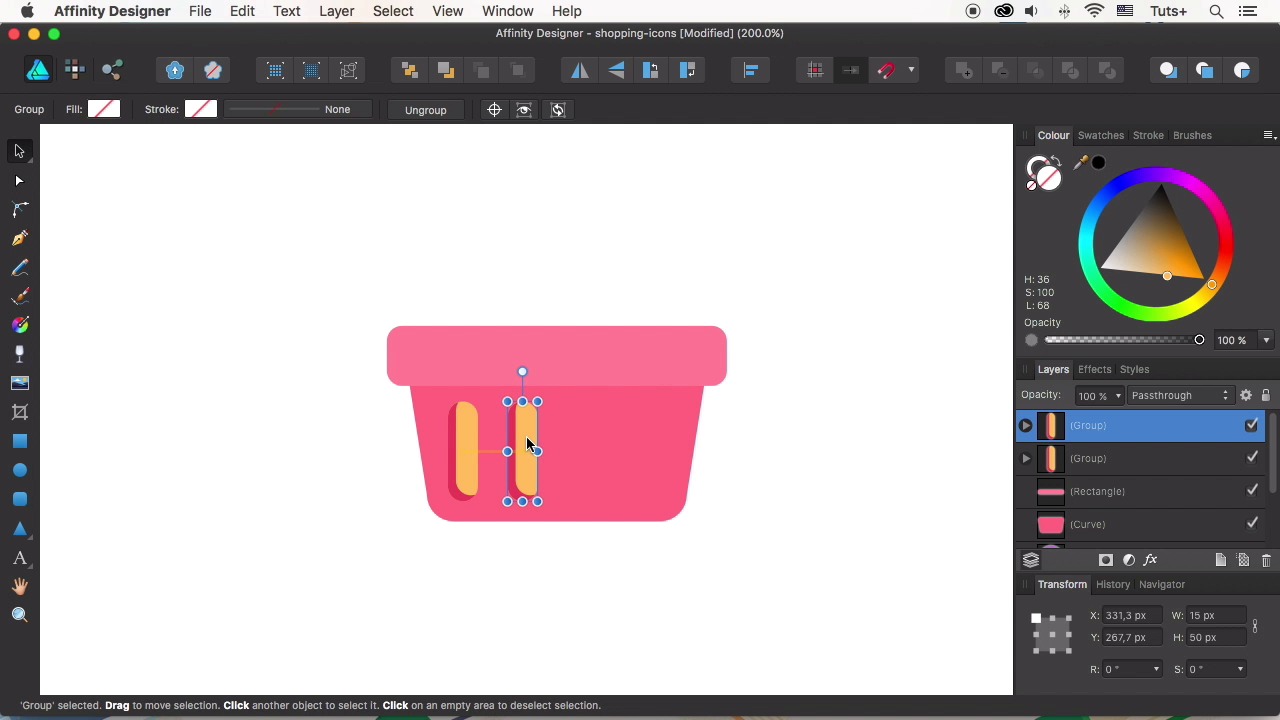
- Overview
- Transcript
2.4 Shopping Basket Icon
This time we’ll be drawing a shopping basket icon, combining the shapes, modifying them and learning how to duplicate a shape multiple times.
1.Introduction
1.1Introduction01:17
2.Creating Flat Shopping Icons
2.1Shopping Bag Icon07:13
2.2Discount Badge Icon07:01
2.3Hanger Icon05:21
2.4Shopping Basket Icon06:07
2.5Dress Icon05:33
2.6Cargo Truck Icon07:41
3.Conclusion
3.1Conclusion01:36
2.4 Shopping Basket Icon
Hello everyone. We're continuing the course, How to Design Flat Icons in Affinity Designer with Yulia Sokolova at Tuts+. This time we'll be drawing a sharp basket icon, combining the shapes, modifying them, and using various tools. Let's see how we can do it. Let's grab the rounded rectangle tool, and make a shape of 130 by 90 pixel size. We can adjust the corner radius from the control toolbar on top. Let's set it to 15%, and change the color to a nice tint off pinkish red. Now we can convert the shape to curves. Take the note tool and make the top of the shape wider. So at the top left bare of nodes, hold SHIFT and press the left arrow of your keyboard to move it ten pixels to the left. Do the same for the opposite half of the shape moving the nodes in the opposite direction. Let's take the rounded rectangle tool again and shave the top part of the basket. Make a 170 by 30 pixels rectangle, forming a rim over a border of our basket. Align the shapes. And make its fill color a bit lighter. Continue using the rounded rectangle tool to make some holes in the base of the basket. Make a 15 by 50 pixels rectangle. And let's make its corners more rounded by setting the value to 50%. Now let's copy the shape and paste it twice so that we have three rectangles in total. Use the arrow keys of your keyboard to move the upper copy to the right and up a bit. Select two shapes and click subtract to delete the overlapping parts. As for the remaining shape, let's make it a bit darker. So we should color of the third rectangle to yellowish orange. Select both shapes and group them. Hold option shift and drag the shape to the right making a copy. Press common J to make two more identical copies. And group all the shapes. Now let's add the last element of our basket a handle. Use the rounded rectangle tool to make a 20 by 65 pixel shape. Drag the color picker over the dark red detail of the basket and apply the selected color. Use the Elipse Tool to make a small circle for the pin and click and drag the eye dropper to pick the needed color and apply the selected color. Select all the elements and align them to the center. Don't forget to group the elements. Now we can copy the icon base from one of the previous icons. Align the basket to the circle and make it somewhat bigger. Pick the color from the yellow stripes and apply to the icon base. Adjust the color if needed. Making it a bit lighter or darker. And don't forget to change the color of the shadow as well. Edit the size and the shape of the shadow to make it to feed the basket. Move the nodes of the shadow shape. And delete the ones you do not need. Make some minor color adjustments, if needed. And here we have it. Our shipping basket icon is ready. Nice job. That's how you can use only the rounded rectangle tool to make a stylish DIY recognizable object. In our next lesson, we'll be making a stylish women's dress icon for our set. Can't for it, let's move on.


