
 Lessons: 8Length: 42 minutes
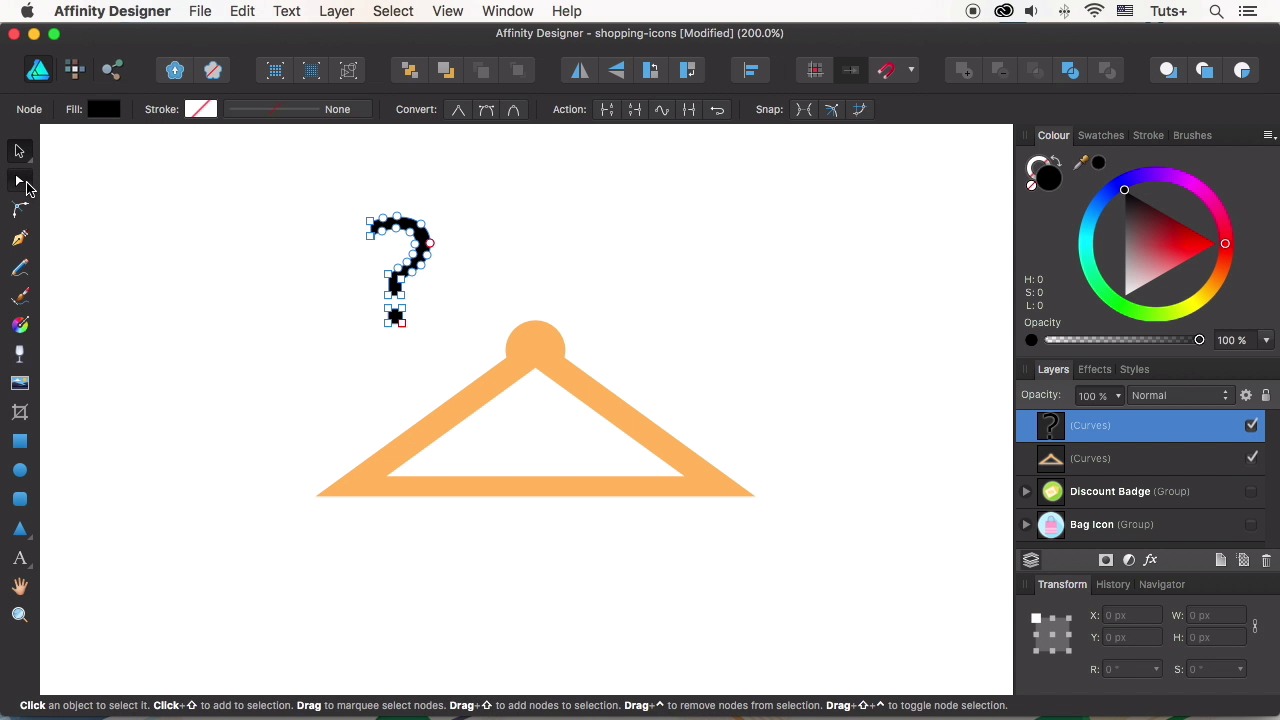
- Overview
- Transcript
2.3 Hanger Icon
In this video we’ll be designing a dress hanger icon, using the Operations panel and the Artistic Text Tool of Affinity Designer to make our workflow faster and easier.
1.Introduction
1.1Introduction01:17
2.Creating Flat Shopping Icons
2.1Shopping Bag Icon07:13
2.2Discount Badge Icon07:01
2.3Hanger Icon05:21
2.4Shopping Basket Icon06:07
2.5Dress Icon05:33
2.6Cargo Truck Icon07:41
3.Conclusion
3.1Conclusion01:36
2.3 Hanger Icon
Hello, guys you're watching how to design flood icons in Affinity Designer course with Ilya Socholova at Tuts+. In this video, will be designing a dress hanger icon using the Operations panel of Affinity Designer. Let's start. So let's take the Triangle Tool, And make a squashed shape of about 220 by 80 pixel size. Let's fill it with light orange color. To make it look like a wooden surface. And copy our shape by pressing Cmd+C and Cmd+V. Hold Cmd+Shift and make the top copy somewhat smaller. And let's add one more detail to the base of the hanger. Take the Ellipse Tool, And form a small circle of 30 by 30 pixel size covering the top point of the triangle. Select all the elements and align them to the center, and now select only the circle and the larger triangle. Use the add function in the Operations panel on top to merge the two elements together, forming one single shape. Finally, select the modified shape and the smaller triangle, and apply subtract operation to cut the triangle out, forming a hole. Great, it already looks like a stylized hanger. The only thing we need to add here is a metal hook on top. if you don't wanna spend a lot of time on drawing the shape manually, there is a faster way. The hook reminds us of a question mark and you can actually use this similarity. Let's switch to the artistic text tool and type a question mark. Now let's select the appropriate font to make the question mark both geometric and straight edged. I select the Verdana font. Click right mouse button and convert to Curves. Now our question mark is not a piece of text anymore, it is an editable shape. Take the Node Tool and delete the point of the question mark. Select two bottom nodes and drag them down using the arrow key, making the hook longer. Place the shape at the top of the hanger and the use the Layers panel to drag the hook beneath the hanger shape. Set the field color to light grey for the metal surface. We already have a circle icon base, so we can just copy it from one of our previous icons. And drag it beneath the hanger in the Layers panel. Select both shapes and group them. Align the shapes. Change the color of the icon to light violet. I like the combination of violet and orange colors. It gives a good contrast to our icon. Change the color of the shadow as well. And use the Node Tool to make the shadow fit the hanger. Move the nodes around to making the shadows somewhat narrower. And position the nodes, hiding the amended pieces of the shadow behind the hanger. Play with the colors, Make some minor adjustments here, if needed. Make the hanger and the shadow a little bit smaller. Now it looks fine. Great job, our third job icon is ready, we have some work to do though. Next time, we'll be doing a shop basket item combining the shapes. Don't miss it.


