
 Lessons: 8Length: 42 minutes
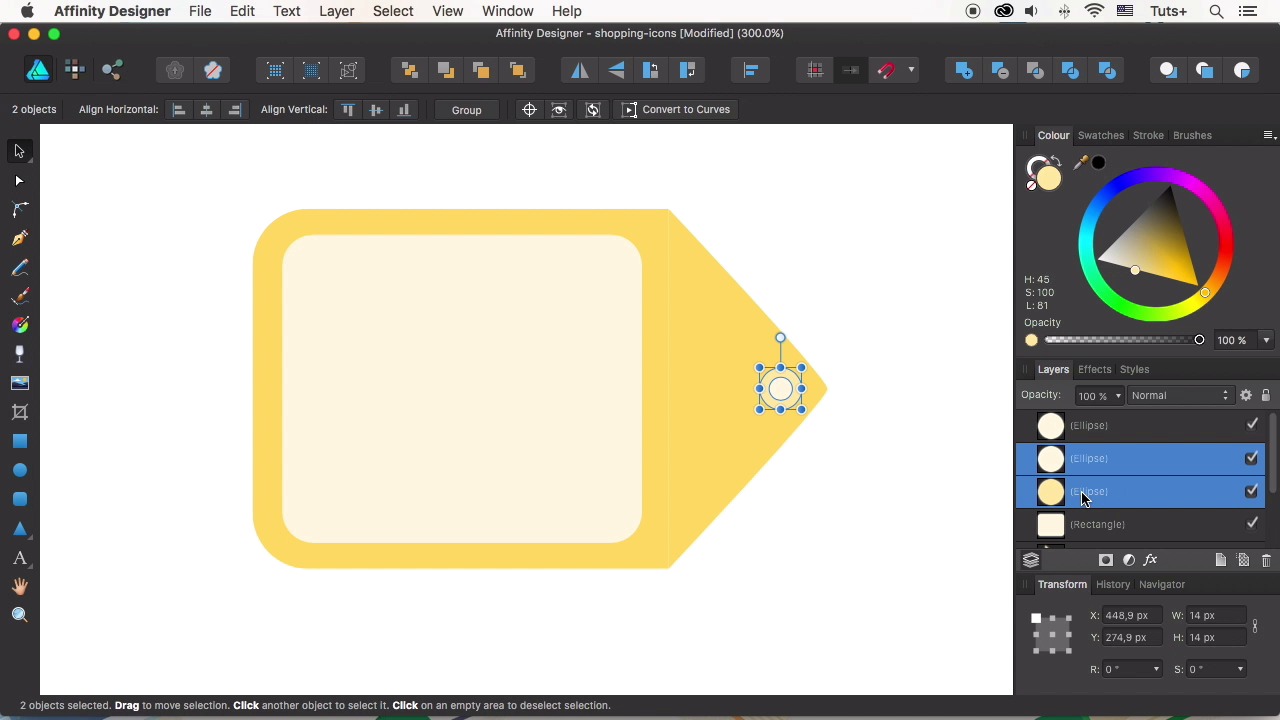
- Overview
- Transcript
2.2 Discount Badge Icon
This time we’ll be designing a discount badge icon, using basic shapes, operations, the Vector Crop Tool, and the Artistic Text Tool.
Related Links
1.Introduction
1.1Introduction01:17
2.Creating Flat Shopping Icons
2.1Shopping Bag Icon07:13
2.2Discount Badge Icon07:01
2.3Hanger Icon05:21
2.4Shopping Basket Icon06:07
2.5Dress Icon05:33
2.6Cargo Truck Icon07:41
3.Conclusion
3.1Conclusion01:36
2.2 Discount Badge Icon
Hello and welcome back to How to Design Flat Icons in Affinity Designer Course with Yulia Sokolova at tuts+. This time we'll be designing a discount badge icon using basic shapes, operations and various tools, let's do this. Let's make our first icon invisible in the Layers panel and start making a new one. Take the Rounded Rectangle Tool and select some nice yellow tint from the Color panel. Make a shape of about 160 by 120 pixels. And adjust its size in the Transform panel if needed. Let's make the corners less rounded, setting the radius to 15% in the Control panel on top. Now, take the Vector Crop Tool and shrink the right part of the shape. The shape is still editable so you can always switch on back to its initial look using the same tool. Let's make a triangle of the same color. Rotate it to 90 degrees and attach the shape to the rectangle. Set its size to 120 by 120 pixels to make the shapes fit each other. Finally, select both shapes and align their middles in the upper toolbar. Now, open the Arrange menu. Go to Space Horizontally and remove the Auto Distribute tick. This will make the objects stick to each other with no gap between them. Squash the triangle. And convert it to curves. Now let's make its right corner smooth. And use the Node Tool to shorten the node handles making the corner a bit more pointed. Let's make another rounded rectangle on top of the first one. Reducing the corner radius value to 10%. And fill it with a very light yellow color. Align the shapes. And position the rectangle making it fit the badge. Now let's take the Ellipse Tool and make a hole on the badge of about 9 by 9 pixel size. Copy the shape by pressing Cmd+C and Cmd+V and make the copy a bit larger. Change the fill color to darker yellow. Now let's cut the hole in the circle. Duplicate the smaller circle once again so that both big and small circles and add to the operations panel on top, you subtract to cut the shapes. Now, select the triangle and the remaining circle and use the subtract again to cut the hole in the badge. Rearrange the shapes and done. Now let's add the percent sign to the badge depicted in this count. Take the Artistic Text Tool and type the percent sign. Let's select some bold font to make it clearly visible even if the icon is going to be very small. I'm using the Bowlby One free font. You can find a link on it down below if you like to use the same font. I think it is bold enough and can be clearly seen in any size. Increase the size of the font to 72 points. Align the text to the center of the shape. Let's change the color of the text. Select the percent sign and click and drag the eye dropper from the Color panel right onto the yellow part of the badge to pick the needed color. Now we can click a small color circle next to the eye dropper icon, this way applying the selected color. Easy as that. Select and group all the elements of the badge. And let's duplicate the blue circle base of our previous icon. Drag the copy under the discount badge in the Layers panel. Align the shapes horizontally and vertically. And let's rotate the badge 30 degrees to make the icon composition more balanced. And finally, let's tweak the shadow shape. There is no need to make a new one, so we can adjust the size of the existing shadow making it fit the edges of the badge. And use the Node Tool to edit the nodes attaching them to the badge. If you want to delete the needed nodes, just select them with the Node Tool and use the Delete key of your keyboard. Let's change the color of the icon base to a nice grass green shade. And change the shadow color to green as well. And here we have it, our discount badge icon is finished. Nice job. We've discovered some new tools and functions of Affinity Designer. Let's move on and see some other tips and tricks that can be used to make a hanger icon. Don't miss it.


