
 Lessons: 7Length: 38 minutes
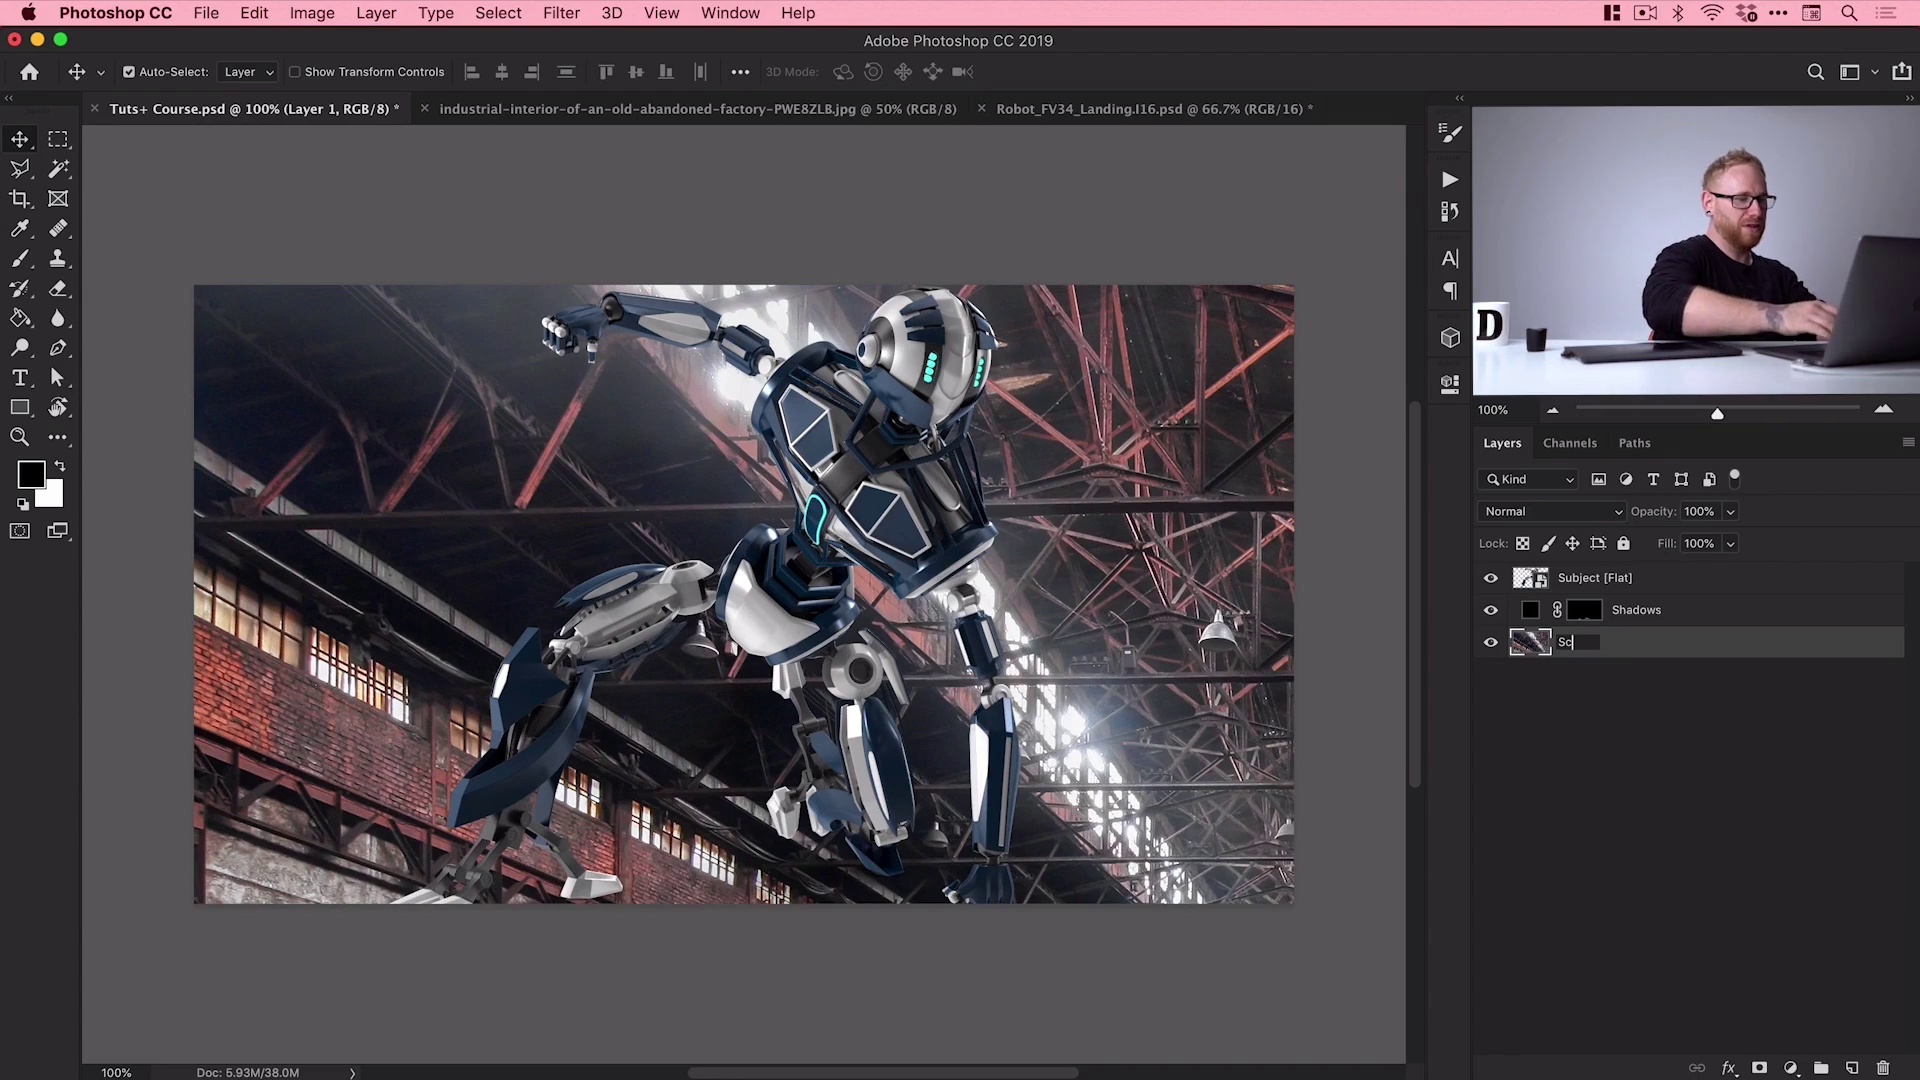
- Overview
- Transcript
2.1 Setting Up Our Project
In this lesson, we’ll begin learning how to use Adobe Photoshop for creative compositing. We'll start by downloading the necessary assets from Envato Elements and setting up the layers in our scene. Along the way, you'll learn how to cut out an image in Photoshop.
Useful Links
2.1 Setting Up Our Project
Okie-dokie, so we're now in Photoshop. I have a new document. I've created a canvas cities 1920 by 1080 pixels. This is what we're going to be working with. But, first of all, well, we need some images. So we're gonna jump over to Envato Elements, remember that the links to download the images that you'll see are provided with the course. So we have the industrial setting here, so we can sign in, download, there we go, we'll get that one, and if I switch over to the other tab, you can see we have a robot here. Now this is listed under the 3D category, and the great thing about these 3D assets is you can spin the camera around and download what you want at a specific angle. It's incredibly useful if you're looking to take an image of a robot, like in this example, and match it with your scene. So I can click here, View 3D Render. Elements does its thing, and now I can click, and drag, and rotate this around. So I'm going for something like, that makes pretty cool, pretty menacing, but we're kinda go with something like this. Now, you can download it as a PNG. Essentially, it will have transparency, and it will include the shadows, but if you want a layered PSD where you can turn the shadows on, off, and a few other things, then I would definitely recommend checking PSD, and then you can download that at this specific angle. So I've already gone ahead and downloaded these images. Let's just switch over here. So we've got the industrial image, and the robot, and if they're packaged inside a zip folder, just double-click the zip folder. If you're on Mac it will extract the files. If you're on PC, just drag the files out of the zip folder onto your desktop, and once you've got them we're ready to open these in Photoshop. So we could right-click and go Open With, or we could just drag these down here, or if you're on a PC, go to File > Open, and you can do that on a Mac as well. So there's multiple ways to get these images in. So you can see we have our robot at our desired angle, we have this subject flat layer, we can turn that off and on, and the beauty of this is we also have shadows. So I'm going to keep the shadows, cuz they could be pretty useful. So I'm gonna hold shift and select both of these layers, right-click > Duplicate Layers, and I'm gonna select the document as my PSD. Click OK, and I can see that they are now in here. So next we need the background, we have our industrial setting, so let's just go to Select > All, and then go Edit > Copy. Because this is a JPEG a flat image it will just copy everything that's selected with the marching ants. Jump over here. Click on our background layer, go to Edit > Paste. If you do paste this above the subject like this by mistake, it definitely happens, just drag that underneath. Now, I can actually get rid of the background layer by pressing Delete or Backspace on the keyboard, we don't need that anymore, and I'm gonna call this layer Scene, and I'm just going to name this Robot, so I'm just double-clicking on the text to rename, we've got Shadows as well. Okay, so, we've got our robot, we've got some shadows we've got the scene now we need to kind of like group everything together, because as we create these compositions they can get pretty complicated, so just naming your layers, organizing your folders from the beginning, is good practice. So what I'm gonna do is I'm going to hold Shift, select both of these layers, right-click, and I'm going to select Group from Layers, and we can give this group a name. So I'll call this Robot, and then I've got Scene down here. Now at the moment, the scene is a JPEG, so it's not a smart object, and then what we wanna do is we want to convert most of what we bring into Photoshop into a smart object. The reason we do this is because smart objects enable us to add things like effects and filters. As smart filters we get a lot more flexibility, we can edit effects that we apply later on in the course, and we can delete them as well. If we don't use smart objects then any effects and things you apply, they're permanent. The only way to get rid of them is to go Edit > Undo, Undo, Undo, and we don't wanna do that. So we're gonna work a little bit smaller, so we can right-click this scene as soon as we pasted it in, and go Convert to Smart Object. Now what this does is kind of creates a snap shot of this image of this size. So if I just zoom out, you can see it's quite a large image. We'll go to Edit > Free Transform, and because it's a smart object, it remembers all the data of this image at its native size. So if I scale it down, back up, back down, back up, it's not gonna lose any quality, whereas if it's a JPEG, you scale it down small and you bring it back up again, and it's not a smart object, guess what? We're gonna get pixelation, so this is a great way to avoid that. So I'm just scaling this down with the free transform option, and I can double-click, or press Return, to set that. There we go, my scene looks a pretty good size now I think. Then we have our robot. So now I'm just gonna create a new photo from the bottom of the Layers panel, and I'm gonna call this Scene. Nope, [LAUGH] spell that correctly. Scene, there we go. Now I'm gonna drag my scene image into the scene, and I'm going to create one more folder now, and I'm gonna call this effects. This is where we're going to apply some dramatic effects and everything towards the end, and we'll pop that up there. So that's how I like to structure my composite. I have the scene, I have the subject, or any subjects. Sometimes I'll have an objects layer as well, other things that might be there that don't really fit into any category, and then I've got the effects right at the top. [MUSIC] Okay, so we're nearly done setting this up. The only other thing I'm going to do now is select the robot and the shadows, and do the same thing again. We get to the background, go to Edit > Free Transform. We'll just zoom out a little bit, and I'm gonna hold shift and scale this down. I'm just gonna try and position this roughly where I would like it to be. So something like this ,and you can see those shadows underneath look pretty cool as well. You can turn those off and on. So they help everything just seem a little bit more believable, but there we go. So that's the end of the first lesson. In the next lesson, we're going to take a look at adjusting levels, lighting, and color balance, and yeah, so I'll see you in the next lesson.


