
 Lessons: 13Length: 1.2 hours
- Overview
- Transcript
3.4 How to Create the Moon Materials
In this lesson, you will learn how to create basic materials and how to use and apply them to our moon model.
1.Introduction
1.1Welcome to the Course00:40
2.Cinema 4D Tools
2.1Cinema 4D Setup05:43
2.2How to Create Basic Shapes05:48
3.Modelling the Moon
3.1How to Edit a Sphere06:02
3.2How to Extrude the Craters09:29
3.3Creating Moon Craters09:43
3.4How to Create the Moon Materials03:55
4.Lighting and Rendering
4.1How to Create Different Lighting Setups05:46
4.2How to Use the Camera Tool02:57
4.3How to Render the Moon02:52
5.Editing in Photoshop
5.1How to Import the Render Into Adobe Photoshop11:01
5.2Final Touches09:32
6.Conclusion
6.1Thanks for Watching!00:58
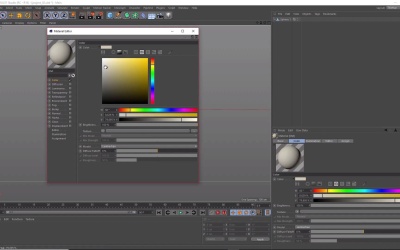
3.4 How to Create the Moon Materials
Hi everyone, and welcome back to create a low poly moon with Cinema 4D. So in the last video, we took a look at a couple of different ways we could models the craters for our moon. In this video, we'll take a look at how we can color our moon using materials. Now the way that we color models in Cinema 4D is by using materials. To create a new material, click on the Create button at the bottom of the screen here, and select New Material. You can also press Ctrl+N on the keyboard and it will do the same thing. So let's go ahead and do that. And this will spawn a default material in the bottom of the screen here which is usually displayed as a gray sphere. So I double click on this material here, and now we can start editing the properties of it in the Material Editor. So this will include a whole range of different options ranging from Color, to Transparency, to Reflectance, and also if you wanted, some Light, so some glow if we selected the Glow option here. But for now the only thing that we're interested in is the Color option, which is at the top here. So let's go ahead and select Color and un-tick anything else which is selected by default such as the Reflectance here. And from here, we can now choose the color of our moon. So either double-clicking on the color square here we can go ahead and choose a warm grey color for our moon. And you'll notice now as we select a color, this should also be reflected on the bottom here so we can know exactly what sort of color material we are adding to our objects. So I'm just going to add a light, sort of warm grey here. Then once you're happy with the color, all you need to do is close it. And now to add the color to our object simply click and drag the material onto the moon on our view port like so. Or we can also click and drag the material into our sphere or our moon in the list view. Now this can be quite handy if there are a lot of objects in the view port and it's quite difficult to select the objects that you want. So let's go ahead and delete the duplicate material in our sphere, cool. So we can also color a selection of polygons if you wanted to use different material for the same object. In order to do this, let's go ahead and create a new material. And with this new material let's go ahead and make a darker color like so, removing the reflectance. Now using a combination of the polygons and the live selection tool, let's go ahead and select our sphere like so and select these polygons here. And now drag our new material into the selection. Now if we deselect that you'll notice now that our selection is slightly darker, or it's change color compared to the rest of our polygons. And this is also reflected in our list view like so. We can go ahead and select all the craters and add this new color to it. But for now, that's it for this video. In the next video, we'll go through how to create different lighting set-ups. See you all there.


