

Do you want to learn how to make glossy text in Photoshop? In this tutorial, I'll show you how to create a shine effect in Photoshop using the Layer Style panel. And if you want to save time, you can use Envato to find other shiny effects.
Follow this shiny font effect design video tutorial on our Envato Tuts+ YouTube channel:
What You'll Learn in This Glossy Text Tutorial
- How to make shiny letters in Photoshop
- How to create a shine text logo without a shiny font
- How to make the text look 3D
- How to make something look shiny with layer styles
Tutorial Assets
The following assets were used during this tutorial:
- Font: Lobster 1.4
- Background and Contour inside the zip file attached to this tutorial
1. How to Add a Shine Effect in Photoshop
Step 1
Go to File > Open, and open the background image.


Step 2
Pick the Horizontal Type Tool (T) with these settings:
- Font: Lobster 1.4
- Size: 210 pt
- Anti-Aliasing mode: Sharp
- Color: White
#ffffff


Step 3
Write "Shiny" and place it in the center of the document.
To center a layer, press Control-A to select the document, and then pick the Move Tool (V) and click on the Align Vertical Center and Align Horizontal Center icons.


Step 4
Double-click the Shiny layer to open the Layer Style window.
Now, this is how to change text color in Photoshop with a gradient effect. Feel free to turn on and off the following effects to see what's changed. Let's start with the Gradient Overlay; this way you will be able to see better what is happening.
Add a Gradient Overlay with these settings:
- Blend Mode: Normal
- Dither: Unchecked
- Opacity: 100%
- Reverse: Unchecked
- Style: Linear
- Align with Layer: Checked
- Angle: 90º
- Scale: 100%
Click on the Gradient Bar and make a gradient with these settings:
- First Stop Color:
#ffc600 - First Stop Position: 0%
- Second Stop Color:
#f8e45f - Second Stop Position: 100%


Step 5
Add a Bevel & Emboss with these settings:
- Style: Emboss
- Technique: Smooth
- Depth: 286%
- Direction: Up
- Size: 10 px
- Soften: 0 px
- Use Global Light: Unchecked
- Angle: 96º
- Altitude: 16º
- Gloss Contour: Click on the Contour box and load the file Shiny Contour.shc (zip file)
- Anti-Aliased: Checked
- Highlight Mode: Screen
- Highlight Mode Color:
#ffee93 - Highlight Mode Opacity: 67%
- Shadow Mode: Normal
- Shadow Mode Color:
#190a20 - Shadow Mode Opacity: 9%


Step 6
Add a Stroke with these settings:
- Size: 4 px
- Position: Outside
- Blend Mode: Normal
- Opacity: 100%
- Overprint: Unchecked
- Fill Type: Color
- Color:
#7344ac


Step 7
Add a Drop Shadow with these settings:
- Blend Mode: Normal
- Color:
#ae00f6 - Opacity: 100%
- Use Global Light: Unchecked
- Angle: 120º
- Distance: 5 px
- Spread: 100%
- Size: 5 px
- Contour: Linear
- Anti-Aliased: Unchecked
- Noise: 0%
- Layer Knocks Out Drop Shadow: Checked


Your image should look like this:


Step 8
Select the Shiny layer and press Control-J to duplicate it. Then right-click and choose to rename it to Shiny TOP.


Step 9
Right-click the Shiny TOP layer and choose Clear Layer Style. Then double-click the layer to open the Layer Style window.
Add a Bevel & Emboss with these settings:
- Style: Inner Bevel
- Technique: Smooth
- Depth: 551%
- Direction: Up
- Size: 16 px
- Soften: 0 px
- Use Global Light: Unchecked
- Angle: 96º
- Altitude: 16º
- Gloss Contour: Cove - Shallow
- Highlight Mode: Screen
- Highlight Mode Color:
#ffee93 - Highlight Mode Opacity: 67%
- Shadow Mode: Normal
- Shadow Mode Color:
#190a20 - Shadow Mode Opacity: 9%


Step 10
Add an Inner Shadow with these settings:
- Blend Mode: Multiply
- Color:
#bf8c01 - Opacity: 21%
- Use Global Light: Unchecked
- Angle: -45º
- Distance: 5 px
- Choke: 0%
- Size: 5 px
- Contour: Linear
- Anti-Aliased: Unchecked
- Noise: 0%


Step 11
Add a Gradient Overlay with these settings:
- Blend Mode: Color Burn
- Dither: Unchecked
- Opacity: 100%
- Style: Linear
- Align with Layer: Checked
- Angle: 90º
- Scale: 100%
Click on the Gradient Bar and make a gradient with these settings:
- First Stop Color:
#a5a5a5 - First Stop Position: 4%
- Second Stop Color:
#ffffff - Second Stop Position: 27%
- Third Stop Color:
#e2e2e2 - Third Stop Position: 74%
- Fourth Stop Color:
#b2b2b2 - Fourth Stop Position: 100%


Step 12
Add an Outer Glow with these settings:
- Blend Mode: Screen
- Opacity: 75%
- Noise: 0%
- Color:
#eac919 - Technique: Softer
- Spread: 0%
- Size: 0 px
- Contour: Linear
- Anti-Aliased: Unchecked
- Range: 50%
- Jitter: 0%


Step 13
Add a Drop Shadow with these settings:
- Blend Mode: Exclusion
- Color:
#1eff00 - Opacity: 100%
- Use Global Light: Unchecked
- Angle: 120º
- Distance: 3 px
- Spread: 100%
- Size: 3 px
- Contour: Linear
- Anti-Aliased: Checked
- Noise: 0%
- Layer Knocks Out Drop Shadow: Checked
After that, click OK


Step 14
Now hold Control and click on the Shiny and Shiny TOP layers to select both. Then press Control-G to group the layers.


Step 15
Double-click the group layer to open the Layer Style window.
Add a Drop Shadow with these settings:
- Blend Mode: Normal
- Color:
#000000 - Opacity: 30%
- Use Global Light: Unchecked
- Angle: 120º
- Distance: 3 px
- Spread: 39 %
- Size: 5 px
- Contour: Linear
- Anti-Aliased: Checked
- Noise: 0%
- Layer Knocks Out Drop Shadow: Checked
After that, click OK.
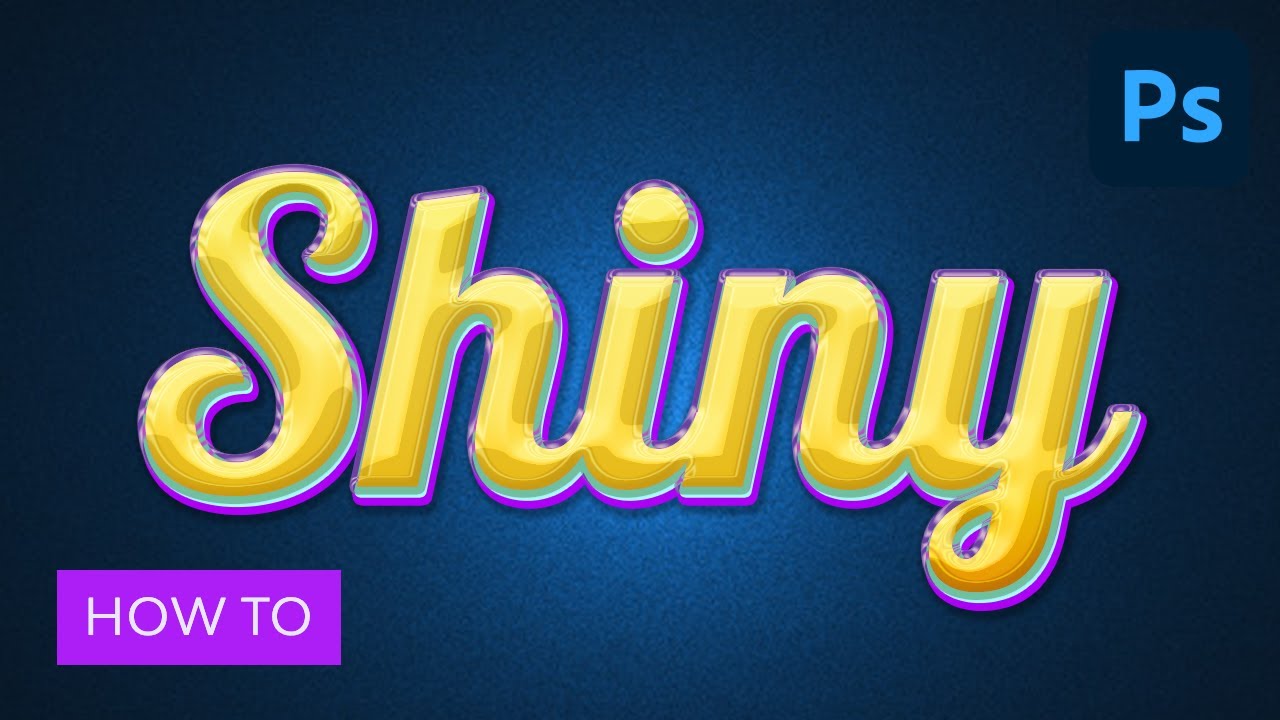
And the result is:


Congratulations, You're Now Done!
In this tutorial, you learned how to create a colorful and shiny text effect in Adobe Photoshop. We started out by creating a layer style, and then we added another layer style on top of that to complement the effect. And now you know how to make a glossy effect in Photoshop!
You can also apply this tutorial to create silver or gold text in Photoshop.
Other Shiny Letter Text Effects
There are many ways to make shiny letters in Photoshop, so if you want a different effect, here are a couple of propositions available on Envato:
Blue Shine Text Effect (PSD)


This effect for shiny letters is quite similar to the one we've been creating in the tutorial—the letters seem 3D, and they have nice shiny edges. To use this shine text effect, you just need to replace the text with your own.
Ultra Realistic Reflective Text Effect III (PSD)


If you need real shine, this advanced glossy effect in Photoshop will make your text look unique. You don't need a special shiny font—just use any font you like and replace the text with your own. Start experimenting with metallic text in Photoshop with this download.
3D Chrome Generator Shine Text Effect (ATN, PSD, PDF)


Looking for an easy way to create metallic text in Photoshop? Add a beautiful shine to your text logo with this action. It looks like real chrome, and your letters will reflect the colors of the environment (that is, the background you use). If you need extra help to customize your shiny font, use the attached video instructions.
Holographic Glass Text Effect (PSD)


Are you looking for a glossy effect in Photoshop? You don't have to know how to make something glossy in Photoshop to achieve an effect like this. Just replace the text in this file, and you'll get colorful shiny letters with a sparkling text effect in seconds.
Shiny Holographic Text Effect (PSD)

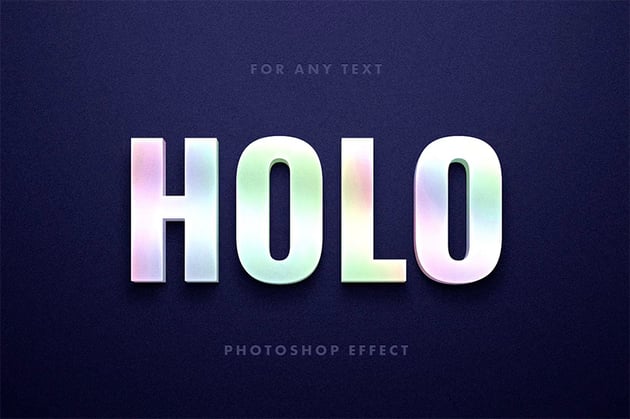

Create cool holographic shiny letters with this versatile PSD shiny effect. It's perfect for a dazzling logo or a shiny font. Just drop your design into the Smart Object and watch it transform instantly into eye candy.
More Text Effect Tutorials
Keep experimenting with shiny effect text designs. If you enjoyed this glossy text tutorial, you may also like these courses:

 How to Make a 3D Hologram Text Effect Photoshop Action


 How to Create a Magma Hot Text Effect in Photoshop


 How to Make a 3D Text Effect in Photoshop


 How to Create a Cartoon Gradient Text Effect in Adobe Photoshop


 How to Create a Clean, Glossy Plastic Text Effect in Photoshop


 Best Resources of 2023: Photoshop Text Effects & Layer Styles


 30+ Cool Photoshop Text Effects, Actions & Styles for 2024

 How to Create a 'Stranger Things' Inspired Text Effect in Adobe Photoshop

 How to Create a Realistic Neon Light Text Effect in Adobe Photoshop

 How to Create a Realistic Chrome Text Effect in Adobe Photoshop
 By
By


