
 Lessons: 15Length: 1 hour
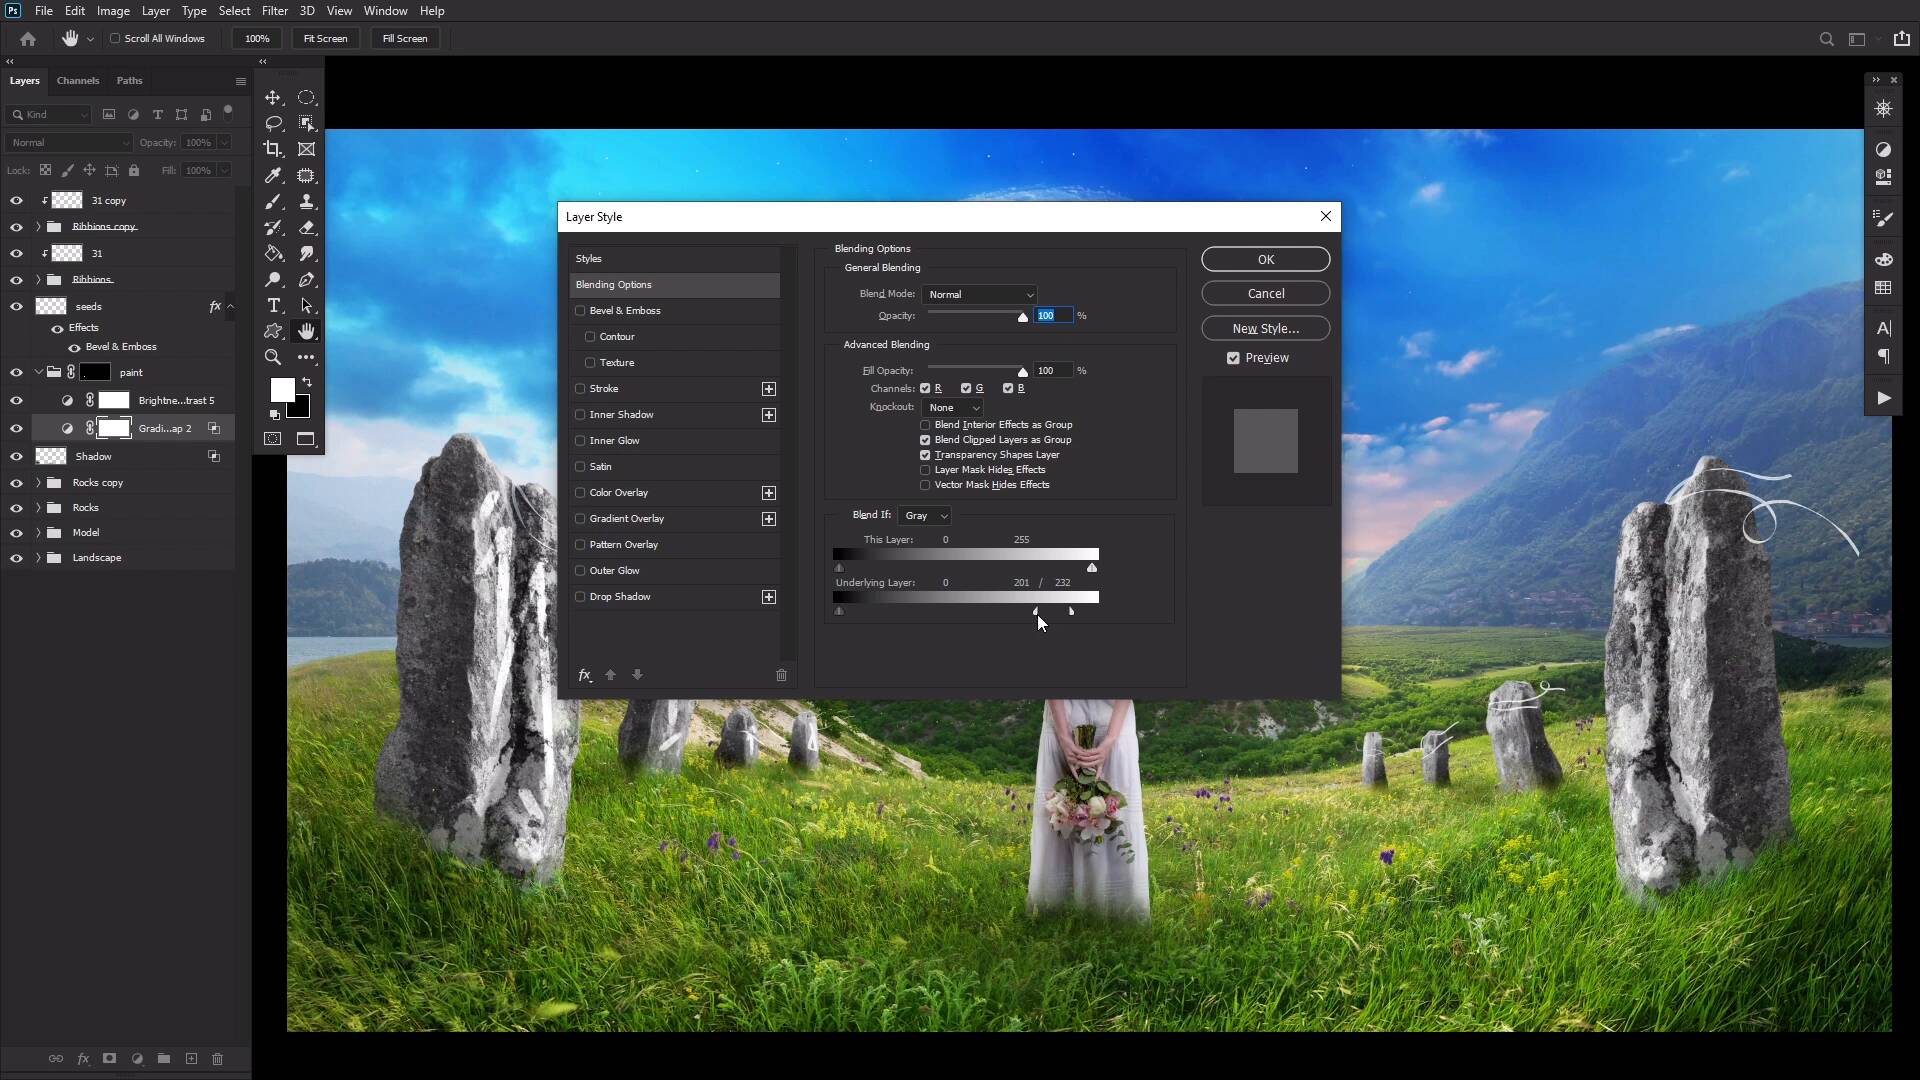
- Overview
- Transcript
4.2 Painting With Adjustment Layers
In this lesson, we will look closely at how to combine the power of adjustment layers and Photoshop layer masks to create special effects such as tattoos, makeup, paint, and more.
Related Links
- Photos on Envato Elements
- 30 Charcoal Texture Photoshop Stamp Brushes
1.Introduction
1.1Introduction00:55
1.2Setting Up Photoshop and Choosing the Right Resources05:25
2.Creating a Landscape
2.1Sky Replacement in Photoshop03:13
2.2Adding Stars and a Planet to the Sky04:19
3.Compositing a Subject
3.1Image Compositing in Photoshop06:28
3.2How to Cut Out an Image in Photoshop Using the Pen Tool03:04
3.3How to Select Hair in Photoshop03:05
3.4How to Use the Object Selection Tool in Photoshop03:12
3.5How to Blend in Photoshop Using Layer Modes 03:01
3.6Lighting Effects in Photoshop10:52
4.Adding Details
4.1Painting Simple Details 05:35
4.2Painting With Adjustment Layers03:01
4.3Creating Depth05:06
5.Color Correction in Photoshop
5.1Color Grading in Photoshop04:01
6.Conclusion
6.1Conclusion01:12
4.2 Painting With Adjustment Layers
Welcome back to Introduction to Photo Manipulation in Adobe Photoshop. In this video, we'll be looking at how to paint with layer adjustments. By adding some symbols to our stones, just to give the image a bit more fantasy-esque interest. Let's start by creating two adjustment layers below our ribbons group. First, a black to white gradient map. And secondly, a brightness contrast layer set to 150 brightness and -50 contrast. Now, let's group these two in a group named Paint, giving it a layer mask filled with black. Now, with any sort of grungy brush, these charcoal Photoshop brushes from Envato Elements will work wonderfully. Mask in various rooms and symbols. I'm just trying different shapes and swirls until I'm like yeah, that looks pretty cool. However, if you want, you can research real runes from various cultures or even books and movies. Now that our runes are painted, we can help them blend a bit better using our old friend Blend If. For the gradient layer, we want to adjust the highlight toggles to where they're around 198 and 232, as seen by these numbers here. While for the brightness contrast layer, we want to adjust the shadow toggles to be 0 and 170. This will remove all of the brightness caused by the paint from the darker areas of the stone. You can finish up by going in with a black, grungy brush to roughen up the edges of the paint, using small little quick strokes. This is optional, but I totally think it's worth the effort and only takes a few minutes. That's it for our painted rocks. A very simple and quick effect that can actually be applied to multiple other things. Tattoos, face paint, graffiti art. It's a very versatile technique here, love it. So next time in Introduction to Photo Manipulation, we are moving on to how to add some extra depth to our image. Always a very fun step.


