
 Lessons: 10Length: 41 minutes
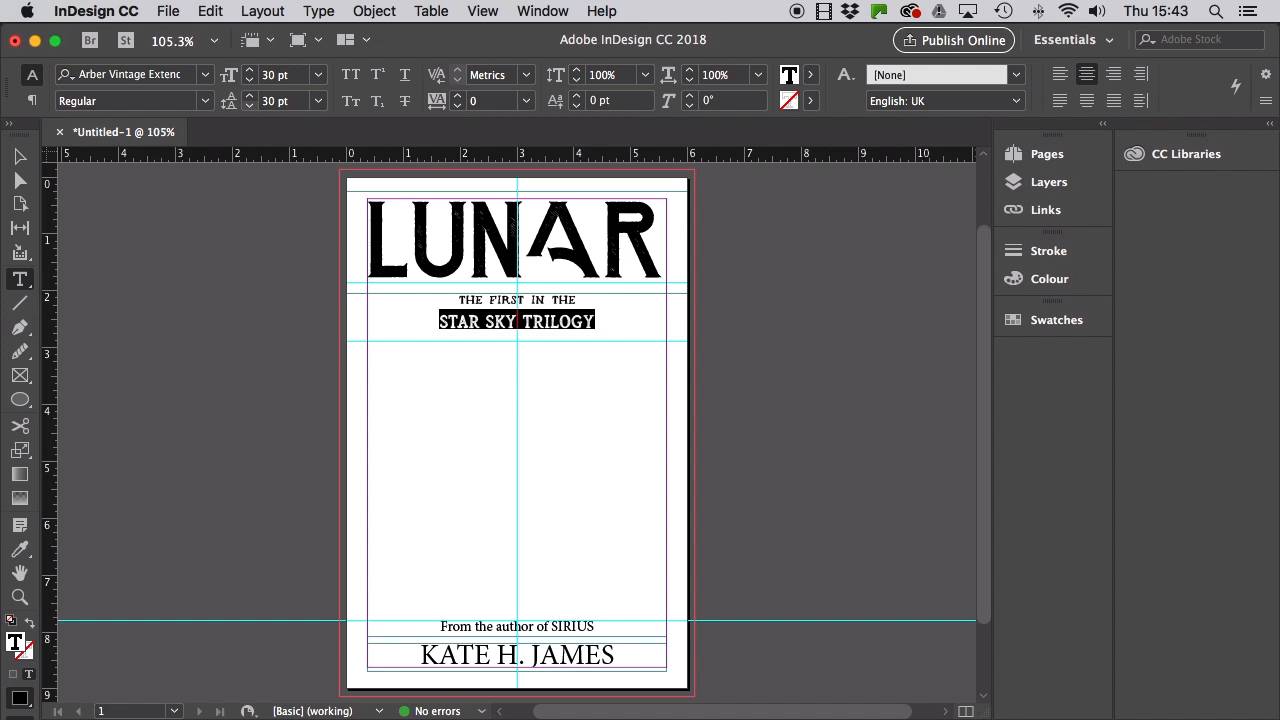
- Overview
- Transcript
3.2 How to Refine Your Design: Part One
Here, we’ll continue to refine our front cover, focussing on how to select typefaces, format typography, and incorporate graphics into the design. We’ll also look at a few ‘good practice’ principles, such as working with layers and viewing covers at true size to assess whether text is legible.
Related Links
1.Introduction
1.1Introduction01:12
1.2What You'll Need to Get Started01:49
2.Getting Started: Genres, Styles, and Sizing Your Cover
2.1How to Find Creative Direction for Your Cover03:44
2.2How to Size Your Cover03:14
3.Designing Your Front Cover
3.1How to Draft the Front of Your Cover02:13
3.2How to Refine Your Design: Part One06:23
3.3How to Refine Your Design: Part Two08:32
4.Expanding Your Cover Design
4.1How to Expand Your Design Into a Full Cover07:34
4.2How to Export Your Cover for Printing03:25
5.Conclusion
5.1Conclusion02:51
3.2 How to Refine Your Design: Part One
Okay, we're still here working on our front cover. It's looking a bit blank at the moment, so let's get working on changing that. So, first thing to look at is the typography view cover. Personally, I'm more of a type centric person so I always like to get the vibe of this right before I consider the graphics too much. You might be the other way around, and that's fine too. But because I'm leading this course, we're going to selfishly do it my way. Okay, so let's get the text content up on the cover first. So switch to the type tool by choosing it from the Tools panel over here, or hit T on your keyboard. So drag across the page to create a large text frame across the top, pulling the bottom edge down to the first guide and making sure that the frame is reasonably central. Type in your title, so here it's going to be lunar, L-U-N-A-R, okay, cool. From the top controls panel, big up that form size to really generous 130 points. And set the text to align center, okay, next text frame, drag one out to create a subheading. I'm going to type in the first in the, then a line break and Star Sky Trilogy and set that to 18 points, one eight, and align center for now. Another small text frame here down at the bottom resting the top edge on this guide, I'm going to type in from the author of Serious, and set that to 18 points, and align center again. Okay, final text frame at the bottom of the page, author name here, which is Kate H James. And set that to align center, and a slightly larger font size at 36 points. So now the text is mapped out, we can start to have some fun with the type faces. Of course, when you're designing your own covers, you're going to want to experiment with lots of fonts, and you might find that you use something for a while and change your mind later. And that's all good, it's just part of the design process. So this is the sped up Blue Peter version, where I'm going to show you my final results after playing around with things. All the fonts I'm using for the cover you can find over on Envato Elements, and you'll find reattached to this lesson the resource list which details the links to these, so make sure to check that out, okay? So fonts I'm using for the cover are Baddest for the header font, let's get that applied from the font list. I want the rough way, not the regular, that's nice. Okay, let's increase the tracking, the letter spacing just a little to 10 to spread it out a bit more. Okay, for the next line down, just the first in there, I've opted for Native, and increase the tracking of this to 60. For Star Sky Trilogy I want to use Arber Vintage Extended. And I'm going to increase the font size a bit, making this line 30 three zero points in size. I'm also going to set the leading to 30 points as well, to separate that a bit more from the interline, okay, awesome. For from the author of, I'm going to set that in Arber Vintage Extended, and pull out just the book name, Sirius, in that kind of brand font that we've established, which is Baddest in Rough. And increase the tracking across that whole piece of text to 70. Let's just tweak the size of Sirius down to 16 points. Let's set the author name in Arber Vintage Extended and increase the tracking to 80, awesome, thst's looking really nice. To keep everything organized on our cover design, we should separate elements into their own layers. So head over to expand the layers panel, or go up to Window > Layers if you can't see it, and double click on layer one. Let's rename it type, and let's lock that layer as we've done with that for now. Right, over to my second favourite part of the design, which is the graphics. Let's choose new layer from the layers panel menu, and rename this image and click OK. And then drag this down to sit beneath the type layer. In your Finder window, navigate to the folder of Lunar Moons from Space, from Elements. Cool, okay, so we want to use the EPS formats. Open up the Moon-02-Cresent.eps file in Illustrator. Just select it and Edit > Copy, and minimize the window, done. Okay so head back to your InDesign document and Edit > Paste it onto the image layer. And then hold Shift and scale it down, position it centrally. Okay, cool, okay and repeat. For a bit of visual difference, open up the Moon-03-Crescent.eps file in Illustrator. Copy it. Head back over and paste that in. Scale it down so it looks like it's peeking out from behind the large moon. Okay, right, last moon to go, open up the Moon-03.eps file in Illustrator. And copy it, head back over to InDesign, paste it in. And then right-click Transform > Flip Horizontal. And then move it into a mirrored position, okay, cool. And there we have it, our front cover's starting to come together. In the next lesson we'll work on refining those extra special details, like color and texture, which is really fun. So I'll see you over there.


