
 Lessons: 7Length: 36 minutes
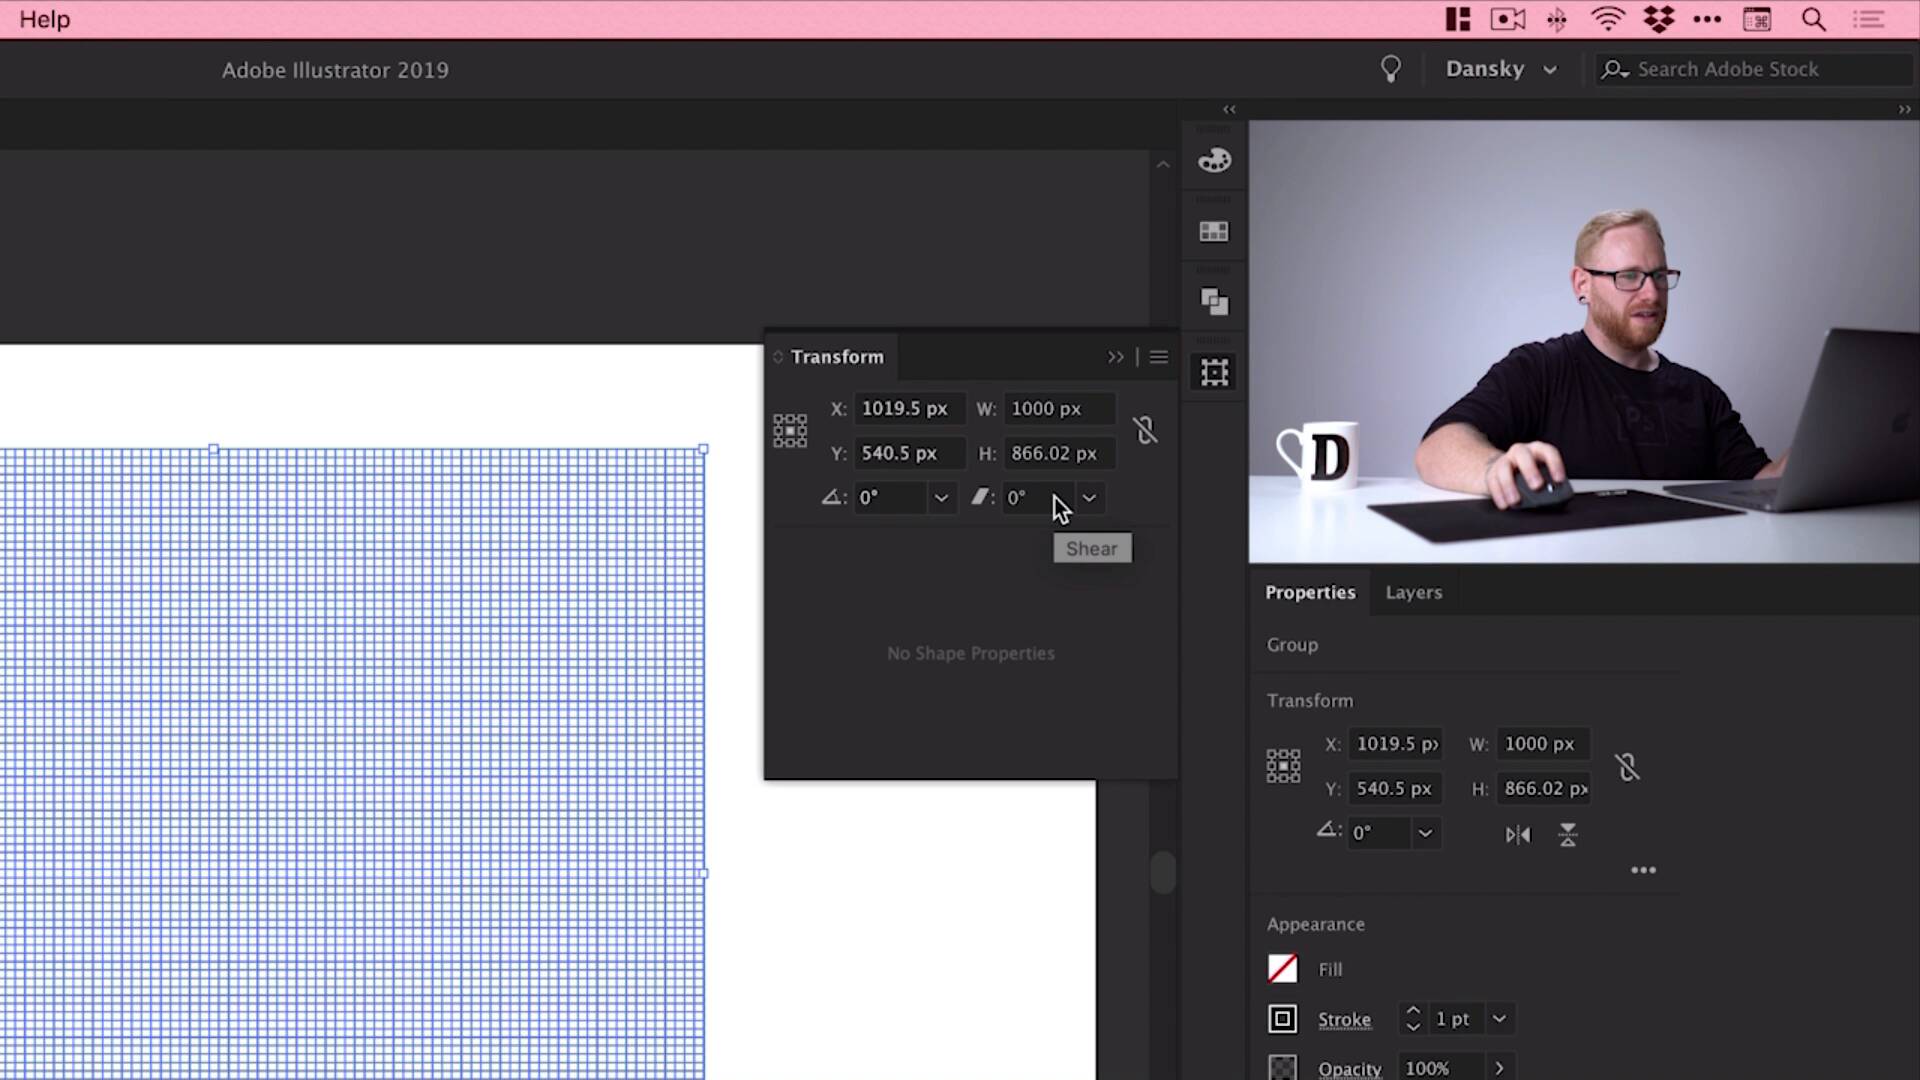
- Overview
- Transcript
2.2 How to Make an Isometric Grid in Illustrator
In this lesson, you’ll learn how to make an isometric grid in Illustrator. I'll show you a quick way to create an isometric grid—something you’ll find useful for all aspects of designing and creating isometric text in Adobe Illustrator.
1.Introduction
1.1Welcome to the Course00:45
2.Designing the Isometric Text Effect
2.1Setting Up Our Project02:19
2.2How to Make an Isometric Grid in Illustrator04:31
2.3How to Make Isometric Text02:41
2.4Adding Layers and Colour08:36
2.5How to Add Shadow to Text in Illustrator09:53
2.6Illustrator Freeform Gradients07:01
2.2 How to Make an Isometric Grid in Illustrator
Hey there, welcome back to the course. In this lesson, we're gonna learn how to quickly create an isometrical grid that we can use in Illustrator. Now, we're not gonna be using this too extensively with the design that we're creating. It's gonna be isometric, but it's not gonna be tied to a grid. However, we're doing a course on isometric design. So I couldn't not include this because you might want to work a bit more specifically on that grid. So whether you want to or not, it doesn't matter, it will be on its own separate layer, you can turn it on or off. And I'm gonna jump into Illustrator now and show you how to quickly create this isometric grid. Okay, so we're now in Illustrator, as we left off, we have our new document. And I'm gonna start by going up here to the Line tool, just left-click and hold until you see the Rectangular Grid Tool. Then we can left-click anywhere on the artboard, and it brings up this dialog box. And then we can specify a width and a height for the grid that we're going to be creating. And we can also choose the number of horizontal and vertical dividers. So I'm just using this here, so I'm going with 100 and 100 again. Now, it doesn't matter what values you use. But the important thing is that the width and the height and the number of vertical and horizontal dividers, they are the same. So this looks good to me, click OK, and you can see we've got quite a detailed grid there. Now we need to turn this isometric, so what we're gonna do is we'll go over here to the Transform panel. Click on the More Options icon, and you see you get a few more options. Now, if you don't see this, if you're on an older version of Illustrator, what you can do is go up to Window and then down to Transform. And I've got this panel here that I can use. In fact, what I can even do is I could dock this as part of my workspace, and then it just pops up there. So once you've got the panel, first thing you're going to want to do is make sure that this is unlinked. So we don't want our width and our height to constrain those proportions as we adjust either one of them. So we're gonna select our height, and in this box we're going to type 86.602%, very specifically this number, and press Return. And you'll see it makes everything a little bit narrower, it squashes it. Next what we're going to do is go to this box here, this is the Shear. And we'll select this and press -30, press Return. And alongside that we have the Rotate box. And in this one, we're gonna type 30 and then press Return. [MUSIC] And there you go, we have our isometric grid. Now you can, of course, scale this, I could zoom out. And I could just scale this up to be giant, just so it covers the entire artboard, and I can adjust the position. Now, whilst you can do this with guides in Illustrator, I like to kind of create this myself, because now I get a lot more flexibility in what I can do with this. For example, I could make this thinner, I could make the guides thicker. I can actually change the other Stroke properties if I wanted. I could have dashed lines, for example, or I can even add a color, so I could go and add something like a cyan. And then if you need to deselect it, go to Select > Deselect. And there you go, I've created my own isometric grid. You can move it around, you get a lot of flexibility with it. Now what I'm going to do is actually just zoom out, it's a very big grid. So I'm gonna select this grid, go over to my Layers panel, I've got mine docked over here. Now, at the moment, we just have Layer 1, that's what you get by default with a new document. So I'm gonna call this, we'll call this Isometric Grid. And what I can do is I can lock this layer by clicking in this space here, just so I don't accidentally move it by mistake. And I can also just turn this off and back on, so I can turn it off and on as and when I like. Now, if I go to the bottom of the Layers panel, I'm going to create a new layer, and I'm going to call this Text. Now, this is where our isometric text design is going to go. As I mentioned a moment ago, we're not gonna be working too specifically with the grid in this course. But it's nice to have it there, if we ever need it, just by turning it off and back on. Okay, so we've set up our isometric grid, it's there on it's own layer if you want to turn it off or on depending on the isometric design you're creating. But we've also set up our new text layer. And in the next lesson, what we're gonna do is actually create some text and then make that isometric as well, so I'll see you in the next one.


