
 Lessons: 7Length: 36 minutes
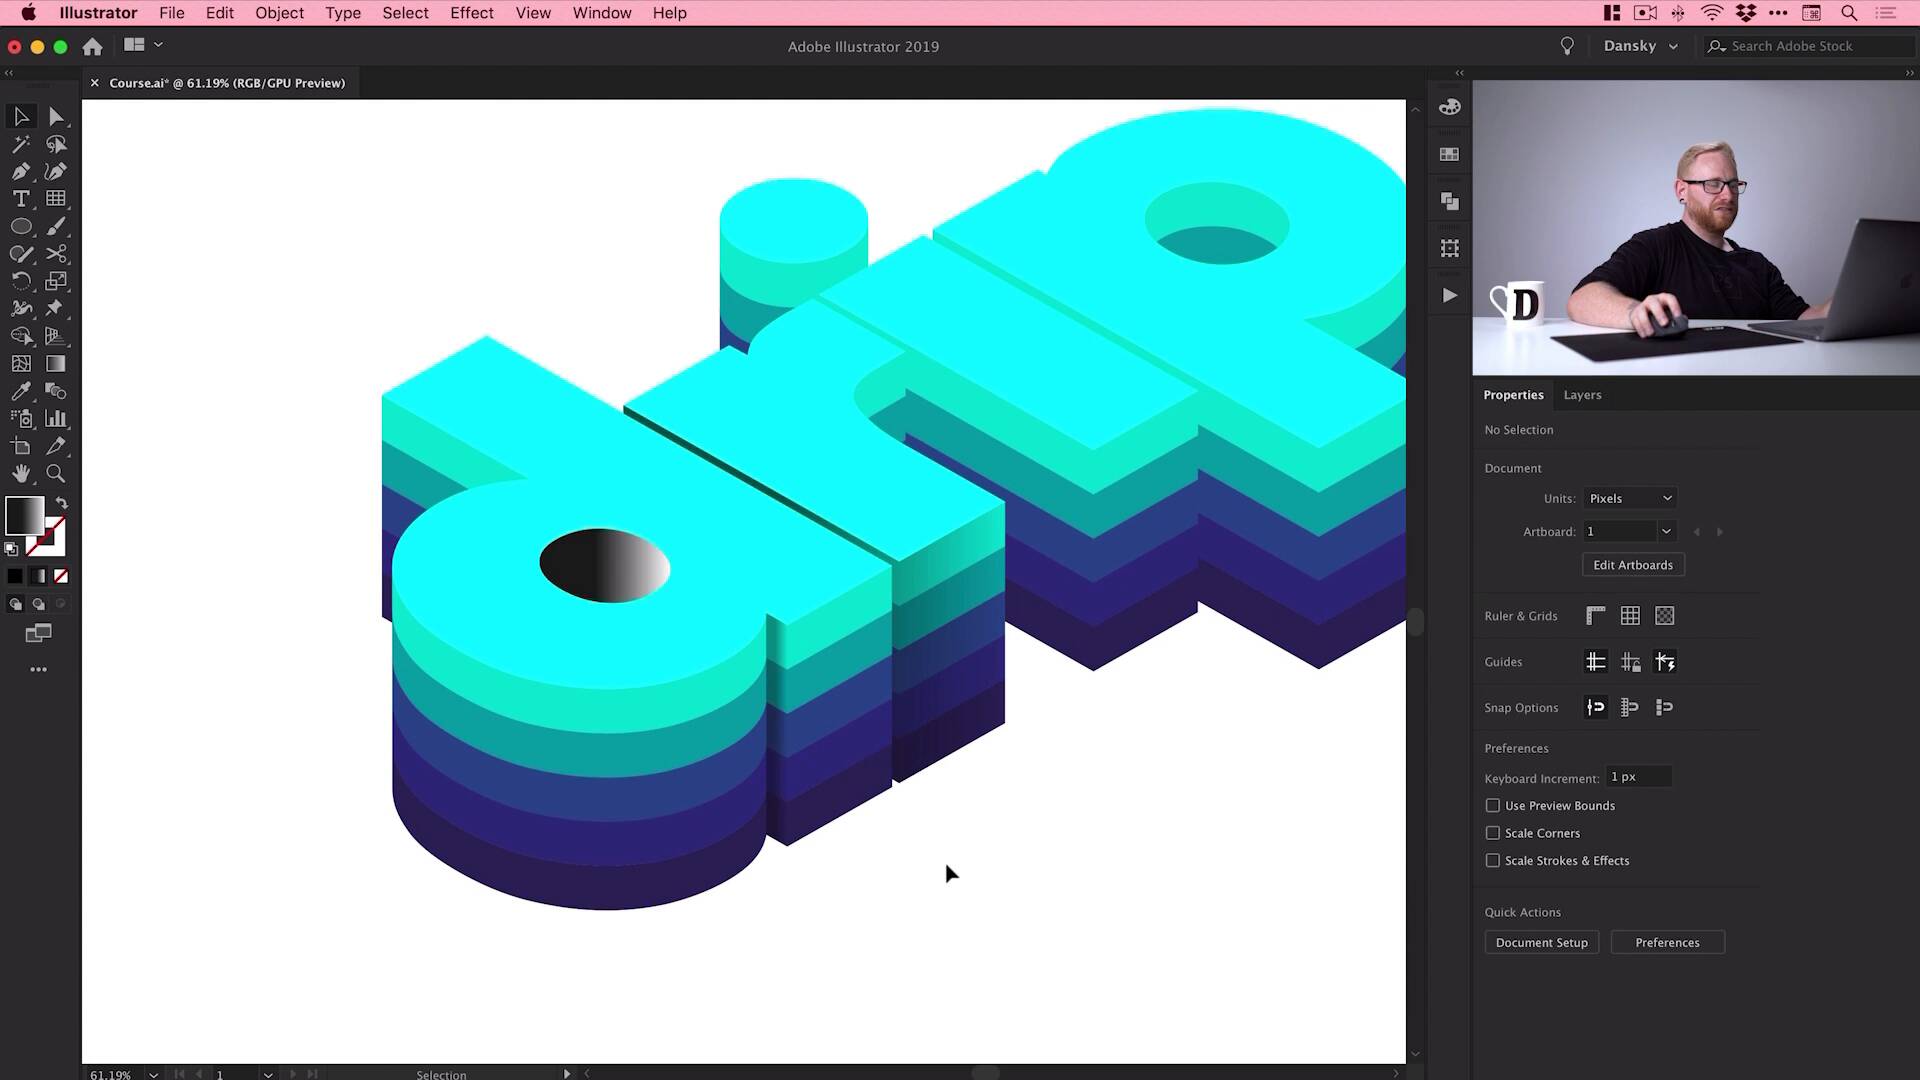
- Overview
- Transcript
2.5 How to Add Shadow to Text in Illustrator
A drop shadow is a great way to give your text more depth. In this lesson, you’ll learn how to add shadow to text in Illustrator.
1.Introduction
1.1Welcome to the Course00:45
2.Designing the Isometric Text Effect
2.1Setting Up Our Project02:19
2.2How to Make an Isometric Grid in Illustrator04:31
2.3How to Make Isometric Text02:41
2.4Adding Layers and Colour08:36
2.5How to Add Shadow to Text in Illustrator09:53
2.6Illustrator Freeform Gradients07:01
2.5 How to Add Shadow to Text in Illustrator
Hey there, welcome back to the course, so we've added some layers, some color. In this lesson, what we're gonna do is add some shadows to our text, just to give everything a little bit more depth. So we'll jump back into it now and I'll show you how to do this. Right here, so this is where we left off. We have our text. We have it layered, and we have lots of colors all set up as global swatches. But it still looks quite flat. Now you might want this style which is fine, that looks great. But we're gonna add some shadows to give this a bit of depth. So remember when we went up to View in the previous lesson and went Snap to Point, this is going to come in handy. So if we zoom in nice and close, what I'm gonna do is just grab the pencil, and I'll start with this one. So I'm gonna click here and this is nice and easy. We have straight lines essentially, this is a fun dot to dot. [MUSIC] So if you lose your point like this at any point, just go Command or Ctrl+Y to jump into outline mode. Remember, you get that wire frame, maybe go with completed shape. So essentially, what we're gonna be doing is defining a light source. Just imagine where that light is coming from, and then we're going to create shadows based on that. So I've just created this random shape here. And what we're gonna do is select the Gradient tool. And over here, from the Property Inspector, just gonna click on the Gradient Options icon, and then click the Gradient slider. This will add a default black to white gradient. And I'm gonna leave this running from left to right just so the gradient doesn't go weird. If I rotate it, you can see it kind of comes from an angle. I kind of want to keep it in line with my lettering. You can adjust the gradient if you like though. You can also adjust how far the gradient comes across. So it could reach all the way across or it could be very, very short like this. Or you might want to go to the gradient panel and just swap it around all together. So it depends entirely on what you're going for. But once you've done that with the black to white gradient, just select it, go over to capacity here and just change the blending mode from normal to multiply. Now if you're on an older version of Illustrator, just go up to Window, down to Transparency, and there you go. You get that same panel pop up. Now, this is pretty intense. So I'm gonna bring that opacity down quite considerably. We'll go with, [MUSIC] We'll go with 30%, and then I can go back into the gradient and just fine-tune that if I want to have that a little bit narrower. Or I can swap it round again. So you can see I'm just really fine tuning the gradient, the opacity so it's gonna be darker in this part here, and then it'll be lighter here. So we'll leave that one like this. I'm gonna do another one now. So we've got a little one here. [MUSIC] So there we go, tiny little gradient. Remember, select it, change the Blending Mode to Multiply and then adjust the opacity depending on how strong you would like that gradient to be. [MUSIC] So you can see already, we've just literally done two and it takes it from being flat to having much more depth. Okay, so that's pretty easy. We've got the dot to dot. We've got lots of straight edges, that's easy. What about circles or circular edges or rounded corners? Because trying to get the pencil and to draw around this corner exactly, well, it's not only going to be imprecise, but there's a better way to do this. So at the moment, I have this art board. I'm actually going to go to View and then down to Hide Edges. Nope, that's the wrong one. There's another one. There we go, Hide Art Boards. So I still have an art board, but it's just hiding the edges. So I kind of have this infinite Canvas now, which is just gonna make things a lot easier. So if I just select everything here, and then I'm gonna go to Edit > Copy > Edit > Paste in Place, hold Shift and use the down arrow key again. [MUSIC] Just notice this, all the way down here, what I'm gonna do is try and create a shadow on the inside. So if I just drag over everything to select it, and then grab the Shape Builder tool over here on the left, what this allows me to do is join individual segments together into a single shape. So I can just click and drag through everything in this circle, just make sure you capture everything. And that is now a single shape. But I can actually click on this, if I ungroup it first. Then we're gonna ungroup that a few times. This individual piece I can now move around. So again, I can use Shift and up. We're using that Shift and nudge technique again. And boom, there we go. It pops it back in that spot and I've isolated that shape. Now while we're here, I'm gonna do another one. So we're gonna add a shadow here on this curve. So this one is probably one of the more complicated ones. So I think how I'm gonna get around this is I'm gonna start by grabbing the pencil. What we'll do is we'll click, [MUSIC] We'll add Shape, I'll bring the gradient to about the halfway point. I'm just gonna hold Shift and click to keep my line perfectly vertically straight. So there we go, I have a random shape. And I'm just gonna fill this with a random color for the time being just so I don't get confused with the gradient. Now if I go into outline mode again, that's Command or Ctrl+Y, I get that wire frame view. This looks incredibly complicated. But if I select everything and grab the Shape Builder tool, what I can do is I can actually hold down Alt or Option on the keyboard. And you can see the plus changes to a minus. And whereas before, the Shape Builder tool combined shapes together, this will actually remove them. So if I hold down Alt or Option and then click and drag, you can see it will trim off anything outside of the selection. So everything I'm dragging through now with Alt or Option held on my keyboard is being completely removed. So I'm just gonna do this. We'll get rid of absolutely everything and then now what I can do is let go of that and then just go back to the normal one. So we'll just click and drag without holding any other keys on the keyboard. Combine all this together. Now, sometimes you will get like random artifacts like this if you zoom in far enough. You can see these random pieces. You can use the Direct Selection tool up here to select them and delete them. So these random little pieces of path. [MUSIC] And this bit over here looks to have gone a little bit weird. So we could use the Shape Builder tool or we could select everything and we'll try the Pathfinder panel and we'll see if we can unite that, there we go. So I hope we've got this random little piece here, so again, Direct Selection tool. So sometimes when using the Shape Builder tool, you do get this. These random anchor points just happen to find their way into certain places. And it's just a case of diagnosing how they got there, and then getting rid of them with the Direct Selection Tool. It's a great way to kind of isolate certain areas, select anchor points and remove them. So that's how you do it. So now we can come out of outline mode. And again, we'll hold Shift, use the good old Shift and nudge technique. [MUSIC] And we could go and apply our gradient all over again. But actually, what I'm going to do instead is use the eyedropper tool, and just click on the gradient that I've already done. And it will instantly apply that same gradient with those same settings and that same blending mode of multiply. [MUSIC] Now, it's a little bit intense so I might just bring the opacity down just a pinch. And we have this one up here, so we can eyedropper tool that one as well. That one doesn't seem to want to work for some reason, so if you do get anything like that just not working, don't worry about it. Just go and change that to multiply yourself. [MUSIC] And I'll bring that down, like so. So there we go, we've added some depth to the edge of a shape that was straight. We've added it to the inside of a letter. But we've also added it to a curved one around the corner. So what I'm gonna do now is I'm gonna speed this up, go through, do those same three techniques, across the rest of the entire shape. And then, we'll be ready to move on to the final lesson. [MUSIC] Okay, so there we go. I finished adding the shadows. It just helps give everything a bit more depth and just feel a little less flat. So we're gonna move on to the final lesson in a moment, where we're gonna be looking at adding some highlights using freeform gradients.


